Chủ Nhật, 5 tháng 2, 2017

Youtube daily Feb 6 2017

When we were young we wanted to be epic.

We rode on the backs of dragons and

dreamt of flying cars. We were taught that

power - was nothing more than being the

strongest guy in the room.

But brute strength was not enough -

We had to learn grace. We found that

staying true to who you are -

is all that matters...

That balance isn't found; its created. And the

ability to reinvent ourselves - is the most

human trait of all. All this to grow

fearless...So that when we got the chance.

We could deliver that flying car. And

once again, ride on the backs of dragons.

For more infomation >> Official 2017 Alfa Romeo Super Bowl Commercial | Riding Dragons - Duration: 1:01.

-------------------------------------------

Photoshop Tutorial: How to Create a Wax Seal with Raised Text - Duration: 10:05.

Hi. This is Marty from Blue Lightning TV.

I'm going to show you how to create the look of a wax seal with raised text and how to

quickly change its color.

This is an update of a tutorial I did quite awhile ago on an earlier version of Photoshop.

I provided this envelope image that you can download to place your wax seal onto.

Its link is located in my video's description or project files below.

Click the New Layer icon to make a new layer.

Open your Elliptical Marquee Tool and go to the center of your document.

Press and hold Alt or Option + Shift as you drag out a circular selection approximately this size.

Click your foreground color to open the Color Picker.

Pick a rich color for your seal.

Later, I'll show you how we can easily change its color.

Now, your foreground color is the color you just picked.

Fill the selection with your foreground color by pressing Alt or Option + Delete.

To deselect it, press Ctrl or Cmd + D.

We'll convert the shape into a Smart Object, so at any time, we can modify the filters

that we'll be adding to it.

To do this, click the icon at the upper, right of the Layers panel and click, "Convert to Smart Object".

Go to Filter, Distort and Wave.

The amounts in the settings will warp your circle into the shape inside the Preview window.

Fee free to adjust the amounts in the settings.

I made the number of Generators: 1, the Wavelength: 1 and 700, the Amplitude: 1 and 300 and the Scale: 100%.

The Type is Sine and the Undefined Areas are "Repeat Edge Pixels".

Click the "fx" icon and click "Bevel Emboss".

The Style is Inner Bevel, the Technique is Smooth and the Depth is 100%.

The Direction is Up, the Size is 50 pixels and Soften it 0 pixels.

Uncheck Global Light.

The Angle is 90 degrees and the Altitude is 60 degrees.

The Highlight Mode is Screen, the color is white and the Opacity is 85%.

The Shadow Mode is Multiply, the color is black and its opacity is 30%.

Click "Contour".

Open your Contour shapes and click the gear icon.

Click Small List and click "Half Round".

Click Drop Shadow.

The Blend Mode is Normal.

Click the Color box and in the hexadecimal filed, type in: 3E1100.

Then, click OK or press Enter or Return.

Make the Opacity: 60%, the Angle: 130 degrees and the Distance: 10 pixels.

The Spread: 0 and the Size: 20 pixels.

Click the New Layer icon to make a new layer.

Go to the center of the shape and as before, press and hold Alt or Option + Shift as you

drag out a circular selection.

Fill it with your foreground color and deselect it.

As before, convert the shape into a Smart Object.

Go to Filter. Distort and Wave.

This time, we'll make the inside circle less warped.

I'll make the Wavelength: 1 and 999 and the Amplitude: 1 and 148, however, feel free to

adjust these amounts.

Click the "fx" icon and click "Bevel Emboss".

Change the Direction to "Down" and the Size to 16 pixels.

Change the Highlight opacity to 90% and the Shadow opacity to 50%.

Click "Contour" and change it to Linear.

If you want to make the inside shape bigger or smaller, open your Transform Tool by pressing

Ctrl or Cmd + T. If this message appears, click OK.

It's just telling us that the Smart Filters will will temporarily turned off while we resize the shape.

Go to a corner and when you see a diagonal, double-arrow, press and hold Alt or Option

+ Shift as you drag it out or in.

To accept it, press Enter or Return.

Ctrl-click or Cmd-click the thumbnail of the inside shape to make a selection of it.

Make the outer shape active and Alt-click or Option the Layer Mask icon to make an inverted

layer mask of the selection next to the shape.

Scroll to the top and make the top layer active.

Out text will be placed above it.

Open your Horizontal Type Tool and click the center of your seal.

Pick a font.

I'm using "KaiserzeitGotisch Regular".

If you'd like to use it, I provided its link, as well.

I'll make its size 200 points, Smooth and Center Alignment.

Click the color box and pick white, so we can see our text.

Then, type out your text.

If you want to lower or raise one of the characters, click this icon or go to Window and Character.

The Character panel will open.

Highlight the character you want to lower or raise and drag the "Baseline Shift" icon

to the right or left.

To adjust the space between the characters, click between the characters and press and

hold Alt or Option as you press the right or left arrow key on your keyboard.

We can close the Character panel now.

To reposition your text, open your Move Tool and move it.

If you want to resize it, use your Transform Tool.

Reduce the Fill" to 0.

This makes our text invisible, but all the Layer Styles that we'll be adding to it will remain visible.

If we were to reduce the Opacity to 0 instead of the Fill, the Layer Styles would become

invisible along with the text.

Click the "fx" icon and click "Bevel Emboss".

The Style is Emboss.

The is Depth: 200%, the Direction is Up and the Shadow Opacity is 40%.

If you want to change your seal's color, first we'll place all of the layers that comprise

your seal into a folder.

To do this, scroll to the bottom of the Layers panel and Shift-click the outside shape to

highlight it and all the layers above it.

Then, press Ctrl or Cmd + G. Let's name it, "Wax Seal".

Click the Adjustment Layer icon and click, "Hue/Saturation".

To restrict the Hue/Saturation to affect just the contents of the folder and not the background

envelope, we'll need to clip the adjustment layer to the folder by making the adjustment

layer into a clipping mask.

To do this, either click this icon or press Ctrl + Alt + G on Windows or Cmd + Option + G on a Mac.

Drag the Hue slider to the right or left.

This is Marty from Blue Lightning TV.

Thanks for watching!

For more infomation >> Photoshop Tutorial: How to Create a Wax Seal with Raised Text - Duration: 10:05.

-------------------------------------------

Crossroads' Super Bowl service draws thousands - Duration: 1:27.

LIKE THE BIG GAME.

>> ARE YOU GUYS FIRED UP TO BE

OF THE SUPER BOWL OF PREACHING?

RICHARD: THE RIVALRY IS INTENSE,

BUT THE MESSAGE IS ONE OF

BRINGING PEOPLE TOGETHER.

>> IT'S A NATIONAL HOLIDAY.

IT DOESN'T MATTER WHAT YOUR

RELIGION, WHAT YOUR SPIRITUALITY

IS, AMERICANS COME TOGETHER

DURING THE SUPER BOWL, SO WE

THOUGHT LET'S GET TOGETHER AND

HAVE A LITTLE COMPETITION

SUPERBOWL AND SOME SPIRITUAL

GROWTH.

RICHARD: THIS CROSSROADS

CONGREGATION HAS BEEN COMING

TOGETHER FOR THE SUPER BOWL OF

PREACHING FOR OVER 14 YEARS, AND

THE PRODUCTION KEEPS ON GETTING

BIGGER AND BIGGER WITH EVERYONE

GETTING READY FOR SOME FOOTBALL.

>> IT'S A LOT OF FUN, AND IT'S

SOMETHING DIFFERENT, AND IT'S

ACCESSIBLE TO EVERYBODY.

YOU DON'T HAVE TO COME AND HAVE

ANY ASSUMPTIONS ABOUT WHAT TO

BELIEVE.

RICHARD: OVER 40,000 WILL KICK

OFF, PASS AND PUNT THEIR WAY

THROUGH THIS WEEKEND'S 34

SERVICES, WHILE TWO PREACHERS

BATTLE IT OUT LIKE THE TEAMS ON

THE GRIDIRON.

>> BUT I THINK PEOPLE LIKE WHEN

THERE IS SOMETHING FUN COUPLED

WITH SOMETHING MEANINGFUL.

RICHARD: FROM THE CHEERING FANS,

TO THE COMMERCIALS, AND EVEN A

FEW TRICK PLAYS, THIS

CONGREGATION SAYS ITS SCORING ON

A BIGGER ENDZONE.

>> I NEVER KNEW I COULD HAVE

THIS MUCH FUN AT CHURCH.

I WOULD SAY THAT'S IT RIGHT

THERE.

THAT'S THE WHOLE REASON BEHIND

For more infomation >> Crossroads' Super Bowl service draws thousands - Duration: 1:27.

-------------------------------------------

Om Seng Bora - Loan for Increase Income not for buy Stuff | Success reveal - Duration: 11:07.

success reveal

Mr. Om seng bora

Loan for increase income not for buy stuffs

For more infomation >> Om Seng Bora - Loan for Increase Income not for buy Stuff | Success reveal - Duration: 11:07.

-------------------------------------------

Gov. Mary Fallin to call upon lawmakers in upcoming State of the State Address - Duration: 1:08.

ALLIN WILL

GIVE HER STATE OF THE STATE

ADDRESS.

KOCO'S STEVE BOTTARI WITH A

PREVIEW OF THE SPEECH.

STEVE: FIRST UP ON THE TO-DO

LISTS FOR BOTH THE GOVERNOR AND

THE LEGISLATURE, COMING UP WITH

NEARLY 900 MILLION DOLLARS.

>> WE JUST CAN'T TO AFFORD TO

KEEP DOING THINGS THE WAY WE'VE

BEEN DOING THEM IN THE STATE :09

JUST MAKES NO SENSE AND IT'S

IRRESPONSIBLE.

STEVE: EXPECT GOVERNOR MARY

FALLIN TO LAY OUT IN MONDAY'S

ADDRESS HOW SHE THINKS WE CAN

GET OKLAHOMA'S BUDGET BACK ON

TRACK.

>> TO BE ABLE TO INVEST IN THE

THINGS THAT WE KEEP SAYING ARE

IMPORTANT TO OUR STATE .

STEVE: THE GOVERNOR IS CALLING

FOR A MAJOR TAX OVERHAUL.

THE DETAILS TO BE REVEALED IN

THE SPEECH AND PROPOSED BUDGET.

>> WE KEEP TALKING ABOUT OUR TOP

PRIORITIES BEING EDUCATION AND

SPECIFICALLY TEACHER PAY.

STEVE: SHE'S CALLING ON

LAWMAKERS ONCE AGAIN TO RAISE

TEACHERS PAY, SOMETHING THAT

HASN'T HAPPENED NOW IN ALMOST A

DECADE.

>> I DO NOT THINK IT IS WISE TO

HAVE 4-DAY SCHOOL WEEKS .

STEVE: AND THE GOVERNOR SAYS

SHE'S --QUOTE DISAPPOINTED IN

DISTRICTS THAT HAVE SWITCHED TO

THAT SHORTER SCHEDULE BECAUSE OF

BUDGET CUTS.

>> IT GIVES A HORRIBLE

IMPRESSION TO BUSINESS

RECRUITERS, BUSINESSES.

STEVE: ONE-OUT-OF EVERY FIVE

OKLAHOMA SCHOOL DISTRICTS, NOW

GOES TO CLASS JUST

For more infomation >> Gov. Mary Fallin to call upon lawmakers in upcoming State of the State Address - Duration: 1:08.

-------------------------------------------

20 Cool Home decor DIY Project - Duration: 13:27.

Do you enjoy fun DIY projects?

Here are some great DIY projects that will improve your home.

Maybe you need some additional shelf space or you just want to spice up an old table.

Don't save that project for a rainy day—you can start today by catching these easy-to-do

step-by-step guides.

Even for someone who is busy, these projects make a fun weekend activity.

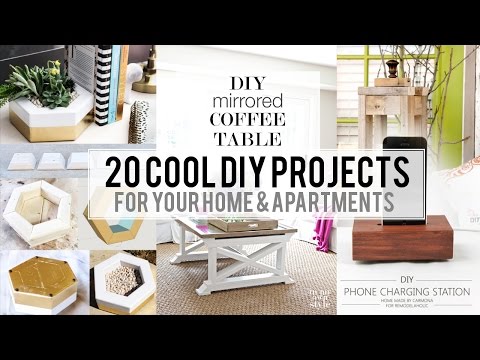
Here are 20 cool DIY projects for improving your home.

1.

Make a giant Jenga set for your backyard.

Okay, so maybe you haven't played Jenga in a few years (or a lot of years), but this

is a fun and satisfying home project that gives the whole family something fun to do

in the back yard.

You can either use some old 2x4 boards and trim them all to the same size or you can

start from scratch.

2.

Customized timber knobs.

Want to give your chest of drawers a little something extra?

This super easy DIY project just requires that you find some images you want to apply

to the surface of a standard timber knob.

You'll print off the images on paper before using paint, sealer, and mod podge to put

it all together.

You'll love the way it adds interest to a plain chest of drawers.

3.

Headboard and footboard bench.

Want a classy new bench for the front porch or back yard?

Start by finding a cool headboard and footboard combination from a local thrift store.

Then, you'll use 1x3 boards to make the seat itself and a couple 2x4 boards to hold

everything together.

4.

Floating DIY corner shelves.

Need some additional shelf space?

Or, maybe you just want to dress up that plain-looking corner in your home.

Jump on "board" with this cool project as you make a base to hang your shelf on.

You'll need a table saw and a few other basic tools, as well as the right wood stain,

but this easy project will be worth your while.

5.

Make your own modern coffee table.

For this one, you'll need a few items like 2x4 inch boards, some fancy table legs of

your choice, a saw, and a few other things.

First, you'll make sure all the boards are the exact size you want.

You can fit the boards together, using a hidden crossbeam to hold everything in.

Stagger the boards when you place then for a chic modern look to your coffee table.

This project is perfect for modifications as well—stack the boards however you like.

6.

Turn a broken Ikea Storm Lamp into a chic light.

Storm lamps are cool because they offer not only light, but shape as well as texture.

However, that nifty paper that makes up the lamp shade can easily tear.

But—no worries!

You can easily turn that torn lamp into a cool new lamp for your desk.

Watch the video to find out how.

7.

Make a thrifted mirror table.

This one isn't too complicated—just find a mirror at a thrift store and get to work!

You can do this with wooden beams for the base of a brand new coffee table,

or you can add this to the top of a current coffee table for a fun new look.

Just be careful—mirrors can break easily if you set something down on the surface too hard.

8.

Make an interactive LED light-up table.

Ok, this one's going to require some dedication and some hardcore nerd energy, but when you're

finished, this will be one of the coolest projects you've ever done!

First, you'll need a table worthy of reconstructing.

This Ikea table worked perfectly.

You'll have to cut into the surface of the table far enough to suspend this kind of low-res

screen.

Then decide on a good size for your cubes—in this example, they used a 12x12 grid.

The actual frame with cubes is more than likely need to be laser cut in order to be

a perfect fit.

Here, they've strategically wired the LED lights into the grid and used special game

codes to program it.

This is a really great way to make something not only interesting, but also interactive!

Check description to find more detail.

9.

Create a unique phone stand.

Tired of holding your phone at arm's length to skype with friends?

By making a cool cell phone stand, you're not only creating something fashionable that

keeps the phone in place, but you're also making something that helps hold the phone

when being used.

The cool thing about this project is that you can use a "spare" piece of wood and

dress it up.

10.

Make your own patio furniture.

Nobody wants to pay outrageous prices for patio furniture (after all, it's going to

be out in the weather).

So build your own with a few 2x4 boards!

The tutorial below shows you exactly how to build this model, but the beauty of this project

is that you can get creative and make any shape or size you like.

11.

Make a cool plant stand.

If you have plants but nowhere to put them, they might just end up on top of the fridge

or somewhere out of sight.

This guide shows you just how to make a cute plant stand that will allow you to enjoy where

your plants are,

and it will allow your plants to bask in the sun all they want.

The best part is that this tutorial shows you how to do this project with $10.

12.

Easy DIY table candle lantern.

For those looking for a unique piece to add to the patio (or even a fancy foyer or dining

room), this project is a fun one.

It's great because you can use scraps of wood—they don't even need to match.

The variety of scraps will make this interesting.

This will end up housing your favorite candles and will be a chic addition to any table.

13.

Make a multi-purpose shower/bath shelf.

Ready for that relaxing bath you've been promising yourself?

Here's a cool shelf that you can set your lap top or some scented candles on in the

tub.

It can also double as a shelf to place your things on for the shower, as it can slide

across the top of the tub.

If you only want to see it when in use, stick it in the closet and pull it out when both

the bath and Netflix are calling your name!

14.

Assemble a nifty kitchen stool (or two).

This guide shows exactly how to put together a little extra seating for your kitchen, or

for any extra seating you need.

If you like unique furniture, this project is for you.

You'll come out with some cool vintage-looking A-frame stools to use anywhere in the house.

You'll be using 2x4s as well as a few basic tools on this one, so put on your hard hat

and get to work.

15.

Construct a monogram of your last name.

Aren't we all just jonesing for an oversized monogram to stick on the outside of the house?

It's cool and unique (especially if your last name begins with a Z), and it can be

used in different places.

Maybe you'd rather hang it up on the living room wall and surround it with family photos.

This project is not for the faint-of-woodworking, but it's one you'll be proud of.

16.

Create a pencil desk organizer.

This is a cute and fun project to let the kids help out with to make a gift for a favorite

teacher.

You'll use a 2x4 board on its side and cut it out in the shape of a pencil.

Then by drilling multiple holes in a row along the top edge, you'll be able to place pens,

pencils, scissors, or other desk-dwelling objects into the holes for convenient storage.

17.

DIY Chic Floral Centerpiece.

Everyone knows the floral centerpiece will end up being an over-crowded jumble of floral

failure, but it doesn't have to be that way.

In this tutorial, you'll be instructed on how to make a beautiful wooden centerpiece

that allows you to organize your gardening masterpieces around the edges of the frame.

It even has cool tubes to place each stem in so that your flowers get some water while

they impress your company!

18.

Wooden tabletop planter.

If you want to take the previous project to the next level, you can create a gorgeous

tabletop planter in much the same way.

Before filling it with dirt (and yes, with plants), you will cut the pieces of wood to

size and puzzle them together using nails and some basic wood glue.

Give it a cool coat of paint, or add some interest and use metallic paint or stripes.

19.

Make your own ribbon-trimmed roman shades.

Roman shades can be the perfect window cover because they don't cover up beautiful window

framing, but they also allow the perfect amount of light on sunny days.

In this guide, you'll find out how to turn a plain white roman shade into something a

bit more interesting by adding a border of your favorite ribbon.

This all can be done in a fraction of the cost of buying new roman shades for your windows.

20.

DIY file cabinet make over.

Just face it—it's time for that nasty old file cabinet haunting your office corner

to get a makeover.

By first cleaning, sanding, and then re-painting your cabinet, you can make that old drab filer

into a chic new part of your home that you're actually proud of.

You can even add a cool chalkboard side to write your to-do list on!

If you liked any of these projects, feel free to share this with a friend.

Everyone's home can use a little love once in a while, so give one of these projects

a try.

Please like, comment, and share this page, especially to those whose homes could use

a little more creativity!

And as always, press subscribe button under this video if you don't want to miss another

episode we will release sometime in the future.

We hope.

Thanks for watching.

For more infomation >> 20 Cool Home decor DIY Project - Duration: 13:27.

-------------------------------------------

Sean Spicer Gets the 'SNL' Treatment with Melissa McCarthy - Duration: 3:05.

Hey guys for Complex News, I'm Natasha Martinez.

Since the start of the Trump administration 'SNL' has a lot of material to choose from

and they just got fresh material from White House press secretary Sean Spicer.

Spicer has been under an extreme microscope when relaying news to the press, so much so

that he got the 'SNL' treatment last night from none other that Melissa McCarthy.

McCarthy's skit as Spicer stole the show, even if host Kristen Stewart's surprise f

bomb was placed just at the right time in her opening monologue.

Kristen's debut was a long time coming and she handled the flub so well, I'm sure she'll

be back.

But it's McCarthy's portrayal of Spicer that everyone really hopes will be back, as it

was priceless.

The 46 year old comedian was almost unrecognizable but nailed every single gesture, and temperament,

that we've seen from Spicer

so far.

The gum thing is about the recent discovery that Spicer chews and swallows two and a half

packs of orbit cinnamon gum by noon everyday.

That kind of behavior is not to be trusted, but then again, neither are his words.

The

whole sketch is full of Spicer specific gems but my favorite is:

Melissa McCarthy's SNL performance is sure to make everyone forget that Ghostbuster's

even happened and get back to loving her for golden moments like this one.

That's your news for now, for more of today's trending stories subscribe to Complex on YouTube.

Không có nhận xét nào:

Đăng nhận xét