Thứ Năm, 29 tháng 12, 2016

Youtube daily Dec 29 2016

CHARLES: AND BREAKIN NEWS THIS

MORNING.

NEARLY 100 ENTERGY CUSTOMERS IN

THE DARK, AFTER PEOPLE HIT THE

EQUIPMENT IN A NEIGHBORHOOD.

AND KELSEY DAVIS IS LIVE FRO

THE SCENE.

WHAT DO YOU KNOW WHAT RIGH NOW?

KELSEY: HEY, CHARLES WE PULLED

UP THE THE SCENE MOMENTS AGO.

WE CONFIRMED BY JEFFERSON

PARISH, THE TRUCK ON THE T

TRUCK CRASHED INTO THE HOUSE

HERE IN THE 400 BLOCK.

ARE TALKING TO PEOPLE WHO

LIVE IN THE HOUSE.

WITH US THIS MORNING.

>> GAB REALLY.

>> YOU WERE LOOKING AT 4:00 TH

MORNING.

WHAT HAPPENED.

>> WE HEARD, LIKE WE HEARD A BIG

OLD CRASH.

USUALLY LIKE IF W HEAR A CRASH

I WOULD IGNORE.

AND MOM SCREAMED, A CAR, OR

TRUCK RAN INTO THE HOUSE.

WE CAME DOWNSTAIRS AND SAW IT.

WOW.

WE HEARD ABOUT PEOPLE, CARS

CRASHING IN, LIKE T CARS, BUT

IT IS RARE YOU HEAR ABOUT IT

GOING INTO SOMEBODY HOUSE.

IT IS CRAZ

>> NOBODY WAS HURT IN YOUR

HOUS

WALK AWAY?

>> WELL, I KNO HE HAD A NECK

BRACE ON AND PUT HI IN THE

AMBULANCE AND DROVE OFF

>> WHEN YOU CAME DOWNSTAIRS, YOU

HEAR WRECKS, BUT YOU S A CAR

CRASH INTO YOUR HOME, WHAT WE

THROUGH YOUR HEAD.

>> I DON'T KNOW, MY MIND WAS

BLANK.

>> NOBODY WAS HURT, YOU ARE OKAY

THIS MORNING.

>> YES, SIR.

>> WHAT?

>> YEAH.

>> ANYTHING ELSE YOU CAN TELL US

WHAT YOU'RE SEEING AND HEARING?

JUST GLAD THAT YOUR FAMILY, AND

THAT IS UNDER YOURMOM'S

BEDROOM.

>> I WAS GLAD THAT SHE OR MY

STEP-DAD DIDN'T GET HURT.

>> THANK YOU.

TALK TO US.

AGAIN, HEARING ABOUT 4:30 THIS

MORNING.

THE CAR CRASHED INTO HIS HOUSE

HERE IN THE 400 BLOCK OF TER

PARKWAY.

AND TRAFFIC IS SPOTTED AS THEY

WORK TO GET THE CAR PULLED AWAY

ON THE TOW TRUCK.

WE ARE TOLD THAT 9 ENTERGY

CUSTOMERS ARE WITHOUT POWER.

THEY KILLED POWER TO WORK TO

MOVE OR I BELIEVE THI IS PART

OF THEPROBLEM, THIS CAUSED THE

MOWER OUTAGE.

IT SHOULD BE RESTORED AROUND

8:00 THI MORNING TO THE 90

RESIDENTS.

AGAIN A SURPRISE FO THIS FAMILY

HERE, IN THE 400 BLOCK OF TERRY

PARKWAY.

THEY ARE OK.

AND THE DRIVER OF THE TRUCK WAS

TAKEN AWAY IN A NEC BRACE.

WE'RE HOPING TO TALK TO

OFFICIALS IN A LITTLE WHILE AND

GET DETAILS ON THE CONDITION OF

For more infomation >> Vehicle crashes into Terrytown home - Duration: 2:51.

-------------------------------------------

2015-2017 F-150 Tonno Pro TonnoFold Tonneau Cover (w/ 5.5 ft. & 6.5 ft. Bed) Review & Install - Duration: 4:56.

Hey, I'm Alex from americanmuscle.com, and this is my quick review and breakdown of the

Tonno Pro TonnoFold tonneau cover fitting your 2015 through current F-150 with a five

and a half-foot bed.

So in this video, I'm gonna talk about the construction and materials of this cover,

who this might appeal to, what you should expect to be spending, and then we'll take

a very quick look at the installation, where you're gonna be looking at an incredibly easy

1 out of 3 wrenches in the difficulty meter and less than 30 minutes to get this on to

your truck.

So this should definitely appeal to any F-150 owner that's gonna be looking for a fold-up

design as opposed to a hinged or a roll-up design.

So if you're unfamiliar with what a tonneau cover is, we're gonna give you a little bit

of a crash course here.

So let's take a closer look.

So first and foremost, one of the main benefits of a tonneau cover is going to be to keep

whatever you're hauling in your bed safe, secure, as well as dry.

Now, this is gonna be great as this is gonna be fully weatherproof so you can rest easy

knowing that no matter the elements, be it rain, sleet, or snow, you're gonna have whatever

you're hauling be safe and sound.

So not only the aforementioned reasons, you're gonna be keeping prying eyes away from your

gear.

Now, for me, that could be woodworking gear, tools, camping gear, anything like that that

I don't wanna have anybody dipping into my truck and pulling out as it's my property,

and I wanna keep it safe, secure, and protected.

At the end of the day, another great reason about having a tonneau cover is gonna be lowering

your drag coefficient.

That essentially means that when you're driving, wind is gonna be into your bed, and it's gonna

be dragging your truck down.

What you're gonna be doing with a tonneau cover is essentially creating a little bit

more of an even stream so that, at the end of the day, you're gonna be saving a little

bit of money at the pump.

So at the end of the day here, guys, from a utilitarian perspective, this is definitely

worth its weight in gold as it's gonna be keeping your belongings and your gear dry,

safe from the elements, as well as keeping unwanted eyes and hands out of your bed.

This is something that I truly think really just completes the rear end of your truck,

and it's gonna make it look that much more streamlined.

So in terms of the build quality here, I can absolutely attest this is holding up over

time as I had this exact model on my 2014, which Justin reviewed earlier in the year,

and it has definitely held up over the seasons.

This is also gonna feature a tri-fold design, which I personally like, in comparison to

a rollup, which I think it's a little bit on the tacky-looking side as well as in comparison

to a hard cover, which is hinged that comes up at the back.

One of the reasons why I like this a lot is because it's gonna over the fold-up.

So in the event that you have to get anything out of your bed, you could do so incredibly

quickly.

So taking a closer look at the materials, this is gonna feature a 24-ounce black textured

finish vinyl, which is gonna be marine grade quality, so you can rest easy knowing that,

again, you're gonna be keeping all of your belongings dry just as long as this is installed

correctly, which I'll hit on a little bit later.

So another thing that I like about this kit is gonna be the frame or skeleton.

This is gonna be manufactured out of 6063 powder-coated aluminum.

And despite this being on the underside, you're gonna rest easy knowing that it's gonna be

able to hold up over time to anything that you're gonna be putting to it.

Another great aspect is that this is not a permanent modification.

Again, this is going to go on in literally a heartbeat.

So in the event that you're looking to change up your tonneau cover down the road, you could

take this off very easily.

Or if you need to haul some gear that's gonna be sticking out of your bed, you can pull

this off in a minute.

So in terms of how this is gonna install, which I'll hit on a little bit later, this

is gonna feature a impact resistant slide lock design as well as having clamps on the

underside here.

Now, another thing that I really like about this kit is right at the back here, you're

gonna see this is gonna have a little extra material here as well as having it on the

sides.

Now, that's gonna be to ensure that whatever you're gonna be hauling is not gonna come

into contact with any moisture, dirt, or anything else that you're gonna be putting your truck

to.

So in terms of the pricing here, you should expect to be spending only about 280 bucks

for this kit, which, in my opinion, is incredibly aggressive, as this is gonna be at the bottom

of the price spectrum.

And running this in comparison to some of the other covers out there, you're gonna see

that it can easily tip the scales at $500 or even $600.

So looking at the installation, just like I had said in the beginning of the video,

you're looking at an incredibly easy 1 out of 3 wrenches in the difficulty meter and

less than 30 minutes to get this on to your truck.

Now, having this on my own 2014, I can personally attest that it had taken more time to physically

get this out of the box than it did to get on my truck.

And, essentially, once it's out of the box, the only thing you need to do is gonna be

stretching this out, putting this onto your bed, attaching your clamps, and you're good

to go.

And, honestly, it does not get any easier than that, and it's on par with installing

instead of floor mats.

All right, so just to wrap things up here, some final thoughts.

I definitely like this option, not only based on the fact that I have this exact model on

my own 2014, but for the fact that it really cleaned up the rear section of my truck, made

it look a lot much more streamlined, as well as protecting any of my gear that I'm gonna

be hauling from the elements as well as keeping prying eyes off of it.

So that's my quick review and breakdown for the Tonno Pro TonnoFold tonneau cover fitting

your 2015 through current F-150 with a five and a half-foot bed, available right here

at americanmuscle.com.

For more infomation >> 2015-2017 F-150 Tonno Pro TonnoFold Tonneau Cover (w/ 5.5 ft. & 6.5 ft. Bed) Review & Install - Duration: 4:56.

-------------------------------------------

ROG GAMING School - Utility Supports - Position 3 [Part 6] - Duration: 3:16.

Hi people, Ben here!

With the position 4 covered, let's go ahead and talk about the next position.

If you are tuning in just now, I would like to quickly repeat the idea behind these positions.

Depending on the number, these positions have different farming priorities.

Position 1 has the highest, while the position 5 has the lowest.

This changes many aspects - experience progression, items you buy and stuff you do during the

game.

Position 3 is right between the highest and lowest priority and might be the most complicated

position to play.

You need to find a perfect balance between farming and not farming, ganking and not ganking,

carrying and supporting.

There's no way to tell what a position 3 Hero will turn out to be during the game.

It really depends on the flow of it.

But fear not, we will give you a few tips and name a few relatively

easy Heroes if you really wish to try out this gameplay.

These heroes generally build towards the team fight and team support items such as Pipe

and Drums, or initiation items.

This position needs an item or two to really max out its damage output, but even without

them, they can do some serious harm.

For example, Clock is one of the best initiators in the game and can disrupt the fight even

without the items.

However, as soon as he gets something like Blademail, Force Staff and Aghanim, he becomes

the most annoying thing to play against.

Same story with Windranger.

Shackle and Focus Fire combo can quickly kill off solo supports.

Still, as soon as she gets the Blink, Aghs and Crit, only a few Heroes can live through

her engage.

Bristle might be the easiest position 3 Hero, even though things get complicated later in

the game.

It's really hard to kill that Hero, even if he doesn't have any items.

But get the Crimson Guard and some Magical Resistance on top of it, you will often need

at least 3 Heroes and a few months of chasing to get him.

Should I even mention the Timbersaw?

Can easily get as tanky as the Bristle, but still do some serious damage.

That Hero is the cancer, unless he's in your team.

Timbersaws in your team somehow always suck.

Dark Seer is another great example for a position 3 Hero.

Really irritating to a melee enemy Carry that farms in the same lane.

Also has a free Haste spell to run away from the danger.

Once this Hero gets the Mek, Pipe and Blink, oh boy - I am not going to spoil anything

for you, just check out Universe and what he's able to do with this Hero.

You will often end up on the offlane with these Heroes, sometimes roam in case you end

up playing with Heroes like Bounty.

But the same logic applies to all of them - be irritating as much as you can without

the items, but be the ultimate pain in the butt if you get some.

And yeah, that would be all for now!

Thanks for watching and see you soon!

Take care!

For more infomation >> ROG GAMING School - Utility Supports - Position 3 [Part 6] - Duration: 3:16.

-------------------------------------------

Camera Dials and Control Functions Overview | Olympus Pen-F FAQ Video - Duration: 14:26.

Izzy here from Digital Goja. Today I'd like

to go over a frequently asked question

about the Olympus Pen-F.

If this video helps you out remember

to hit me up with a like button

underneath and subscribe to our channel.

When in Miami, come visit me at

Digital Goja showrooms.

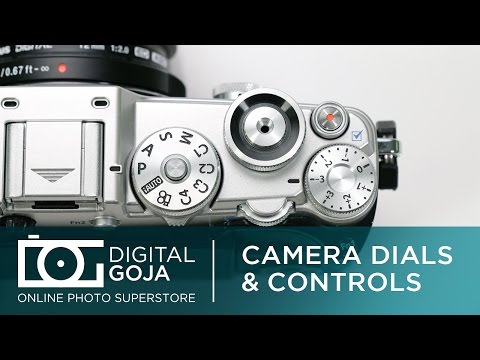
Alright so, now what we're going to do is

we're going to take a look at the actual

dials and controls on the Olympus Pen F.

So this is basically what you will

receive in your instruction manual and

we're going to go

what these individual dials and controls

do for your camera. #1, we're

going to take a look at the mode dial

lock and this is a really awesome

feature I would wish that some other

camera manufacturer think of this

because this allows you to set your

particular mode and then lock it in

place, that way you don't change it

inadvertently when you're using the

camera and of course this is the mode

dial, notice how this is where you're

going to set your different modes,

whether you want to work on different

custom settings, you want to do video

you're intelligent auto and of course

your PASM settings and you lock it in

place it stays perfectly there. Now we

have the rear dial. This guy is allowing

you to change certain custom functions

and settings on your Pen-F and you

toggle it left and right.

Then on the side here this guy is what

is called an exposure compensation dial

and notice how it has settings starting

with 0 and you can do quarter stop all

the way up to +3 and as you turn it

the other way, and again these have

indentation and they lock in place, you

can go all the way over to -3.

Your next one is very popular in today's

world of course is your movie dial. When

you press this that activates your movie

shooting and when you press it again it

deactivates your video recording. Now,

right to the left of that, this is your

shutter button, again, all of these guys are

very well constructed, this is all metal

and notice one thing that to maintain

that retro design in the Olympus Pen-F,

we have a mechanical shutter release port.

I mean this is from in the days gone by

where you can actually use a mechanical

plunger to release your camera for self

timer or long exposures. That's called

the cable release connector. Now this in

front right here, is what is called your

front dial and this again is yet another

command dial that you have access to

change different settings on your Pen-F

and different functions. Now the one all

the way in the front here, this is the

one that was little bit controversial

when the camera first came out and

people are saying all this tends to be

in the way, honestly I think it's

perfectly placed, this is what is called

your Creator dial and this is where I can

actually set different color and art

filters whether I want to shoot in mono

or in particular filtration systems that

are built into the camera and it has a

toggle or locks in place, again, also

metal, very well constructed, it feels

really nice to the hand. Then right below

here, this is your on this side, and it's

covered in that leather design, this is

your lens release button. So when you

depress this you now have the capability

of removing your lens and it locks it

back in place so you depress it to

remove it and then line it up and it

locks it back in place. Now, this button

over here is something that had

disappeared for a while and most digital

cameras,

this is what is called a preview button

and it's basically a depth of field

preview button so when you depress the

camera will actually stop down and show

you in the live view or even your

electronic viewfinder, how much depth of

field you have in the image depending on

your settings currently on the camera.

And on the top over here we have our

stereo microphone because remember it

does have a built-in mic system and

that's what these two little ports up

here are, so that it does record in

stereo and then, very important button,

and again there was controversial they

said it was too far, I honestly like it

because it allows me to just do it with

a flip. This is your On/Off button so it

makes it really simple to turn your

camera on and off. It doesn't turn very

easily so it's not something that you're

going to be turning on and off by

accident. And then right here is your

self timer and illuminator AF

illuminator lamp, so when you have your

Pen-F set to self timer this guy will

depict it by blinking and when you're

working in lower light situations

this is where the AF beam will be used.

On this side over here is your speaker

so when you want to listen to any audio

that you've recorded on your Pen-F

this is actually the speaker system

right here these three little ports on

the side. And then since we're on this

side this is your strap eyelet, this is

the way that you're going to be able to

connect a strap specially the

conventional one that comes with or even

some optional straps that are on the

market and it is a very conventional

design with the plastic protector here

so you don't have any

braising or scratching of the body due to

the fact that it is metal. And we already

spoke about the lens release button, but

i'm going to show you something here

which is on the actual body, and this is

the lens lock pin. So notice when I

depress the lens release button this

is what actually hold the lens in place

so that when you go to line up a lens to

connect it the Olympus lenses are

usually going to have this little red

dot which will line up to the red dot on

the camera body so that way you align it

and then you turn it to lock it in place,

so they made it nice and simple to be

able to easily do it as a matter of fact

it's indented so even if it's in a dark

situation and very low light you can

feel your way on how to connect your

lens correctly.

Oh and last but not least here is your

flash connector hot shoe and it's a

standard hotshoe so that means you can

work with many different flashes that

are out the market, it will slide on in

place and they give you a really nice

hot shoe protector, which you want to put

somewhere because this is very simple,

I've already lost 3 of these and of course

this is where you are also put the flash

that's incorporated with the camera

which is the FL LM 3, it'll mount on here

perfectly but it does give you the

option of working with other flashes. And

notice this icon here, that's where it

basically this is from the days gone by

of film.. this is where you would see your

film playing which now is where your

sensor is and that's basically telling you

that your sensor is lined up from here on.

And there you have it this is all the

controls on the top of our Olympus Pen-F.

Now we're going to go and proceed in

looking at the rear dials and controls.

Alright so now we're going to take a

look at the back or the rear of our

Olympus Pen-F and see what all this means.

So first of all we have the viewfinder

alright, which is this area right here this

is where

you're going to put your eye up to the

electronic viewfinder, and it also has an

eye sensor in here.

What that means is when you put your

eye up to it it's the proximity sensor

automatically shuts off the rear LCD, so

that's all incorporated here and you

also have your viewfinder eye cup and this

is rubberized, it's pretty much attached

on here, it doesn't seem to be a

removable piece so it's built into the

frame but it's very well-constructed.

It's like a hard rubber that's going to

give you the added protection and

benefit of covering any excess light. And

right here is your diopter, so if you

wear glasses,

the beauty of it is that you can

actually adjust it to your particular

class setting. So if you wear eyeglasses

or readers this is the way to adjust

this so you don't have to keep taking

them on and off to be able to work with

your viewfinder, that's your diopter

adjustment dial, right next to it this is

what is called your live view button and

here's where you can actually depress it

and change whether you want the camera

to have live view constantly or you can

switch back and forth between electronic

viewfinder or set it to the proximity

sensor. It also doubles as a function

#2 button, which allows you to

set it to whatever purpose you desire.

Here this is an actual toggle lever that

allows you to look at your parameters

when it comes to histogram and leveling

systems and you can toggle that

back-and-forth left and right. Then, right

on the end over here

this guy is your function #1

button, which is also programmable and

this is going to allow you to set

particular features that you want this

button to do for you, then right over

here on this side, this has been around

for quite a while,

that's your magnification button, so this

is when you are viewing on live view or

on playback mode this is how it allows

you to magnify your image. Right below

that over here to the right is our info

button and as you press this it

activates different

information on the screen. So if I want

to change whatever info is being shown,

notice how as I press it either adds

more information or removes it all

together and then of course right to

your left

this is your menu button and this is the

one that allows you to access your

entire menu and be able to go through it

and pick whatever options you want to

change or preset in the camera, that's

your menu button. Now right here this is

your arrow pad and notice how when you

are in the menu you can toggle between

the different folders and settings

by using the arrow pad and you can move

it to the right or to the left and up

and down. Now the arrow pad itself when

the menu button is not activated also

allows you to do your settings and you

notice that they are indicated here with

particular icons and it shows you where

you have for your ISO and white balance

you're focusing point your Flash

override and you're shooting mode,

whether you want to continue self-timer

and so forth, plus right in the middle is

your ok button and this is the one that

we use to activate the super panel for

the super menu or you can also click on

it to activate the particular setting

that you want to lock in place and to

the right is the very popular and that's

why it's indicated in blue

this is your playback mode so when you

depress this button that activates

playback of your images whether their

stills or video and then the very

important little trash can

this is the way to delete your images. If

you want to delete videos or stills

individually or you can do them in

groups or clusters and of course last

but not least the touchscreen, 3.2 inch

panel that allows you to disengage it,

it swivels, so notice how I can swivel it to

the left and I can angle it depending on

the view that I prefer and of course

remember this is your touchscreen also

so you can go ahead and do focusing

point adjustments or particular settings

with the touch screen, you can even use it to

actually incorporate it as your shutter

and it closes up so it gives you that

beautiful leather backing and it gives

you the safety of the protection. Now

we're going to go to the side, and right

here is your cover to access your HDMI

and your USB AV-Out USB port right on

the top and micro-HDMI port right on the

bottom and it has a little hinge so it

locks it in place. Remember, is not weather

sealed but it's very well constructed so

it protects it nicely there and then

underneath, last but not least, here we have

our quarter twenty tripod thread. This is

where you're going to be able to attach

your Pen-F to a tripod, to rigs, to

anything that has a quarter twenty

thread and here is the lever that

releases and opens up the battery door

where we have your battery port which is

held in place by this little red

connector and of course your SD card

slot. So, it has a spring-loaded feature

when you press down that locks in place

and there you have it

this is the bottom side and front and

top of your Olympus Pen-F camera.

Well I hope I answered your question

about the Olympus Pen-F and if I didn't,

please leave your question below in the

comments section I'll be happy to get to

answer for you and don't forget to share

this video with fellow videographers and

photographers.

Happy shooting!

For more infomation >> Camera Dials and Control Functions Overview | Olympus Pen-F FAQ Video - Duration: 14:26.

-------------------------------------------

Hamari Videos Dekhne Ka Tarika | My Help in Health | Wasib Dawakhana | Youtube Verified Channel - Duration: 4:35.

طریقہ نمبر دیکھ کر میری ویڈیوزز| صحت میں میری مدد کریں |

For more infomation >> Hamari Videos Dekhne Ka Tarika | My Help in Health | Wasib Dawakhana | Youtube Verified Channel - Duration: 4:35.

-------------------------------------------

INCORPORATED | Season 1, Episode 5: 'Forget About Me' | Syfy - Duration: 2:52.

.

[steady percussive music]

♪ ♪

- Any pregnancies? Abortions?

- No.

- Number of sexual partners?

- One. - I hope he was worth it.

Payout's 30% more for a virgin.

Mr. Brownston!

Negative for STIs and parasites,

and she's had all of her inoculations.

- Standard 20-year contract--

the usual disclaimers.

I can offer you this signing bonus today,

and this payout at the conclusion of your contract.

- And my father will be released right away?

- We can have him out in an hour.

- All the money goes to him and my brother.

- Less your debt to the bank, yes.

- All you have to do is sign.

- Elena! Wait!

Ah! Ah! Elena!

- Girls like us are the lucky ones, Elena.

We have something to trade.

- If you sign this, you'll be giving up everything--

your freedom, your rights, your name.

Tell her!

- Ms. Marquez has been fully briefed

on the terms of her employment. - Did they tell you that

you become the property of Spiga?

Just give me a week.

Just give me a week. I'll find another way.

- Aaron, my dad will be dead in a week.

- But Elena-- Don't!

[device drones] - No!

[wallops] - Aaron!

- [coughs and groans]

- Listen to me... - [groans]

- If you love me, I need you to do one thing...

- [groaning]

- Forget about me.

- [groaning]

- That's why my closure rate is over 90%.

- The fire...

You started it?

You destroyed our life for a fu--ing commission?

[tense music]

[roars] [taser surges]

[grunting]

[convulsive grunting]

For more infomation >> INCORPORATED | Season 1, Episode 5: 'Forget About Me' | Syfy - Duration: 2:52.

-------------------------------------------

Philippines President News December 30 2016 President Duterte interviewed One one One by Pinky Web - Duration: 1:07:43.

duterte

For more infomation >> Philippines President News December 30 2016 President Duterte interviewed One one One by Pinky Web - Duration: 1:07:43.

-------------------------------------------

Desenho Mágico | Vamos Desenhar Animais - Episódio 2 | Kids Super Songs Brasil - Duration: 3:21.

Let's draw something!

Let's draw something!

What is it?

What is it?

Can you guess which animal we are going to draw now?

Let's draw some basic shapes.

Hmm... I wonder what that is.

Now, we'll draw some lines.

Hmm... We are almost there!

A few more lines and we're almost done!

Did you guess it?

It's a rhinoceros!

Now, let's spell it!

Rhinoceros!

Very good!

Are you ready for the next drawing?

Which animal are we going to draw now?

Let's start with an oval.

Hmm… what could it be?

Now, we'll draw some ovals.

Hmm... I think I've already seen this somewhere!

A few more lines and we're almost done!

Do you know what it is?

It's a bee!

Would you spell it with me?

Bee!

This was fun!

See you again soon!

Until the next episode of Magic Drawing!

Go ahead and guess it!

Go ahead and guess it!

So much fun!

So much fun!

For more infomation >> Desenho Mágico | Vamos Desenhar Animais - Episódio 2 | Kids Super Songs Brasil - Duration: 3:21.

-------------------------------------------

Magic Drawing | Let's Draw Animals - Episode 2 | Kids Super Songs - Duration: 3:14.

Let's draw something!

Let's draw something!

What is it?

What is it?

Can you guess which animal we are going to draw now?

Let's draw some basic shapes.

Hmm...I wonder what that is.

Now, we'll draw some lines.

Hmm... We are almost there!

A few more lines and we're almost done!

Did you guess it?

It's a rhinoceros!

Now, let's spell it!

Rhinoceros!

Very good!

Are you ready for the next drawing?

Which animal are we going to draw now?

Let's start with an oval.

Hmm… what could it be?

Now, we'll draw some ovals.

Hmm... I think I've already seen this somewhere!

A few more lines and we're almost done!

Do you know what it is?

It's a bee!

Would you spell it with me?

Bee!

This was fun!

See you again soon!

Until the next episode of Magic Drawing!

Go ahead and guess it!

Go ahead and guess it!

So much fun!

So much fun!

For more infomation >> Magic Drawing | Let's Draw Animals - Episode 2 | Kids Super Songs - Duration: 3:14.

-------------------------------------------

Дана Борисова рассказала что ей подарил машину неизвестный мужчина #ValeryAliakseyeu - Duration: 2:54.

For more infomation >> Дана Борисова рассказала что ей подарил машину неизвестный мужчина #ValeryAliakseyeu - Duration: 2:54.

-------------------------------------------

Sweet Baby Girl - Hospital 2 - for Children - GamePlay HD - Duration: 7:05.

Sweet Baby Girl - Hospital 2 - for Children - GamePlay HD

For more infomation >> Sweet Baby Girl - Hospital 2 - for Children - GamePlay HD - Duration: 7:05.

-------------------------------------------

Top 5 Best Entry Level DSLR - HD 2016-17(Full Review & Specs)You Must See Before Buying DSLR - Duration: 6:29.

Top 5 Best Entry Level DSLR - HD 2016-17(Full Review & Specs)

For more infomation >> Top 5 Best Entry Level DSLR - HD 2016-17(Full Review & Specs)You Must See Before Buying DSLR - Duration: 6:29.

-------------------------------------------

Top 10 Craziest and Funniest WWE Moments, Report(WWE SMACK DOWN GIRLS ) - Duration: 3:24.

Top 10 Craziest and Funniest WWE Moments

Không có nhận xét nào:

Đăng nhận xét