Thứ Sáu, 13 tháng 10, 2017

Youtube daily Oct 13 2017

Hey guys! Welcome to the Google Search Name Challenge!

This is a challenge where I in the

Google search box thing

type in the name of a famous person

either a celebrity or a fictional character

and then I will see what Google comes up with in those suggestions thing and then I will react to that.

And I'm sure that it's not an original challenge or a new challenge.

But I don't know if it has a name or not, so...

There you go. Google search name challenge.

Alright, let's see what Google comes up with. First I need to record the screen...

Yeah.

Eh... Okay.

Let's see...

Harry...

Well, actually, I'll search here...

Okay. It already knows I will search for Harry Potter...

Okay.

Harry...

Potter

is

dead?

Yeah... well, he died in the seventh book, but...

he's not...

dead anymore...

Harry Potter is dead eh heh heh...

Is that some kind of fanfiction or something?

Harry Potter is missing fanfiction...

(thinking)

Well...

Okay.

Harry Potter is death fanfiction... Wait, I thought Dumbledore was supposed to be death, and Harry was the youngest brother...

Yeah, that Tumblr theory going around.

Harry Potter is a genius fanfiction.

Well, that would be...

... an alternate universe. I mean, he's not stupid or anything, but he's not a genius either.

Okay, this was fun!

Let's see if it's different if I say Harry

JAMES

Potter is...

alive fanfiction... Oh, Harry Potter James is alive fanfiction. Ah, okay.

Yeah, that would be nice.

Harry Potter is James' brother fanfiction... That would be disgusting.

(WHAT'S WRONG WITH THIS FANDOM?)

Who is Harry James Potter?

wHo Is HaRrY jAmEs PoTtEr? It's the name of the...

(people are stupid)

Okay!

Harry Potter James is alive, yeah okay...

Harry Potter is James Bond! Okay...

I haven't seen James Bond.

This was funny.

Okay, let's take a new one.

Ehm...

Yeah.

Let's see...

Hermione Granger is

Tony Stark's daughter...

Oh, Game of Thrones. Ehm...

I haven't seen Game of Thrones. Or read it.

Hermione Granger is not black...

Does that mean (inaudible) she's not a part of the Black family...

Oh, eh...

(I feel stupid now)

Yeah, ehm... I don't know.

(JK Rowling said it's up to the reader to imagine, so she can be any race the readers want her to *drops mic*)

I actually don't care, eh...

Hermione Granger IS black...

Well, that's contradictory.

(contemplating how much I hate my fandom for debating over something as superficial as the race of a fictional character with no canon race)

Yeah, I don't care about that.

Hermione Granger is hot...

Yeah, that one was to be expected. Ehm...

I think Emma Watson is quite beautiful. I never imagined Hermione as being, you know...

particularly beautiful, but...

At the yule ball, she was for sure

the queen of the ball or whatever.

Hermione Granger is a pureblood fanfiction.

That would be interesting. Really interesting, actually.

I'd read that.

But not now. Let's just say: Hermione is...

Black, okay. It was there again. Hermione Island.

Right.

Hermione is Draco's cousin fanfiction.

(let that sink in)

Then she would have to be either pureblood or halfblood...

That could also be funny.

Hermione is white... Okay, is everything going to be about her race or what?

(it's 2017, what did you expect?)

Hermione is Snape's daughter fanfiction.

(WHUT?)

But... Snape doesn't...

Well, Snape is not married or anything...

Who would be the mother then?

(asking the big questions)

Huh.

That was interesting.

Hmmm.

Who am I gonna pick now?

I don't know.

Okay.

Ron Weasley

is... Dumbledore.

I've seen that theory a few times, and...

In some ways, it actually makes sense, but in some ways, it doesn't make sense...

I think I will make a rant about that.

In another video.

Ron Weasley is Dumbledore theory, yeah okay.

The name of Ron Weasley's rat is...

Scabbers or Peter Pettigrew.

There you have it.

Ron Weasley is Voldemort.

What?

Holy... No... That doesn't make sense...

No, he's not.

Ron Weasley is a seer.

I have seen that theory on Tumblr! I have seen all the theories on Tumblr.

But... it makes so much sense that he would... be, like,

a little bit of a seer, and...

That's also a rant for another video.

Okay.

What if we say Ronald Weasley is...

Our king.

No, wait.

Yeah.

Ronald Weasley is our king, that's true.

Ronald Weasley is Ed Sheeran...

Yeah, that's... that would be funny, and they really do look alike, erh, you know, Rupert and Ed Sheeran.

It would be so funny if...

Yeah, Ronald Weasley is... Yeah, okay, they're there again.

Okay, what if we just say Ron is?

No, okay, that's... Okay, Ron is a normal name, so...

Yeah.

That was funny.

Now I know what my next videos are gonna be about! Hm!

Thank you so much for watching. I hope you liked this video.

If you did...

... like! If you didn't, dislike.

No, don't dislike. That's... that's rude. That's rude! Don't dislike! Okay...

Eh, if you...

If you want to see more of this challenge, write in the comment box below what you want you want me to search for the next video,

and if you have ideas for other challenges for me to do,

also write so in the comment bow below,

annnd... I will see youuuu... next time, I hooope...

Raven HIHIHIHI larious

For more infomation >> Google Search Name Challenge: Harry Potter (The Golden Trio) - Duration: 6:50.

-------------------------------------------

SAP HANA Academy - Getting Started with SAP HANA on Azure: Create Instance [2.0 SPS 02] - Duration: 11:20.

Hello and welcome to the SAP HANA Academy.

The topic of this video tutorial series is Getting Started with SAP HANA on Microsoft Azure

and in this video, I will show you how create

an SAP HANA, express edition instance using the SAP Cloud Appliance Library.

Hi, I am Denys van Kempen.

In the previous video, the first of the series, we introduced

the SAP Cloud Appliance Library (CAL) as cloud solution marketplace

similar to the Microsoft Azure marketplace and

showed you how you can create a cloud solution provider account in CAL.

With the cloud providers set up we can return to our solutions page and search for express.

This will return SAP HANA, express edition.

At the time of the recording, there is only one solution for express.

It is available for both AWS and Azure.

Select it for more detailed info.

It is the complete version.

Server + applications.

In the description is mentioned that it can run on laptops

but you will need a pretty powerful laptop for that as you can see,

the recommended size is 30.5 or 32 GB.

32 is also the maximum size for the free edition.

If you want to use more memory, you will need to license express.

More Information points to the express edition page on the Developer community.

If you are new to this edition, you might want to read up a bit about it.

Great tutorials as well.

Terms and Conditions contains the fine print

and the Getting Started Guide provides more information about the solution:

system details, how to connect with SAP HANA studio, should you want to do that,

and license information.

To create an instance, select Create Instance here in the header.

Choose the account you want to use.

I will be choosing Azure here.

We then get a cost forecast (with disclaimer).

Just like the weather, I guess.

33 dollar cents per hour when active.

5 dollars per month when suspended, this is for storage and the license fee for SUSE Linux.

HANA is for free.

There is no charge from SAP for the express edition.

Give the solution a name.

I will use ha-hxe- 1 Region, I cannot make any selection here;

depends on your account.

Pick one closest to where you work.

And enter a password that respects the requirements here.

And then you can click Create.

For those that would like a bit more control, you can go into Advanced Mode

but before we do this let's pause for one second.

We are about to create an SAP HANA, express edition virtual machine on Azure in the cloud

and all we had to do was think of a name and a password.

That's it.

Consider an on-premise installation where you had think about the hardware,

networking, storage, security, preparing the SUSE Linux operating system,

installing SAP HANA, performing post-installation configuration requirements.

Maybe not rocket science but still there is a fair amount of work that needs to be done.

With CAL, all you need to come up with is a name and a password.

What's up with Advanced mode?

Step 1. Account Details - is the same: Choose the account.

Step 2. Instance Details -

Fortunately, the information we already provided is picked up,

no need to enter the same data twice.

Network and Subnet. The selection will depend a bit on what's

already there on Azure for your account.

We will explore the possibilities in another video.

Public Static IP Address might be an interesting option.

Default here is an ephemeral IP, as it is sometimes called.

This means that each time you start a VM, you get a new IP.

Now should you want to store the URL to HANA cockpit or the SAP web IDE

as a favorite in your browser, this is of course not going to work

with a different IP each time, so you may want to go for a static IP.

There is a small charge for this.

Step 3 allows us to specify the size and access points for the virtual machine.

E4_v3 is selected as default.

4 cores and 32 GB of RAM.

You could pick D12_v2 with 28 GB as well.

The D series on Azure are for memory intensive applications.

E4 is for high-end D series; Microsoft recently introduced this.

Depends a bit on the region what you see here.

They run on the Intel Broadwell and Haswell processors.

The other default configurations have more than 32 GB and,

for HANA express edition, would require a license, as mentioned.

Note also that the platform has been tested but for HANA express there is only community support.

Then we have the access points.

This concerns the firewall configuration.

There is a whole list of them, documented in the getting started guide.

I will address this is a separate tutorial.

Step 4.

Concerns the solution password.

This will be for the operating system administration account,

the software owner, <sid>adm, for HANA express with SID=HXE, hxeadm,

and for the SYSTEM database administration account both for the system database and for

the HXE tenant database.

Step 5. Schedule Details -

allows you to configure scheduling options.

First, set your time zone.

Then you can choose between activation by schedule: for example, office hours

or have it running until a certain date

(end of the project).

or manually activate and suspend, which is the one I will select.

Optionally, you can also set the termination date of the solution instance.

Termination means that the instance will be deleted. Removed. Gone.

Review to review.

As a reminder, in basic mode, all we selected was the name and a password for the solution.

Maybe the region.

For Advanced, I have added a static IP.

This is optional.

You can also easily do this in the Azure Cloud Portal.

Click Create to create.

We get another warning on Supported VM Sizes.

As mentioned this is only for the express edition.

Then we get a pop-up that the private key has been generated.

This enables you to access the VM in command line with your Azure account.

Typically, you would want to store it in CAL.

So, that's what I will do here.

Click Store.

Then, you will also want to download the key, assuming you are on the computer that you

will use to connect to the VM.

We will address is in the next video.

If you want, you can encrypt the key with a password.

Depends a bit on the use case.

This is just a demo system, so I won't do this here but if you are doing anything serious,

you might want to consider this.

Then we get a message that the solution is prepared to be used for the first time and

that this will take approximately 20 minutes.

The first time it can actually be a bit more, the time it takes to copy over the canned

VM to your region.

Then a couple of minutes more to prepare.

So, if we time travel here a bit, fast forward, we have our solution ready, active.

From the Operations menu we can Suspend the VM, meaning stop it.

We can also Edit, Reboot, or Terminate the VM, and t erminate here means delete, remove, gone.

Select it for more detailed information.

We have our cost forecast.

The IP addresses, the internal one and the public one, that we will need later on to connect.

Solution info with a link to the Getting Started Guide.

The different access points.

And the activation schedule.

In the header, we have the same operation options:

Suspend, Edit, Reboot, and Terminate and also the option to download the private key to

connect to the VM.

Select Edit and now we can modify some of the options.

Edit header to change the name of the VM.

We can activate Termination Protection to avoid that you or anyone from your team that

can also access this account delete the VM unintentionally.

We can disable some of the access points.

And change the schedule.

If we briefly switch to the Azure Portal and, from our Dashboard, access Resources and filter

on the access group SAPCAL-username-subscription id, we can see the resources that were created for us.

The virtual machine A number of disks

The public IP, Network interface and the Network Security Group for the access points.

OK

So much for this second video, creating an SAP HANA express edition VM on Microsoft Azure

using the SAP Cloud Appliance Library.

In the next video, I will show you how you can connect to HANA using the different access points.

Thanks for watching.

You can find more video tutorials on our YouTube channel.

If you would like to be informed about new video tutorials, please subscribe to our channel.

You can connect with us on LinkedIn or follow us on Twitter, as well for updates.

And we also have a page on Facebook and Google+.

If you are watching this video on YouTube, do not hesitate to leave your comments to

the video page and, if you like, give us your vote on his video.

Thank you for watching.

For more infomation >> SAP HANA Academy - Getting Started with SAP HANA on Azure: Create Instance [2.0 SPS 02] - Duration: 11:20.

-------------------------------------------

William Patrick Corgan: Aeronaut - Duration: 4:05.

For more infomation >> William Patrick Corgan: Aeronaut - Duration: 4:05.

-------------------------------------------

3 Efficient Ways to Supply Your App with a Virtual Assistant - Duration: 4:41.

Hello, guys!

Welcome back to All About Apps series from Cleveroad Studio.

Today, we are going to talk about the technologies that let us talk to our mobile devices.

Talking to artificial intelligence is no longer science fiction.

Living in your phone, watch, or TV, it can search the web, plan daily routines, or even

control domestic machines on your behalf.

The ecosystem and scope of activity of virtual assistants are growing rapidly.

So let's inspect some aspects of the mobile apps development supplied with virtual assistants

right away.

There are three ways to make your app understand verbal language and keep up a conversation.

To begin with, you can integrate existing voice technologies into your application.

Siri, Google Now, and Cortana are the best known of them.

Siri can be integrated with the apps using SiriSDK that consists of two frameworks.

The first one covers the range of tasks to be supported in your app, and the second one

advises on a custom visual representation when one of the tasks is performed.

Google assistant works with the selected apps only.

The list includes such hot names as eBay, Lyft, Airbnb, and others.

They are allowed to make their own Now Cards via special API.

Google Now works on the basis of speech recognition followed by information search.

Google provides the developers with a step by step guide for integrating such functionality

into an app.

Voice Actions API teaches how to include a voice mechanism both in mobile and wearable

apps.

Microsoft encourages developers to use the Cortana voice assistant in their mobile and

desktop apps.

You can provide the users with an opportunity to set a voice control without directly calling

Cortana.

Cortana Dev Center has guides how to make a request to a specific application and how

to integrate Cortana with your app . The second way is to build an intelligent

assistant with the help of open source services and APIs.

There are numerous tools for developers who are keen on machine thinking.

Melissa, Jasper, Api.ai, Wit.ai ,just to name a few.

The third way is to develop a voice assistant from scratch with its further integration

into your application.

If you intend to to make your own Siri or Google assistant, make sure that you do possess

the appropriate skills and sources, because this process is far from simple.

Let's explore some Basic technologies in mobile voice assistants

Voice/speech to text (STT) This is the process of converting speech signal

into digital data (e.g., text data).

The voice may come as a file or a stream.

You can use CMU Sphinx for its processing.

Text to speech (TTS) This is the opposite process that translates

text / images in a human speech.

It is very useful when, for instance, a user wants to hear the correct pronunciation of

a foreign word.

Intelligent tagging and decision making serve for interpreting the user's request.

Image recognition is an optional but very useful picture.

Later, you can use it for developing multimodal speech recognition.

Noise control.

The noises from cars, electrical appliances, other people talking near you make the user's

voice unclear.

This technology will reduce or totally eliminate the background noise that prevents a correct

voice recognition.

Speech compression.

With this mechanism, the client side of the applications will resize the voice data and

send it to the server in a succinct format.

Voice interface.

It is what the user hears and sees in return to his or her request.

As you can see, each approach has its weak and strong points.

Siri, Google Now, and Cortana are well known among users.

A lot of people would prefer interacting with a familiar and trusted technology.

Yet, these mobile assistants have some limitations as for integration with the third-party apps.

Also, they differ in their functionality and run on specific platforms.

These factors prevent the flexibility of development.

The main advantage of independent development is that you are free to implement whatever

you like.

The main con, though, is that it is a very complicated process that will take a lot of

time and effort.

This is all for today.

Hope that today's information was helpful.

To read the full article, visit the Blog page on the Cleveroad website.

See you again soon on the next edition of 'All About Apps'.

For more infomation >> 3 Efficient Ways to Supply Your App with a Virtual Assistant - Duration: 4:41.

-------------------------------------------

Harry Potter: A History of Magic - Duration: 0:44.

For more infomation >> Harry Potter: A History of Magic - Duration: 0:44.

-------------------------------------------

English Ninjas - Verb Conjugation - Duration: 3:16.

Hello, from English Ninjas! This is Margaret. And today I want to talk a

little bit about verbs. So typically when you learn a verb you learn it in its

infinitive. That's kind of its most neutral. You often learn that something

is "to be" "to do" "to say" "to have" right?! And from there you conjugate it by the

subject. So you have "I am" "you are" "he/she/it is" "we are" "you are" "they are" simple enough.

And then you have that with all of the infinitives if you move on from

that sometimes you start learning the past tense next so for the most simple

regular verbs you often add an "-ed" so if you have I act in present tense the past

tense would be I acted at an "-ed" to the end of "act" or I admire Amelia Earhart

If you wanted to do it in past tense "When I was little, I am admired Amelia Earhart."

"I check my shoes, to make sure they are tied" you can say: "Yesterday I checked my shoes or I checked my bag for my passport."

That is the most regular that those are for regular verbs in the past

tense adding an "-ed". There are also irregular verbs but we'll talk about that at a different date.

Next, another type of verb is the past participle. Many times the past participle is also the same as a

simple past for just adding an "-ed", but there are also times when it is not.

Especially - these irregular verbs - so if you say the verb "to give"

like to give a gift you can say "I give presents to my family for their birthday."

If you wanted to say it at past tense, it's irregular so say: "I gave my mother and necklace for her birthday."

Now... If you're switching to past participle, it's not "gave" again it is now "given"! So... It would be "GIVEN".

And now I would say: "I have given my mother jewelry every birthday."

So, many people ask me what is the easiest way to do that? Unfortunately there is not an easy way to figure out

which verbs are regular and which ones are irregular. The best you can do is

really get a list kind of line them all up and just go through them. Maybe 10 a day!

And just kind of get into your mind which ones are regular which ones are irregular.

If you have any questions about that you want to talk more with

the tutor about irregular and regular verbs feel free to let us know always

happy to answer questions have a great day. :)

For more infomation >> English Ninjas - Verb Conjugation - Duration: 3:16.

-------------------------------------------

More being learned about York County woman's rescue - Duration: 0:57.

For more infomation >> More being learned about York County woman's rescue - Duration: 0:57.

-------------------------------------------

Heading into the weekend - what's the weather looking like? - Duration: 3:53.

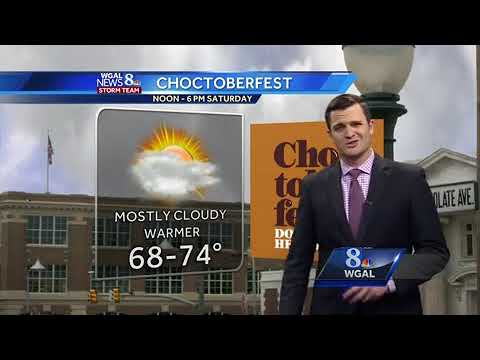
For more infomation >> Heading into the weekend - what's the weather looking like? - Duration: 3:53.

-------------------------------------------

NH nurse volunteering with Red Cross in California - Duration: 0:56.

For more infomation >> NH nurse volunteering with Red Cross in California - Duration: 0:56.

-------------------------------------------

WORLD'S LARGEST GUMMY SKULL - Halloween Special - Duration: 7:55.

Hi and a huge Halloween welcome to Steve's kitchen. We've been having a lot

of fun in the kitchen today, just come down here and have a look. Oh yes we've

been making a giant gummy skull and will it come out in one piece? we don't know

yet, you don't know, if you want to know you're going to have to keep watching let's

get on and make this giant Halloween gummy skull.

Now I've got these aeroplanes, these are anniversary, 90 year anniversary packages.

So they're done in the old-fashioned style but this is just a raspberry jello

and it makes about five hundred mls or two cups of regular jelly. So we're just

going to open a packet, now our jello for this gummy skull has got to be stronger.

So we're making a double strength recipe and we're adding some extra gelatine as well

to help this set really firm. So I've got four packets of this beautiful raspberry

jello or jelly crystals. Now remember a lot of these jello powders are mainly

sugar so I'm not going to just use all jello, we've got regular powdered

gelatine here and I'm going to add in 3 tablespoons of gelatine. Now do be

careful with hot water, this is hot water from the kettle. I've got two cups here,

I'm putting four cups in in total. We're just going to pour this in with our

jello and gelatine, beautiful smell of raspberry coming off of there and in

goes the second two cups. So that's four cups of hot water, pop my my whisk in

there. I want to dissolve all this jello up

until I get a nice clear liquid. Now this is a beautiful skull shaped baking mold

Now you can get these in plastic and I'll leave a link down below.

I think Wilton may have discontinued them but they still are for sale and

they are really, really well made. I've got an elastic band across there, that

will become apparent in a moment. Now keep stirring your jello until all

the little bits have dissolved and we don't want too many bubbles on the top.

Now I'm going to start with the back of the head I'm just going to pour this

thick, very thick jello into the mold. Now we've got a little over four cups, I'm

going to keep pouring that until it gets pretty close to the top. Now these are

little half ball cake molds as well that you can buy in the stores. What I'm going

to do with this is, we need to drop it into our jello. Now be careful that is

still a little bit hot and that's where the elastic band and these nice big

chopsticks or any piece of dowel will do. I'm going to pop a chopstick on here the

second chopstick about a couple of inches

from the other one and then we're going to push that in and sort of ease it under

the chopsticks. Now because there's nothing but air inside this bowl it's

going to push up a little bit hard, so what I'm going to do is just half fill it

with water, just to weigh it down until I feel that there's an equilibrium between

the buoyancy of this and the jello underneath and then I'm just going to

ease this into place and as the jello sets we're going to have this nice

little hole in the center of the head, where I can put my brains. Now with the

second half, the skull half, we've already got the chopsticks in place so I'm just

going to start filling this one up as well and then we want to move these

spheres. So I'm just going to hold the chopsticks, move them so they are

accurately in line with each other and a last little top up just to bring

it up to the near the top of the mold and we're going to leave these jello's

until they've completely set. You won't be able to move them while they're hot

like this but eventually you could probably pop them in the fridge and

they'll set a little faster. Now my skull jellies have set, I left them overnight

and when they were a little bit firmer I pop them into the fridge to chill up but

you can see they're pretty firm. I've taken that little bit of water out of

the spheres in there and now we've got the job, hopefully if this is firm enough,

trying to get the skulls out. Now I've got some silicone gloves here, they're

food safe, I'm wearing these just to protect the skull from fingerprints and

any of my nails snagging and breaking the skull. Now the chopsticks have done

their job so I'm just going to pull those out of there now, you can see even though

I topped the jello up it's actually sunk down. The first thing I want to do is get

these little Spheres out and what I'm going to do is just use my fingers just to

break the seal where the jello meets the sphere. I'm going to let the pressure of

gently lifting that up release away and yep I'm pretty pleased with that and

then just a little bit of upward pressure and those spheres are just

going to pop right out. So I've got that lovely little cavity which we're going

to be filling up with brains. Now the same thing around the edge of the skull,

if I just push it down and just break the seal around the edge. Now if you're

very careful and just make sure the complete perimeter of the jello has broken

away from the side of the mold and then hopefully with a little bit of

encouragement. Now one of them has come out that is the the back of the skull

and that's all nicely in one piece. I just popped that over there and out

comes the second half. Now we've got to fuse these two guys together a little

bit, about half a teaspoon of gelatine in some hot water, give it a little mix

through. Now almost against reason I'm going to lift the skull back up I'm going to

drop it back into the mold and I've got all these lovely gummy snakes which I'm

using as the brains and I want to pack them in to the cavity and then we've got

my gelatine glue here, a little silicon brush I'm just going to paint over the

surface of the front of the skull where it joins the back and then I'm going to

grab at the back of the skull, I've got this lovely sticky surface, line it up

with our worms, we want to drop it on top, give it a little wiggle to get it into

place. You might wonder why I took the front of the skull out and then put it

back in, it's to really release the tension from the actual mold itself so when this

sets hopefully, we'll be able to get this out. I want to set this for a good few

hours in the fridge to let that bind together. Now hopefully the skull is fused

together, it's time to get Hank out of a tank and this should be fairly simple.

Man he weighs an absolute ton I'm going to pop my hand on the back of the skull

turn it this way up and we're going to give this a good wiggle. whoa look at that,

that is absolutely beautiful, it's sealed nicely nice and tight, there's a seam

around the side. Doesn't he look absolutely gorgeous, we've got to thank Hank,

get a few more puns in. Here's a tip... don't take this outside to try and get

photographs because it will start to split in the heat I'm going to actually lay

Hank down, not sure which way, it's probably that way so he's sort of facing

up a little bit. You know what I can do we

because I've got a lot of these gummies here I'm just going to pop it under his

chin just to support the front of his head. I hope you've enjoyed this video

I'm going to have to restick Hank together I shouldn't have taken him out in the

garden, get him ready because this is going to go to my nephew for his

Halloween party. In the meantime and get these gloves off now, I hope you've

enjoyed the video, please share this with your friends on social media and we will

see you for some more great Halloween recipes on Steve's kitchen very shortly,

take care.

For more infomation >> WORLD'S LARGEST GUMMY SKULL - Halloween Special - Duration: 7:55.

-------------------------------------------

Video SEO - How to Rank 1 in using Tuberank Jeet Pro3 Download And install Bangla 2017 - Duration: 3:02.

For more infomation >> Video SEO - How to Rank 1 in using Tuberank Jeet Pro3 Download And install Bangla 2017 - Duration: 3:02.

-------------------------------------------

🔴 The Next chapter in RV living - Something New - Duration: 2:54.

hi YouTube and welcome back to another video my name is Aron with 3tailsRV.com

if this is your first time here you should consider subscribing because we

are dedicated to helping you with your RV we provide you with RV accessory

reviews DIY projects tips tricks and other creative stuff so go ahead and hit

the subscribe button and don't forget to click on that Bell notification icon so

you don't miss out on anything before I forget I'd like to set a goal for one hundred

*LIKES* for this video and with your help I'm sure we can easily achieve this goal and

with that out of the way let's get started right now

Lori and I would like to thank you for following along with us today and

definitely subscribe for more videos like this in the future. If you know

someone that would benefit from watching this video go ahead and share

this video with them, if you haven't already done so go over to 3tailRV.com

where you will find more helpful trips and tricks to go along with

today's video remember live simple live free and enjoy the ride and we'll see

you next time

For more infomation >> 🔴 The Next chapter in RV living - Something New - Duration: 2:54.

-------------------------------------------

Dyno Test Yamaha 125ZR modified 200cc by Casper Racing Greece - Duration: 1:39.

Dyno Test Yamaha 125ZR modified 200cc by Casper Racing Greece

For more infomation >> Dyno Test Yamaha 125ZR modified 200cc by Casper Racing Greece - Duration: 1:39.

-------------------------------------------

How Long Does it Take to Get Porcelain Veneers? | Dr. Donald Wilcox in Glendale, Arizona - Duration: 1:15.

The length of time involved in having a smile makeover done with porcelain veneers is a

relatively short period of time.

We usually will only require two main work visits that are about three weeks apart.

In between that time, we will see you to evaluate your progress with the temporaries, bleaching

if you're doing that to see how you're feeling about the appearance that we're creating

and make any modifications for that.

We decided how we're going to try to have the smile look when we've done the consultations

prior to the treatment starting, but this will give you a chance to walk around with

a new potential smile and get more feedback and allow us to make any corrections and additions

to it before we give the lab the exact description that you want.

If everything comes back from the lab looking the way you're happy with, it's about

a three-week process.

So, the only thing that's going to delay it is if we spend more time with temporaries

or making changes bleaching-wise or that.

But usually you can pretty much depend on once we begin the work, it's going to take

about a two to three-week period before you have your great new smile.

For more infomation >> How Long Does it Take to Get Porcelain Veneers? | Dr. Donald Wilcox in Glendale, Arizona - Duration: 1:15.

-------------------------------------------

[CC] With this app you learn faster! | Format C #1 | Querbox - Duration: 4:14.

For more infomation >> [CC] With this app you learn faster! | Format C #1 | Querbox - Duration: 4:14.

-------------------------------------------

ఈమాల మీ దగ్గర ఉంటే విష్ణుమూర్తి ఉన్నట్లే | Vaijayanti Mala Telugu | Vaijayanti Mala | Vedic Sciences - Duration: 4:51.

PLEASE SUBSCRIBE LIKE SHARE

For more infomation >> ఈమాల మీ దగ్గర ఉంటే విష్ణుమూర్తి ఉన్నట్లే | Vaijayanti Mala Telugu | Vaijayanti Mala | Vedic Sciences - Duration: 4:51.

-------------------------------------------

Kryon Alaska Cruise ... days 5 & 6 - Duration: 19:09.

For more infomation >> Kryon Alaska Cruise ... days 5 & 6 - Duration: 19:09.

-------------------------------------------

This Old Man Animal Songs For Kids & Babies | Children Songs | Baby Hippo Tom Nursery Rhymes - Duration: 4:31.

This Old Man Animal Songs For Kids & Babies | Children Songs | Baby Hippo Tom Nursery Rhymes

THis Old Man HE PLAYED ONE HE PLAYED KNICK-KNACK ON MY THUMB

Không có nhận xét nào:

Đăng nhận xét