Thứ Bảy, 1 tháng 4, 2017

Youtube daily Apr 1 2017

WHO IS LIVE IN

SALINAS WITH THE TOP STORY.

FERDINAND: IT HAS --

FELIX: IT HAS BEEN NEARLY TWO

MONTHS SINCE JULIAN LOPEZ WAS

THROWN INTO THE RIVER.

HIS FAMILY TURNING TO THE

COMMUNITY LOOKING FOR HELP

FINDING JULIAN.

THE FAMILY OF JULIAN LOPEZ,

REACHING BOTH FAR AND NEAR FOR

HELP FINDING THEIR LOVED ONE.

WEDNESDAY, THEY BROUGHT IN A

SPECIAL SEARCH TEAM FROM MONTANA

TO HELP FIND HIS BODY.

>> THE BROUGHT A CADAVER DOG.

THEY ARE DOING THE BEST THEY

CAN.

THEY HAVE COVERED ALMOST 20

MILES IN TWO DAYS.

FERDINAND: --

FELIX: FRIDAY, THEY WERE

SEARCHING THE SALINAS RIVER.

IT WAS HERE WHERE HE HAD COME

WITH HIS TWO NEPHEWS TO WATCH

THE RIVER.

THE NEPHEWS MADE IT OUT, LOPEZ

DID NOT.

>> THE DAY THAT HAPPENED, THE

RIVER WAS IN SOME PLACES WHITER

THAN A MILE.

NOW IT IS LESS THAN 20 FEET WIDE

IN SOME SPOTS.

WE HAVE A LOT OF AREA TO COVER

AND NOT ENOUGH PEOPLE TO COVER

EVERYWHERE.

FELIX: THE FAMILY NOW ORGANIZING

A SEARCH PARTY TO LOOK FOR

JULIAN.

AND THEY HAVE SET UP A FACEBOOK

PAGE, HELP RING JULIAN HOME,

HOPING TO FIND AN ARMY OF

VOLUNTEERS.

THERE'S A LOT OF GROUND TO COVER

AND IT WILL NOT BE EASY.

>> THERE IS TREES AND BRANCHES

AND BAMBOO.

IN SOME SPOTS, A LITTLE

QUICKSAND.

WE WILL KEEP LOOKING UNTIL WE

FIND HIM.

HOPEFULLY WE GET CLOSURE SOON.

IT IS TOUGH.

FELIX: THE FAMILY OF JULIAN

LOPEZ HAVE ALSO SET UP A

GOFUNDME PAGE TO HELP HELP WITH

SEARCH EFFORTS AND MEDICAL

EXPENSES.

TOMORROW'S SEARCH EFFORT GETS

UNDERWAY AT 8:00 IN THE MORNING.

VOLUNTEERS WHO WOULD LIKE TO

HELP ARE BEING ASKED TO MEET AT

THE OWN STREET -- ELM STREET

BRIDGE.

DAN: NOW THE MAN THAT POLICE SAY

For more infomation >> Search party now being organized to help find missing Greenfield man - Duration: 2:28.

-------------------------------------------

Tutorial - Deluxe Lego Gourmet Kitchen - Duration: 53:10.

Hey everyone!

JAYSTEPHER with a complete tutorial

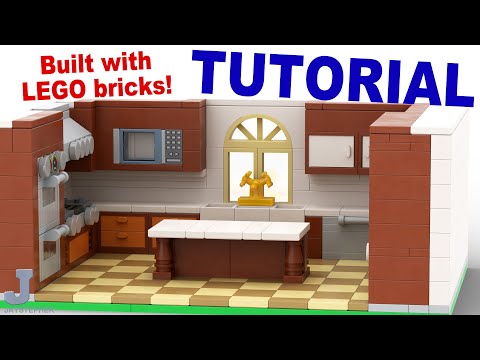
on a Deluxe Gourmet Kitchen

complete with double oven,

stove,

hood,

microwave,

dishwasher,

and refrigerator.

Let's get started!

Let's start the base of the kitchen

with an 8 by 16 plate and a 16 by 16 plate.

Set them side-by-side.

Skip one stud from the top-left.

Place down a 1 by 8 plate.

Let's set a 1 by 6 plate in the middle

followed by another 1 by 8 plate on the right.

Let's take a 2 by 10 plate.

Place it on the top-right

right below the 1 by 8 plate.

Set down a 2 by 3 plate

followed by a 2 by 2 plate on the right.

Let's finish up this side with two 1 by 8 plates.

This is going to be the foundation for the cabinets and walls.

Let's place another 2 by 10 plate on the top.

Making sure everything is pressed down firm,

and another 2 by 10 plate

on the left-hand side.

Take two more 1 by 8 plates,

place them on the left.

On the bottom-left,

let's set down a 1 by 2 plate.

Let's add a tile floor to the kitchen.

You can use any design you wish.

I'm just going to fill in this box with several tiles.

I'm going to be using a 2 by 2 checker pattern.

Here is the tile floor all installed.

In the center, there a 2 by 8 opening for an island.

On the bottom-left,

a 2 by 4 opening for a double oven.

On the right,

a 3 by 8 opening for a refrigerator.

Let's start the first row of wall.

Let's start on the bottom-left

with a 1 by 6 brick.

Let's place a 1 by 2 brick

on the top part of the 2 by 4 opening

and another 1 by 2 brick on the bottom portion.

Set down a 1 by 8 brick.

on the left-hand side.

Let's wrap around the corner with a 1 by 2 by 2 corner brick.

Let's set down a 1 by 6 brick on the top.

Place a 2 by 3 brick on the top-left.

This opening is going to be for the stove.

Place a 1 by 8 brick in the center

followed by a 1 by 6 brick on the right.

Let's wrap around this corner with another 1 by 2 by 2 corner brick.

Let's place a 1 by 8 brick on the right

followed by a 1 by 6 brick.

In the top-right,

place a 2 by 3 brick

and a 1 by 2 brick.

Skip three studs.

Set down a 1 by 2 brick.

On the left-hand side of the 2 by 3 brick,

skip four studs.

Place down a 1 by 2 brick.

Let's start the second row with two 1 by 8 bricks

on the left-hand side.

Set two 1 by 2 bricks

on the previous 1 by 2 bricks.

Place a 1 by 8 brick on the top-left

followed by a 2 by 3 brick

Set down a 1 by 6 brick in the center

and a 1 by 8 brick on the top-right.

Let's finish up the right-hand side with two 1 by 8 bricks.

Place a 2 by 3 brick on the top-right.

Set down two 1 by 2 bricks as shown

followed by a 1 by 2 brick

right on top of the previous 1 by 2 brick on the right.

Take two 2 by 3 by 2 cupboards.

Place them on the back wall

on the top-left.

Take another 2 by 3 by 2 cupboard.

Place it on the right wall.

Take six drawers.

Set them inside the cupboards.

These look nice.

The reason why I pulled the drawers out

is so I can press down on the bottom of the cupboard

for a nice snug fit.

Now let's build our stove,

sink,

and dishwasher.

Let's start the stove with a 2 by 6 plate.

Place a 1 by 6 brick in the back.

Take two 1 by 2 bricks.

Place them in the front

where we have one stud on the left and right-hand sides.

Now take three studs.

Place them on top of one another.

Set this assembly on the left.

The same for the right-hand side with three more studs.

Let's crown off the top with a 2 by 6 plate.

Place a 2 by 2 plate right in the center

followed by a 1 by 2 plate in the front.

Take a 2 by 2 by 2/3 plate with two knobs on the front.

Place it on the left.

Take another 2 by 2 by 2/3 plate with two knobs.

Place that on the right.

In the back, let's set down a 1 by 6 plate.

Take two radiator grills.

Place them right in the center.

Set down two 1 by 2 jumper plates

on the left-hand side for burners.

Two more 1 by 2 jumper plates

on the right-hand side.

On the front,

take four 1 by 1 round tiles.

Place them on the knobs.

These are going to be the control knobs

for the stove.

Let's start the bottom of the sink

with a 2 by 6 plate.

Place a 2 by 2 plate on the left-hand side

where we have a 1 by 2 opening.

Take another 2 by 2 plate.

Place it on the right-hand side.

Place two studs on the left

and two studs on the right.

Let's repeat the same process again

starting with two 2 by 2 plates

followed by four studs.

Two on the left

and two on the right.

Let's lock in the top with a 2 by 6 plate.

Let's place a 1 by 2 brick in the back

Take a 1 by 2 wall element.

Place it in the front of the 1 by 2 brick.

Take two 1 by 2 triple wall element.

Place two on the right-hand side.

Take two 1 by 2 triple wall element.

Place them on the left.

Finally a tap on top of the 1 by 2 brick.

There's our triple basin sink.

Let's build a simple dishwasher

starting with a 2 by 4 plate.

Set down a 2 by 4 brick

on top of the 2 by 4 plate.

Place a 2 by 4 plate

on top of the 2 by 4 brick.

Take a 1 by 2 by 2 corner plate.

Place it on the left

followed by another 1 by 2 by 2 corner plate on the right.

Finally let's finish this spot

with a 1 by 2 plate with stick

for a handle.

There is the simple dishwasher.

Let's set the stove on the left wall.

You have to press down firm on this one!

Let's set the sink in the center

and our simple dishwasher.

Let's construct the island.

Let's begin the construction of the island

with two 2 by 3 by 2 cupboards.

Flip them upside down.

Place a 1 by 4 plate in the back.

Now set down a 1 by 8 plate in the front

to lock the base together.

Take a 1 by 2 by 2 corner plate.

Place it on the left-hand side.

Take another 1 by 2 by 2 corner plate.

Place it on the right-hand side.

Let's flip the assembly over.

Let's add some sides to the island

starting with two 1 by 3 plates.

Let's set down two 1 by 1 plates

in the center of the 1 by 3 plates.

Let's take two studs.

Place them on the left assembly,

and two studs on the right assembly.

Now set down two 1 by 1 bricks

right on top of the 1 by 1 plates.

Let's set down a couple of 1 by 1 nose cones

on top of the studs.

Take two more 1 by 1 plates.

Place them on top of the 1 by 1 bricks.

Finally crown off the top of the nose cones

with some studs.

Let's lay the flat and press down.

So we can line up all the bricks and plates together.

Let's place one assembly on the left-hand side

and one on the right side.

Take four drawers.

Set them inside the cupboards.

So there will be four drawers in total.

There we have our center island.

Let's drop the island in this opening.

Let's tile our kitchen counters

starting with a 1 by 2 flat tile

right next to the stove.

Now place four 2 by 2 flat tiles

on top of the cupboards.

On the right-hand side.

let's set down five 2 by 2 flat tiles.

Place a 1 by 2 flat tile on the right

followed by a 2 by 2 flat tile.

Let's tile the island.

Start with a 2by 4 flat tile.

Place it where it's flush with the drawers

and hanging over on the front.

Set down a 1 by 4 flat tile,

a 2 by 4 flat tile,

another 1 by 4 flat tile,

followed by a 2 by 4 flat tile.

We have a nice overhang on the island.

Let's start the third row of bricks

on the bottom-left starting with a 1 by 6 brick.

Place two 1 by 2 bricks

on the previous 1 by 2 bricks.

A 1 by 8 brick right behind the stove.

A 1 by 2 by 2 corner brick

to lock in the top-left corner.

Set down a 1 by 8 brick on the left-hand side.

Another 1 by 8 brick on the right-hand side

where we skip four studs.

Place a 1 by 2 by 2 corner brick

On the top-right

followed by a1 by 8 brick

and a 1 by 6 brick.

Let's set down two 1 by 8 bricks

on the left-hand side.

This will start our fourth row.

Set down two 1 by 2 bricks

on the previous 1 by 2 bricks.

Take two 1 by 8 plates.

Place them on top of one another.

Set down a 2 by 8 plate

right on top of the 1 by 8 plates.

Set this assembly on the left-hand side.

This is going to be a lip to hold up the upper cabinets.

Let's fill in this area with a 1 by 1 brick.

Take another 1 by 1 brick.

Place it as shown.

This opening is going to be for a window.

Now place a 1 by 8 plate.

Set down another 1 by 8 plate

on the right-hand side.

Let's build up another layer

starting with a 1 by 4 plate

and a 1 by 3 plate.

Let's lock int his corner with a 1 by 2 by 2 corner plate.

Finally a 1 by 6 plate

to level off this area.

Now let's build our lip starting with a 2 by 3 plate,

and two 2 by 6 plates

to complete our corner cabinet lip assembly.

On the right, let's set down a 1 by 8 brick

to finish up this wall.

Let's start the fifth row with a 1 by 6 brick

and two 1 by 2 bricks

on the bottom-left.

Place these on the previous 1 by 2 bricks.

Let's set a 1 by 8 brick right by the stove.

A 1 by 2 by 2 corner brick

to lock in the corner.

Set a 1 by 8 brick in the back.

Let's place another 1 by 8 brick

on the right-hand side.

Now a 1 by 2 by 2 corner brick,

a 1 by 8 brick,

and a 1 by 6 brick

to finish up the right-hand side.

Let's take two 1 by 2 by 3 windows with pane.

Set them inside the opening.

This will let some natural light into the kitchen.

Let's start the sixth row with a 1 by 3 brick

and a 1 by 4 brick.

Take two 1 by 2 bricks.

Place them on the previous 1 by 2 bricks.

Those are the last 1 by 2 bricks we'll see in that area.

I promise.

Skip four studs.

Set down a 1 by 2 brick

and a 1 by 3 brick.

Place a 1 by 4 brick on the top-left.

Take a 1 by 1 brick with one knob,

a 1 by 1 brick,

another 1 by 1 brick with one knob,

and a 1 by 1 brick in this area.

These two bricks with knobs

will be used to hold in the microwave.

Let's skip six studs.

Pace down a 1 by 8 brick.

Finally two 1 by 8 bricks

on the right-hand side.

Let's construct the upper cabinets.

Start with two 2 by 3 bricks.

Place them as shown.

Let's place a 1 by 2 brick on the top

and another 1 by 2 brick on the bottom.

Let's set this assembly on the top-left.

Place a 2 by 4 flat tile on the lip.

This will finish up the bottom of the microwave.

Take two 1 by 2 bricks.

Place them on top of one another,

and set them on the right-hand side of the 2 by 4 flat tile.

Now grab two 2 by 3 by 2 cupboards.

Place them on top of the lip.

Take two 2 by 3 bricks.

Place them on top of one another,

and place it in the top right-hand side.

Take another 2 by 3 by 2 cupboard.

Place it on the lip,

and two 1 by 2 bricks on top of one another.

Set this assembly on the right-hand side of the cupboards

to fill in this area.

Now let's construct the double oven,

the hood,

and the microwave.

Let's construct the double oven starting with a 2 by 4 plate.

Let's place three 1 by 2 flat tiles

along the bottom portion

and left and right sides of the 2 by 4 plate.

Let's place a 1 by 2 brick in the back

followed by two 1 by 1 angular bricks.

Let's attach two 1 by 1 plates

on the angular bricks.

Let's construct the sides for the bottom oven.

Take two 2 by 2 plates

and two 2 by 2 flat tiles.

Place the flat tiles on the plates.

Let's take the left-hand side.

Set down a transparent 1 by 1 brick on the top

and a standard 1 by 1 brick on the bottom.

Same goes for the right-hand side.

Take another 1 by 1 transparent brick

and a 1 by 1 standard brick.

To keep everything lined up,

take a two stud long cross axle.

Place it in like so.

It will snap in place.

These two areas will be lined up.

Let's place the left and right-hand sides

on the 1 by 1 plates.

Take a 1 by 2 plate with stick

and a 1 by 4 flat tile.

Place the flat tile on top of the 1 by 2 plate with stick.

Let's take a 1 by 2 by 2 corner plate.

Place it on the left

where it wraps around towards the back

The same goes for the right-hand side

with another 1 by 2 by 2 corner plate.

Take a 1 by 1 flat tile.

Place it on the top-left

and another 1 by 1 flat tile on the top-right.

Let's set the handle assembly

on top of the angular bricks.

Place a 1 by 2 brick in this opening

followed by two 1 by 1 angular bricks.

Let's finish off the angular bricks

with two 1 by 1 plates

on both left and right-hand side.

Let's construct the sides for the top oven

starting with two 2 by 2 plates

and two 2 by 2 flat tiles.

Place the flat tiles on the plates.

Starting with the left-hand side,

take a 1 by 1 transparent brick.

Place it on the top,

and a 1 by 1 standard brick on the bottom.

The same goes for the right-hand side

with another 1 by 1 transparent brick

and a 1 by 1 standard brick.

Let's slip a two stud long cross axle

in the standard brick.

Place the left and right-hand sides on the 1 by 1 plates.

Let's build the controls and the handle assembly

for the top portion of the oven

starting with a 2 by 4 plate.

Flip it upside down.

Place a 1 by 4 brick on the back.

Take a 1 by 1 angular brick

and a 1 by 1 tile that has a gauge print.

Slip the gauge on the angular brick.

Place it as shown.

Let's make another one

with another 1 by 1 angular brick

and a 1 by 1 flat tile with a gauge print.

Flip it upside down,

and set it on the left.

Take two 1 by 1 bricks with one knob.

Let's place one on the left

and one on the right

followed by two 1 by 1 round flat tiles for knobs.

Take a 1 by 2 plate with stick.

Place it right underneath the angular bricks.

To finish off the bottom,

take two 1 by 2 by 2 corner plates.

One on the left, and one on the right

to wrap around the 1 by 2 plate with stick.

Place the top assembly

on top of the top oven.

Make sure everything is lined up.

There is our double oven.

Let's start the hood with a 2 by 6 by 2/3 plate with four knobs.

Let's set a 1 by 2 plate on the left

and another 1 by 2 plate on the right-hand side.

Place a 2 by 4 plate in the back.

Flip it over.

Set down a 1 by 4 plate

in this area.

Flip it over again.

Set down a 1 by 4 plate in the back.

Place a 2 by 2 slope in the center.

Let's finish up these two corners

with two double slopes.

Place a 1 by 4 plate on top of the slopes

followed by a 1 by 4 flat tile.

Now take four 1 by 1 round flat tiles.

Place them on the knobs

for control knobs.

There's the hood.

Let's construct the microwave oven

starting with a 1 by 2 by 2 frame.

Slip a piece of glass inside the frame.

Next take a 2 by 2 flat tile.

Place it on the left-hand side.

Take a 1 by 2 by 1 by 2 angle plate

and a 1 by 2 plate.

Place the 1 by 2 plate on these set of studs.

Let's fill in this area with a 1 by 2 flat tile.

Let's attach this assembly

on this portion of the 2 by 2 flat tile.

Next take a 1by 2 by 2 by 2 angle plate

and a 1 by 2 plate.

Place the 1 by 2 plate

on these two studs.

Let's cap off the studs

with a 1 by 2 flat tile.

Let's place this assembly

on the right-hand side of the window.

Let's set down a 1 by 2 brick

on these two studs

followed by a 1 by 2 flat tile with graphical print

for a control panel.

There we have a microwave oven.

Let's install the double oven

right in between 1 by 2 brick assemblies.

This has to be pressed down firm to get it snug.

Next is the hood assembly.

This has to be wiggled in a bit,

and our microwave.

It just slides in the slot.

Let's start the seventh and final row

with a 1 by 2 brick in the bottom-left.

Place another 1 by 2 brick

right next to the previous 1 by 2 brick.

Place a 2 by 2 brick

right on top of the double oven.

Place a 1 by 4 brick right here.

Now let's set down a 1 by 2 brick

on the other side of the 2 by 2 brick.

Let's lock everything together

with a 1 by 6 brick.

Place it right above the oven.

Now place this 1 by 6 brick

right behind the hood.

Let's set down a 2 by 3 brick

in the top left corner

to lock that joint together.

Now set down a 2 by 2 brick

to fill in this side of the hood.

Let's place three 1 by 6 bricks in this area.

This will frame in the microwave.

Now let's take a 1 by 4 window with arch.

Place it right above the 1 by 2 by 3 windows.

Take a 1 by 6 by 2 brick with bow.

Place it right above the window.

Let's take three more 1 by 6 bricks.

Place them right above the cabinets.

Make sure you hold down the cabinets while you're pressing down

on the bricks.

Place a 2 by 3 brick in the top-right.

Let's set down two 1 by 6 bricks

right above the upper cabinets.

Place a 1 by 8 brick in this area

followed by a 1 by 6 brick.

Let's set some cupboard doors

inside the cupboards.

Sometimes they are a bit of a challenge to get in.

They don't want to cooperate.

This one's being extra stubborn. [Laughs]

It doesn't want to go in.

Finally!

Let's set the last cupboard door in this area.

Now let's build the refrigerator.

Let's start the construction of the refrigerator

with a 2 by 8 plate

and a 1 by 3 brick.

Place the 1 by 3 brick on the left-hand side.

Let's slip in a 1 by 8 plate

right underneath the 1 by 3 brick.

Next, take three 1 by 6 flat tiles.

Place them in the center

followed by a 1 by 3 brick on the right-hand side.

Let's place two more 1 by 3 bricks

right on top of the previous 1 by 3 bricks.

Let's set down this 1 by 8 plate

right in the back

and a 2 by 8 plate in the front.

This slot is going to be for the pullout drawer for the freezer.

Take two 1 by 3 bricks.

Place them on top of one anther,

and set this assembly on the left.

Take two more 1 by 3 bricks.

Place them on top of one another,

and place this assembly on the right-hand side.

Let's set down three 1 by 2 by 2 wall elements

on top of the 1 by 8 plate in the back.

Let's set down a 2 by 6 plate

on top of the wall elements.

This is going to be our shelf.

Take two more 1 by 3 bricks.

Set them on top of one another,

and set them on the left.

The same goes for the right-hand side

with two more 1 by 3 bricks on top of one another.

Set this assembly on the right-hand side.

Take three more 1 by 2 by 2 wall elements.

Place them right on top of the 2 by 6 plate in the back.

Take a 1 by 1 plate.

Place it in the top-left corner.

Another 1 by 1 plate

in the top-right corner.

Now take a left-handed 1 by 3 by 4 door.

Place it on the left.

Take a 1 by 3 by 4 right-hand door.

Place it on the right.

Let's lock the doors in with a 2 by 8 plate.

You may have to wiggle the doors a bit

to get them to line up.

Let's set down a 1 by 8 plate in the front

followed by a 2 by 8 plate in the back.

to lock in the sides and the wall elements.

Make sure everything is locked in nice and snug.

Let's build the freezer drawer.

Let's start the drawer with a 1 by 2 by 2 by 2 corner plate

and a 2 by 4 flat tile.

Place the tile in the center

on the bottom lip.

Take anther 1 by 2 by 2 by 2 angle plate.

Place it on the opposite side.

Take two more 1 by 2 by 2 by 2 angle plates.

Place them in the rear,

and two more 1 by 2 by 2 by 2 angle plates in the front.

Now take a 1 by 2 plate

and a 1 by 2 wall element.

Place the wall element on top of the 1 by 2 plate.

Set this assembly on the left.

Let's make another one for the right

with another 1 by 2 plate

and a 1 by 2 wall element.

Place this one on the right.

For the front of the drawer,

Let's start with a 1 by 6 flat tile.

Place it on the bottom.

Take a 1 by 2 jumper plate.

Place it in the middle.

A 1 by 2 flat tile on the left

and a 1 by 2 flat tile on the right.

Finally, take a 1 by 1 round flat tile.

Place it on the jumper plate for a knob.

Let's set the drawer in the opening.

Now we have a drawer to store our frozen food in.

Before we can install the refrigerator,

let's pull out the drawer.

Set it in this area.

Press down firm.

You also want to press down inside as well

where the drawer goes in.

Slip the drawer inside.

Perfect fit!

Let's crown off the top with flat tiles.

Let's start with a 2 by 4 flat tile

on the bottom-left.

The tiles will lock all the cabinets together.

Place a 1 by 6 flat tile on the front of the double oven.

A 2 by 2 flat tile.

A 1 by 6 flat tile.

A 2 by 4 flat tile

to finish up the left-hand side.

Place a 2 by 4 flat tile on the top-left.

A 1 by 6 flat tile

and a 1 by 1 flat tile.

Let's wrap up this area with a 2 by 2 flat tile.

Place a 1 by 8 flat tile above the window

to lock the brick with bow in.

Set a 1 by 2 flat tile on the left-hand side,

and another 1 by 2 flat tile on the right-hand side.

Place a 2 by 2 flat tile,

a 2 by 4 flat tile,

and a 1 by 6 flat tile for the top.

Now for the right-hand side,

let's set down four 2 by 4 flat tiles.

These will lock in the cupboards and the refrigerator.

Let's finish above the cabinets with two 1 by 2 flat tiles,

a 1 by 1 flat tile,

and two 2 by 4 flat tiles.

Now the top of the kitchen is finished off.

This concludes the tutorial for the Deluxe Gourmet Kitchen.

It is the perfect height for minifigures.

Jay the Surfer seems to like it.

Now he can fix meals

after a long day of surfing.

I hope this tutorial helped everyone out.

Thank you for watching!

For more infomation >> Tutorial - Deluxe Lego Gourmet Kitchen - Duration: 53:10.

-------------------------------------------

Ding Dong Bell | Kids Nursery Rhymes Song Collection | 3D Baby Songs by Little Treehouse - Duration: 1:03:30.

♫ Ding Dong Bell ♫

♫ Kitty's in the well ♫ ♫ Who put her in? ♫

♫ little johny johnny flynn ♫

♫ who pulled her out? ♫

♫ Little Tommy Stout ♫

♫ What a naughty boy was that, try to drop poor kitty cat ♫

♫ who never did him harm but ate all of the mice in the farmers barn ♫

♫ Ding Dong Bell ♫

♫ Kitty's in the well ♫

♫ Who put her in? ♫ ♫ little johny johnny flynn ♫

♫ Who pulled her out? ♫

♫ Little Tommy Stout ♫

♫ What a naughty boy was that, try to drop poor kitty cat ♫

♫ who never did him harm but ate all of the mice in the farmers barn ♫

For more infomation >> Ding Dong Bell | Kids Nursery Rhymes Song Collection | 3D Baby Songs by Little Treehouse - Duration: 1:03:30.

-------------------------------------------

El Chema | Recap (03/31/2017) | Telemundo Novelas - Duration: 15:18.

CC: TELEMUNDO NETWORK

CHEMA

Did hell just freeze over? How come you're calling me?

I'm in no mood for jokes, Amanda.

I need to know if you've heard from Regina.

<i> Have you spoken to her?</i>

No.

Why?

They kidnapped her and the boys.

It was that f---ing Venezuelan.

Are you sure she was kidnapped?

Maybe she left voluntarily.

Why would she? Don't be ridiculous!

They killed some guys here.

Do you think she'd do something like that?

I don't know, Red.

You two have been fighting for a while now.

You killed her aunt, man. She was like her mother.

Haven't you considered that?

You know what?

I shouldn't have called you.

You stupid, condescending bitch!

Go f--- yourself!

No! Damn, baby, this is why I came to Mexico City

in the middle of the trouble we're in.

I wish I wasn't so worried, but...

As long as you're with me I don't care.

Really?

So you don't care that I'm worried?

We've looked everywhere and we can't find them.

Red is devastated.

I left him in Puerto Morelos with my mom,

but this is horrible.

Have you heard anything about Ricardo Almenar?

Nothing!

I've been investigating that with Ponce.

Damn. With Ponce?

Yes.

The poor bastard even asked me out to dinner.

Look at that. Dinner.

Yeah, so what?

He likes me.

You're not the only one.

Listen, baby, there's something you're not getting.

I love you.

Are they asleep?

Yes.

They were exhausted. Don't make noise.

Poor things.

Everything's been squared away.

I was able to get us all Venezuelan passports.

I even have a new name. Come, sit down.

I don't know how you always do it.

Morillo!

Where the hell is he?

Come here, Julio.

Where the f--- is Morillo? At the whorehouse again?

We haven't heard from him since yesterday.

What did you just say?

Are you worried?

Mom!

Amanda!

What are you doing here?

Where's my dad?

I keep calling and he won't answer.

Relax.

Give me a minute.

What are you doing here?

Tell me the truth.

Did he have anything to do with the disappearance

of Regina and her kids?

Is it true?

Pilar!

Let them have whatever they want and do whatever they want.

This is their new palace!

Like it, baby?

-I love it! -You know what?

I'm glad we didn't end up going to the beach.

We ended up coming to my favorite house instead.

It isn't the biggest.

That one's on the eastern side of the country,

near my hometown.

This one's my favorite, though.

It's perfect!

It belongs to you and the kids now.

I love this house...

and I love you guys!

-Come see. -Wait!

-I need to ask you something. -What?

Did you think I saved up all this money

to take you to a ranch?

Wait, let me clarify.

Around here, we call wood and tin houses ranches.

They're humble homes.

No, I didn't want you going through any trouble.

You're a queen, baby.

I want you... to promise me something.

We're right here. San Pedro Sula.

We need to travel to Choloma.

We need to clear a path to make it to the airstrip.

You have a call, sir.

Well, let's check if everything's ready.

What's up, Chinasky?

Everything's fine here.

We're waiting for you.

We blazed a trail across the northern side.

Sounds good.

We're on the eastern side of San Pedro Sula.

Perfect.

The airstrip is ready.

Alright.

We're bringing over the truck full of merch.

One thing, though.

We're staying in Honduras until things cool down.

Alright. We'll be in touch.

Wh

you good-for-nothing slut?

Don't mess with my kids!

Leave them alone!

Nelson, help me!

Nelson!

Hey!

I'm sorry, baby...

but business is business.

-Your money's over there. -Thank you.

You're all mine now, you bitch.

Should I take the kids?

No! Not my children!

Leave them alone!

Please... not my children.

I trusted you, you f---ing bastard!

I trusted you!

Business is business, Regina!

I'm here to settle some unfinished business with you,

you little slut.

You did this.

You paid this bastard to seduce me

just so you could take vengeance on me!

You fell for it fair and square!

You're the one who slept with him!

Things are about to get spicy!

I'll give you two some privacy. I'm taking the kids.

Yeah, take them.

Not my kids! Leave them alone, you bastard!

Not my kids!

No, no...

Not my kids!

Not my kids!

Tand dad!.t-out to mm

Mom!

Mommy!

Damn, kiddo.

I'm actually doing you a favor.

You're better off in heaven than in an orphanage.

So quit your crying.

Mom!

Ready?

Yeah, man! Just do it!

I know you won't get much sleep tonight, Red...

but you must try to rest and get your mind off of things.

I don't think I can, Mrs. Elvira.

The thought of knowing my kids need me

and not being able to go to them is killing me inside.

I won't bug you like Chema has because I know you're hurt...

but I hope you take this as a sign to leave the business.

Don't you see?

My kids are all I really have.

I don't even care about Regina anymore.

If she wants to leave, so be it.

But my kids?

I need them.

Have faith. They'll show up soon.

You're still here.

I figured you'd gotten the hell out by now.

Or are you here to throw one of your usual tantrums?

You want me to share in your guilt

so I can feel responsible for what happened to Ines,

Martita... and Regina...

and her kids.

If Ricardo's behind their disappearance,

then anything could've happened to them.

What happened to them?

I was with Salma.

-I want to ask you something. -Okay.

Yesterday when those bastards almost killed Ponce and Lopez,

the person you cared about the most was Andrews, right?

Why would I let them kill him?

What about Salma?

Would you have sacrificed her?

I mean... I don't know.

At that moment, maybe, but now I'm attached to her.

Hello?

You know who this is, son of a bitch?

Of course I know.

I can recognize a son of a bitch.

Where are you, you bastard? So I can go kick your ass.

Listen up.

I'm at the perfect place to make you pay

for all the sh-- you've done to me, motherf---er.

Are you responsible for Red's family going missing?

If yes, let's negotiate.

I'll give you territory plus extra

in exchange for them.

That's not his family.

That bitch left with the first bastard to sweet-talk her,

the Venezuelan,

who, by the way, brought her straight to me.

So I wasn't wrong.

You're behind all this.

That's right.

It cost me a whole lot though.

You know I have refined tastes.

By the way, tell Red he's got good taste.

Regina looked hot.

Well, not that hot after the beating she got.

Good talking to you.

What happened? What'd he say?

Where are Regina and my kids? Does he want a ransom?

CHEMA

We're going to Nogales.

Wait, she's not there. Calm down.

Calm down?

Like hell I'll calm down!

-At least let me think. -Think about what?

I'm sorry for what I'm going to say,

Once I know where I'll be, I'll let you know.

Yes, ma'am.

Mom, they're coming for you.

Let's get out of here.

No one's going to touch me.

Give me a gun, Nopal.

Give one to Amanda.

What? Are you crazy?

Let's go call the authorities, Josefina.

Damn it, Mom, get inside!

I heard gunshots.

Did they teach you at the academy

how to fish in troubled waters?

No, sir, but I get the picture.

Don't let them through. ThaI'll pay you more.ng.

Let's go! Now!

Hey!

Get in! The cops are coming!

Sh--! Let's go!

and forget about his sister.

Times are changing and I want to move on up.

I'm going to work from the Ecuadorian-Peruvian border.

I'm going to ship the drugs from Leticia.

I need someone to pick up my coke and get it to Chema.

You're the man for the job.

<i> Mom!</i>

<i> Ready?</i>

<i> Yeah, man! </i> <i> Just do it!</i>

<i> Mom!</i>

<i> From that moment on,</i> <i> Red wa</i>Talk to me.<i>he world.</i>

Hey, Chema...

I know where Nelson Martinez is.

I'll fax you his location.

Stop screaming! Don't get hysterical on me!

You left for a week without telling me where you were,

and now you're leaving again, you motherf---er?

Don't talk like that in front of my daughter, you bitch!

What do you wanNot much.now?

Manny!

Chema...

I had nothing to do with what happened to Red's woman.

I swear I didn't.

You can tell Red yourself, motherf---er!

You damn traitor.

Come on. Let's leave the business.

Who said I wanted to leave the business?

Retirement's meant to be lived out peacefully.

Give me the gun.

For more infomation >> El Chema | Recap (03/31/2017) | Telemundo Novelas - Duration: 15:18.

-------------------------------------------

[Marvel Heroes] Subtitled Pen-and-Paper Iron Fist Guide / BUE to My Channel - Duration: 11:22.

Hello Marvel Heroes Fans, my name

is Wilfrid and welcome to my channel

where you can see videos and guides on

where you can see videos and guides on this free to play game called Marvel Heroes. If you

like this sort of guides, do check out the link

at the description below there are more

guides for you to watch. And also, today there's a

very special announcement here the

biggest update ever to my channel as

inspired by the biggest update ever in

Marvel Heroes. And I am going to use Iron Fist

as one of the heroes to showcase to you this brand new mini-series

Alright, so now, as

you can see here, this not Singapore.

I am now here in Taipei because my team

here has shared some statistics with me.

It's rather interesting. I have been playing

this game in Singapore for quite

some time. And the latency has been rather,

rather bad and I haven't been able to

really play a good game in Singapore so

they are saying that I shall move

to Taiwan because Taipei is a

little bit closer to America. I hope my team

is right. And also I have asked my team

to help me out here with regards

to what I shall do my channel

because I have been doing this for years. I

shall do something new, something fresh and so on.

So they have conducted a study, on

you guys. So, a lot of them is

no brainer. They say that for those of

you who visit my website, and watch my

videos, play this game, you all are comic

books kind of fans. And for people who read a

lot of comic books, you are very

imaginative. You can really see without

showing to you all the game play and so on, you

can actually imagine what's going on

behind the scene. So I am not going to do

I am doing away with all this kind

of game play recording and dive straight

to kind of like what essentially will

make you play your heroes better.

This is my headquarter here.

I will be staying here for a couple

of months if years to complete all my guides.

This is the study room by the way

and this is where you can see all the guides

being made here. Today

is all about Iron Fist. I am going to

do a pen-and-paper way here, as

as you can see, very high tech.

Iron Fist has his

ups and downs.

Recently there

is a Netflix series on Iron Fist. A lot of you

are searching and asking for Iron Fist

guide. And here I am doing one for you in

this brand new biggest update ever to my

channel. OK. Now, before the biggest update

ever, I have been using / playing

Iron First in a Twin Style. So I am going to

use the same twin style here. I am going to

show to you why I like this

twin style. It can be

really effective as well, and fun.

Back to the pen-and-paper guide here.

...

This is serious stuff. You will

be able to understand this after you

watch the guide

Because Iron Fist is

kungfu kind of hero, I am going to (write)

Chinese characters here. I think a lot of

you may not have seen me

writting Chinese before. So I am

going to my Chinese writing here. I

hope that is fine with you. But I will also

annotate a bit of English in here in case

you forget what I've said.

This is your hot bar. This is health.

...

This is chi. And these are not Chinese

characters by the way.

Chinese characters are coming this way.

If you play this twin style, I am

going to introduce to you, the main spender

will be the Fury of Five Forces. To

write five in Chinese will be like

this. So, Fury of the Five Forces is

your main spender. Whenever you are not

trying to run away, whenever you are not

doing all these animation stuffs,

do Fury of the Five Forces.

And also, another big tip

for you is that ... this is left mouse button

this is right mouse button, I

personally would like to bind it to

dash. For Iron First, it is called

Ninjutsu Dash. So ninjas in Chinese there is a

way to write them, this is ninja ... Ninjutsu.

I am going to share with you some really

good tips here. And you will really love

my channel after you have heard this.

If you have a programmable mouse

like I do, I will actually macro this with

medkit plus dash.

Now why do you do that? Why do

we do that is that in this game

the new direction is that medkit is

king. The new infinity system if they

are still trying to do it the same way 1.1b

or whatever it is called, is that

using medkit shorten your cooldown to your

signature, shorten your cooldown to your

ultimate, add an additional dash, reduce

your incoming damage by 10%

or what not for 5 seconds, buff here buff

there. So medkit is going to be king.

You wouldn't want to lose

the opportunity of not using the medkit

when the medkit is off cooldown. Basically

it is one major power you should use. But then

why should you keep pushing

medkit when you don't need medkit?

So what I do is that I will macro medkit onto

dash so whenever I dash I will use a medkit.

But if medkit is on cooldown, then that is fine.

Next time I dash, I will use a medkit.

That is how I play

this game these days.

So now, this is the main spender.

This is the dash. How to

play this twin style? There are

two stances you should use.

The first one is leopard. To write

leopard in Chinese is like this one.

Looks like a leopard. This is a

leopard. This is a stance. This is

leopard. If you are a little bit mindful

about the defense

system, you could use a dragon.

ow do you write dragon in Chinese? It's

this one here. I hope you can see it.

This is dragon. So now, dragon gives you dodge.

Leopard gives you more DPS.

Both of them will buff the next power I am going to say is the

Seven Armies Sundered. Seven is like this.

This is Seven Armies Sundered. Do that.

You can use dragon if you

want to do harder content

for dodge (buff). Or you can do a leopard.

(Either) way is fine. Next one is Seven Armies Sundered.

The third one - the second stance you can use and that

I recommend to you is a Serpent Fang. How to

write serpent in Chinese ... is this one

here. So that is a serpent. It does look

like a snake I hope you get it.

After that, what the snake will buff is

Black-black Poison Touch, one of my

favorite powers to talk about while I am

playing this game. Black-black poison

touch. This is

serpent. This is black.

And then the signature, usually I'd put

it here like Like Onto Iron.

How to write iron in Chinese ... is like

this. It is Like Onto Iron.

This is signature. Let me just bold it so

you guys can see it. So this is

signature. And last one is Chi Blast.

Also benefited from the Serpent.

Serpent buffs the Black-black Poison Touch as well as Chi

Blast. And then the Leopard or

Dragon to buff the Seven Armies

Sundered. You have to keep these two

stances, these two of them together.

To do that you alternate between the

leopard and the serpent. Leopard and serpent

whenever they are off cooldown. Both of

them will be off cooldown at the same time. Both

of them will be off cooldown at the

same time. But make sure you remember you

do a (leopard) or you do a snake. Take

a look at the buff window. You will get

it sorted. How do you get

this to work? This is the last bit of it.

Oh by the way

as for the talents, imagine there are

three columns

the first one is this one.

Then is this one. Then is this one. Then

is this one. Then is this one. Don't ask. Just do it.

You will be awesome.

This next bit is how do you use this

very awesome kind of rotation in a

kungfu style and tackle hard content?

I am going to run through this

with you here. I am sure you guys are

very smart. Imagine you are Iron

Fist. You are Iron Fist. You

know kungfu. So this is Iron Fist.

and you have Kurse here. The bad guy.

So this is Kurse.

This is the bad guy. And usually Kurse doesn't

come alone, right? He will summon a few of

his elves. Some of them

are nasty. Some of them are not. So what

I will usually do is that I will first

dash in. Ninjutsu dash. By the

way once you dash in, you will use the medkit

already. You are wonderful. You

are awesome. You are already buffed. You go in and

then you do a (Leopard).

Then after that you do a

Seven Armies Sundered.

so one two three four five six seven

You do a Seven Armies Sundered

here. And after that you can do a

Black-black Poison Touch. Although it is not

buffed, that's fine. Just the starting of it. Then

you use the Fury of the

Five Forces to punch punch punch punch punch punch punch punch.

Somehow you will need to dash out and use a

medkit anyhow because it is just the way

it goes. Then after that when

the stances are off cooldown, you do a

snake which is Serpent. Then after that you

can do a Seven Armies Sundered one

two three four five six seven

After that you can do a

Black-black Poison Touch. A lot of poison

here. Then after that you can dash out and be

awesome with the medkit cooldown.

And do a Chi Blast. He does something

like that. This is Iron Fist.

This is

Chi Blast.

Then after that you can go back in

again. Be awesome. Do Unto Iron.

This is Do Unto Iron.

One punch like that, Do Unto Iron.

Then after that everything will be ...

(cameraman stay focus!)

... then everything will be off cooldown

... then everything will be off cooldown

and you can do

all the rotation again and be awesome! So

this is how you do it. This is how you

win the battle. And this my

friend is going to be the new (format)

going forward. I hope you have got a chance to

internalize this.

Do a little bit of

study and I am sure sooner or later

you will know kungfu like I do. So

this is wonderful.

By the way I hope you enjoy this video

and I really

thank you all for watching this

channel for so long. This one is

really a special video for you all.

Big love here from Taipei and thanks

my wife to be the cameraman.

She's ... yeah ... I know ... so anyway

enjoy. See you next time. Bye.

For more infomation >> [Marvel Heroes] Subtitled Pen-and-Paper Iron Fist Guide / BUE to My Channel - Duration: 11:22.

-------------------------------------------

How to make Blue Lagoon Mocktail | Recipe in Hindi by Cooking with Smita | Summer Drink - Duration: 1:44.

Hello friends, Welcome to cooking with Smita

today we will make Blue Lagoon Mocktail, and for that we need...

Citrus Blue Syrup

fresh Lemon juice

Sugar Syrup

Sprite or 7up, Club Soda and Ice Cubes

add Citrus Blue Syrup

add Ice Cubes

add Lemon juice

add Sugar syrup

add Sprite

add Club Soda

gently stir using straw

and serve immediately

if you like my recipe, please hit LIKE button below and SHARE it

and don't forget to SUBSCRIBE my channel

THANK YOU

For more infomation >> How to make Blue Lagoon Mocktail | Recipe in Hindi by Cooking with Smita | Summer Drink - Duration: 1:44.

-------------------------------------------

لعبة كرتون عائلة سيمبسون The Simpsons Hit and Run - Duration: 20:10.

hey I'm endorsing a new kilowatt kids

and this one isn't poisonous to anybody

but we know of new and improved buzz

Cola is made from only the finest sugars

and waters plus it has a special

ingredient too hot for the FDA it'll

give you the get up and go you need to

do all the pathetic self get afternoon

try new improved buzz Cola hmm Cola must

get buzz Cola only somebody ate every

dessert in the house I need you to run

to the store and pick up some of that

ice cream with the miniature ponies in

it there must have been one of our kids

probably Milhouse reckless driving is

like pet Pete

hey

that's the stuff psycho and so it begins

brain likes anything yeah great those

shiny things are called coins whenever

you get enough of those you can get a

cool surprise

wow I love definitely pushing things

like touring like a candy wrapper in an

uptrend nobody knows why these things

have turned up all over Springfield they

always seem to turn up whenever

something exciting happens I don't know

what they are but violence is always an

appropriate response in the face of the

unknown there's some collector cards

hidden all over Springfield find the

other ones and sweet reward is yours for

the taking if you want to take a closer

look at the cards you can see them in

the pause menu and don't get your

stinging fingers on and fatty boom

where to go room are you a man

collecting wrenches fixes your car Wow I

need a disco nap you can go inside

certain buildings by pressing the Y

button why did I agree to do the stupid

tutorial is so boring real bad yeah boo

give me a color and I need another

bucket of ice cream with mini pie what

happened to the ice cream with many pies

your wife bought this morning really

probably ate it I don't remember stuff

too good wait congratulations Homer

mission complete go back home and talk

to mom to start the next mission there

are bunch of these scattered in each

level little surprises are hidden inside

each one be sure to come back again to

see if there's something you missed

[Music]

[Music]

this is the future yet the future yet

[Music]

[Music]

eat my gun

let me Lisa left for school with our

science project can you get it to her oh

do I have to you can drop it off on the

way to work and I have to go to work

it's crushing time

I'll educate you a new one

fire in the hole

[Music]

I didn't do it

we think I broke something

[Music]

Oh

[Music]

Oh

[Music]

I wanted a peanut

oh by bikini zones taping

[Music]

fix that bark did it

I played the dating

[Music]

thanks for bringing me my mom of the

digestive system hey where's the

gallbladder I got hungry and it was a

big it was modeling clay hmm by the way

dad mom called she said she needs to

talk to you at home before you go to

work oh thanks so talented and

good-looking please I'm busy installing

s best is right now

[Music]

if you need to really put the hammer

down and drive you can always enter

these time trial races they crossed a

little to enter but they have a mucho

dinero day off I loved it

how right now

I wish I had a dog with it saddled me

watching

[Music]

[Music]

oh my go talk to Ned Flanders he sings

missed and peeled why me I'm the world's

greatest neighbor I even have a mug to

that effect

come all in a dither Homer so many of my

possessions have disappeared I called

the police to find the culprit hope

pretty my lawnmower my cooler my lawn

chair a family portrait even rats

inhaler what kind of sick individual

would take this stuff oh no I borrow it

all up Flanders stuff quick think of an

excuse to get out of here excuse me I

think I have to go shut some corn oops

we just been having just think that's

wrong

nothing lasts forever

the sessions are bleeding

I am evil homer i am evil homer

listening planets cooler I gave it to

party it was like that when I got here

it could be more

[Music]

pick it up here people you remember that

cooler I gave you for your birthday well

Flanders wants it back now what will I

use for a toilet

hey what's the matter you

Oh

almost done now I need glandor stupid

picture of a stupid man nothing lasts

forever

okay there's one and where did I leave

but to put in here you go on top of the

dump truck

[Music]

returned it stuff before the cups by me

sitting around talking to myself

me don't do way to ignore the speed

limit ladies look I found your missing

stuff know about the reward thanks

neighbor Rooney here's your reward a

prayer from the Lord's number one fan

our Father in heaven bless this noble Oh

stupid Flanders getting happiness from

religion oh that was too easy

[Music]

tell me you're late for work and today's

your workplace evaluation with mr.

Smithers but you'll buy my scorpion farm

then where will my scorpions live only

one person can help me Lenny Steven

springfield penitentiary has been locked

down

Stevie

scared

hello

much never run like heaven hey Alma how

about a breakfast or oh no time tell me

where to find mr. Smithers and I think I

saw him at the kwik-e-mart more

breakfast churros for Lenny I'm gonna

need a car with a little more junk in

the trunk if I'm going to take him out

we wonder if party still has the plow

king

[Music]

cool

oh I forgot my mission Barney can I

borrow the poking take what you watch

sexy leprechaun just don't shoot me with

that dart gun oh whatever

[Music]

[Music]

Oh

Barney can I borrow the plat let's do

this if you ever feel like getting a new

set of wheels and you're not picky just

talk to old Gil he's always done a

couple crap boxes to sell

[Music]

kiss is there really a

so

[Music]

the dates were made stop

look out

[Music]

okay thats alot dude

[Music]

client security is a great game

[Music]

I'm a lean mean be thingy

and

learn to drug get dumb head hey I can

hurt a home just waxed undercoated

that's what you get for expecting me to

do the job for which I obtained

can you come and get me i'll pay you a

backrub

[Music]

coming through

you

For more infomation >> لعبة كرتون عائلة سيمبسون The Simpsons Hit and Run - Duration: 20:10.

-------------------------------------------

Tiết Kiệm Cả Tấn Tiền Cả Năm Lấy Cao Răng Chỉ Với Thứ Nước Rẻ Tiền Này - Duration: 10:43.

For more infomation >> Tiết Kiệm Cả Tấn Tiền Cả Năm Lấy Cao Răng Chỉ Với Thứ Nước Rẻ Tiền Này - Duration: 10:43.

-------------------------------------------

CHUYỆN ẤY LIÊN TIẾP xảy ra khiến tôi RỤNG RỜI vì quá bất ngờ - Duration: 3:52.

For more infomation >> CHUYỆN ẤY LIÊN TIẾP xảy ra khiến tôi RỤNG RỜI vì quá bất ngờ - Duration: 3:52.

-------------------------------------------

Blaze And The Monster Machines Ford Denali - Duration: 1:46.

Modified truck

Không có nhận xét nào:

Đăng nhận xét