Trucks for kids learn trucks construction vehicles.
Đăng ký:
Đăng Nhận xét (Atom)
-------------------------------------------
Gordon And Jack Ramsay Hunt For A Burmese Python | Season 1 Ep. 8 | THE F WORD - Duration: 4:27. For more infomation >> Gordon And Jack Ramsay Hunt For A Burmese Python | Season 1 Ep. 8 | THE F WORD - Duration: 4:27.
 -------------------------------------------
Watch LIVE: The National for July 26, 2017 - Duration: 1:04:29. For more infomation >> Watch LIVE: The National for July 26, 2017 - Duration: 1:04:29.
 -------------------------------------------
Teens fight for TD Garden support for center - Duration: 1:44. For more infomation >> Teens fight for TD Garden support for center - Duration: 1:44.
 -------------------------------------------
From seed to still, Iowa farm family opens craft distillery - Duration: 2:10. For more infomation >> From seed to still, Iowa farm family opens craft distillery - Duration: 2:10.
 -------------------------------------------
Dark Avenger 3 (KR) Gameplay Mobile Action RPG Game - Duration: 14:22. For more infomation >> Dark Avenger 3 (KR) Gameplay Mobile Action RPG Game - Duration: 14:22.
 -------------------------------------------
Family speaks out, starts project to remember toddler after fatal daycare accident - Duration: 0:54. For more infomation >> Family speaks out, starts project to remember toddler after fatal daycare accident - Duration: 0:54.
 -------------------------------------------
Donald Trump Donates $100K To Education Dept. After Cutting $9B | All In | MSNBC - Duration: 2:24. For more infomation >> Donald Trump Donates $100K To Education Dept. After Cutting $9B | All In | MSNBC - Duration: 2:24.
 -------------------------------------------
What If Chelsea Clinton Had That Russia Meeting? | All In | MSNBC - Duration: 5:15. For more infomation >> What If Chelsea Clinton Had That Russia Meeting? | All In | MSNBC - Duration: 5:15.
 -------------------------------------------
What Does Salicylic acid Do For Acne | Salicylic acid as The Best Remedy For Acne - Duration: 4:17. For more infomation >> What Does Salicylic acid Do For Acne | Salicylic acid as The Best Remedy For Acne - Duration: 4:17.
 -------------------------------------------
Motu Patlu and the monkey are inviting customers into the shop [Youtube Channel For Kids] - Duration: 2:37.
Motu Patlu and the monkey are inviting customers into the shop [Youtube Channel For Kids]
-------------------------------------------
This Onion Remedy Helps to Cleanse Your Kidneys - Duration: 3:04.
This Onion Remedy Helps to Cleanse Your Kidneys
Your kidneys are the organs in charge of filtering toxins from your blood via a complex detoxification
process that ends with the expulsion of urine.
Keeping them working well is a determining factor in the health of your entire body since
it keeps your electrolytes and other nutrients balanced, among other tasks.
Home remedy with onions to cleanse your kidneys
Onions have medicinal properties that have been used for centuries to support good renal
health.
They provide purifying, antibiotic, and diuretic powers that strengthen this organ.
Meanwhile, they also creating a protective barrier and keeping free radicals and infectious
agents out.
the main active compound in onions, allicin, gives them a powerful anti-inflammatory and
detoxifying effect.
This helps get your kidneys functioning like they should, especially if there is a buildup
of toxins.
Together with the vitamins and minerals in onions, it helps balance fluids in your body
while keeping your electrolyte levels stable.
How to make this remedy
This homemade treatment for cleansing your kidneys takes advantage of the above-mentioned
qualities of onions.
In addition, it harvests the diuretic effect of parsley and lemon.
Ingredients 2 liters of water
2 raw onions 3 branches of parsley
The juice of 3 lemons Preparation
Pour the two liters of water into a pot and heat.
Meanwhile, peel and cut the onions into a few pieces or slices.
Once the water is boiling, pour it into a jar and add the onion pieces.
Then, add the parsley and lemon juice, and let sit for at least two hours.
After this time, strain the liquid.
How to consume The two liters of onion water should be distributed
into several doses throughout the day, ideally 5 or 6.
Since it has a powerful diuretic effect, you should only use the treatment three days a
week, preferably every other day.
It should be consumed for 1 or 2 weeks, depending on the level of detoxification your kidneys
need.
During this cleanse, you should limit your intake of sodium, including table salt, since
this substance interferes with detoxification processes.
It�s also a good idea to avoid saturated fat and sugar.
These are two things that increase toxins in your body.
Instead, eat more fruit and vegetables, especially those with high water content.
You can also eat legumes, mushrooms, and fish.
Contraindications
Consuming this remedy may cause undesired reactions in people with acid reflux or gastric
irritation.
It is not recommended for people with hypotension, since it tends to lower your blood pressure.
It�s also not indicated for people with hypoglycemia, as it could make your sugar
levels drop.
-------------------------------------------
How NOT To Paint A Telescope - Duration: 15:16.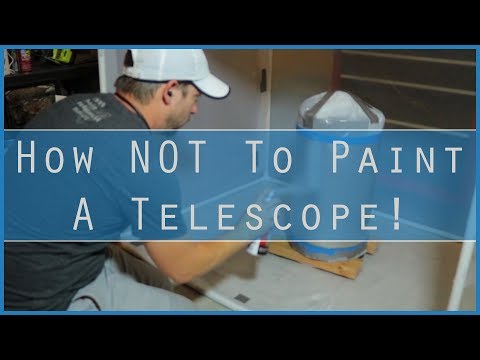
hey YouTube today I want to talk to you
about the LX 50 deforking and
modernization restoration project I've
decided to take on in the last video I
went ahead and deforked my telescope and
said that I was going to put some
dovetails on here in preparing to do the
dovetails I had to remove a set of
screws from the telescope here and here
and some of these screws were so rough
that they had siezed to the tube and I
had to drill them out to avoid getting
filings into the telescope that would
scratch up my optics I had remove the
optics so I went ahead and did that
pulled the screws out with the drill and a
tap and decided since I'm this far let's
go ahead and repaint and flock the
inside so I set out to do the paint job
I stripped all the paint off I primed it
with primer gray hit it with a flat
black because that I'm supposed to use
for this color shifting blue that we
decided to go with and it turned out
looking like shit as you can tell it's
kind of scuffed up it's a little hazy
there's a slight color shift to it and
the biggest annoyance of it all are
these black lines these black lines are
where none of the color shifting paint
stuck to the black primer and the reason
why it wasn't going to stick was even
though I tried to spray at the coldest
part of the day it was still 85 degrees
and the paint dried between the can and
the tube and I had to spray from just a
few inches away to get anything to stick
and that didn't give me a broad coat
uh a broad spray and it was incredibly narrow
so I ended up with these uneven spray
lines and I did my best to minimize them
but as you can see they're still there
and it just doesn't look right so what
I'm going to do is admit defeat I
don't know what I'm doing and I'm going
to take this any get it done
professionally and I'm hoping it's going
to turn out really cool what I did do
however and I
as well is I got a lot of video of how I
went from the original Meade blue to this
point and so what I want to do is show
those of you who are thinking about
taking our project like this but haven't
done it before what it took to get to
this point and I'm sure 90% of you 95%
of you out there have better paint skills
than I do I'm terrible at it
if you can do better paint jobs than I
can then I'm sure that you'll be able to
do a telescope that just looks beautiful
I suck my paint job sucks my telescope
looks like crap so why don't I show you
how I went from the Meade original blue
down to the bare metal and then built it
back up with the primer the black base
coat and in the color shifting paint and
what it took me to get to this stage
first off I needed to remove the paint
from the telescope tube to do this
I used a pretty strong paint remover
what I didn't realize when I was using
this at first is that in direct sunlight
on a black telescope or dark blue
telescope like my Meade is the spirits
inside of the paint stripper actually
boil away which you can see going on
right here now I did my best to kind of
spread it around so it could work at the
time I didn't realize I was kind of
defeating myself the more I spread it
around the faster that the volatile
chemicals inside of the paint thinner
would evaporate and the less time it was
actually effectively able to work and as
I began to try and scour it down through
the paint it just peeled off kind of
like a rubber cement or rubber
would and none of the paint ever
actually came off so after I got wise to
what was happening to the Sun I moved
into my garage and allowed the telescope
to kind of cool down before I tried
again this time I waited and saw that
the paint never actually boiled away so
I was able to spread it around over a
larger area and get it to react with the
paint a little bit unfortunately it was
not very reactive to this kind of paint
and it took an awful lot of scrubbing
just to get a little bit to flake off
but eventually I was able to get down to
some bare metal all in all it's taken me
about an hour just to get to this point
but I was about to have a little bit of
a breakthrough it turns out that this
paint really wasn't paint at all this
telescope had been powder coated and my
paint stripper did soften it up enough
to where I could get under and peel it
off and it peeled away almost like a
latex balloon or heat shrink wrap that
was shrank over the telescope tube so I
set about running paint thinner all over
the telescope tube letting it sit for
about 10 minutes and then peel away what
I could and this went on for about three
hours once I had to paint removed
I needed to fill the original screw
holes leftover from the deforking
process I used automotive body filler to
do this and an index card just to kinda
scrape it smooth with the surface once
filled I then went ahead and grabbed
some 100 grit sandpaper and attempted to
sand down all the remaining specks of
paint that the paint remover could not
get off
there were about a dozen or so spots all
over the tube and some of them were a
bitch to stand down I ended up actually
having to stand them flush with the
metal rather than just sand them off which
is what I was kind of hoping to do the
majority of the spots that I would had
to work on were around the rim now I'm
doing some priming on the optical tube
primer was needed for the paint that I
was going to put on as it was not a
primer and first coat all in one so I
opted for a sandable gray primer that I
could spray all over the tube to kind of
fill in some of the scratches that were
left over for my sanding of the paint
flecks also I was hoping it could kind
of fill in any of the unevenness from
the body filler I put in to the two
screw hole next I needed a better way to
paint putting it on a lazy susan just
wasn't working
I decided I could create a horizontal
roller by using a couple of wheels
screwed into two-by-fours like this I
picked these up at the Home Depot they
were only about 2 bucks each
I used leftover decking screws from when
I built the observatory deck to secure
these to a few spare two-by-fours
leftover also from other construction
projects we've had around the house with
the roller assembly done I was able to
mount the telescope tube to the rollers
and it worked out pretty well once I
actually got the wheels onto the black
metal part and not the piece that I was
trying to paint I could just roll it
around like this and I was able to then
paint left to right instead up and
down after doing a second priming I went
ahead
sanded it down to get rid of any orange
peel in the primer this is it after I
was done sanding for some reason the
video did not record when I was trying
to do the sanding so you can see what it
took it's glossy because it's still wet
from the wet sanding after I had
everything wet sanded and dried I went
ahead and removed the old plastic
masking that I had taped on it was
beginning to peel away from all the
moisture that was in there
and it was becoming a problem and I was
afraid that's a black paint and the
color shift paint would eventually get
into the places I didn't want it to so I
swapped out the old masking for some new
masking after the old masking was
removed I put on a pair of latex gloves
and wash them off to make sure there
wasn't any oil on them and then I went
ahead and used a few drops of dish soap
and warm soapy water to spray down the
optical tube and get any remaining dust
and finger oils left over from the
previous sanding I didn't want any of
this stuff to contaminate the black
paint job that I was about to put on
once I wiped it down with a towel to
kind of dry off any of the soapy water I
then hit it with just regular hose tap
water to get any remaining soapy residue
off the tube again I didn't want to need
that soapy residue to interfere with the
next color of black just to make sure it
dried fast and not to allow any moisture
to soak into the primer I went ahead and
towled it off with a few shop towels just
to make sure that the moisture would
stay on there then I moved it out to an
area where I can get a little bit better
visibility my garage was a little dark
and opted for the deck of my observatory
to re mask the optical tube now it was
about 9:30 or 10 o'clock in the morning
and it was already hot you can see sweat
dripping down my arm from in type to
those latex gloves there's also a bit
windy although on a hot Texas summer day
the wind is more like a hair dryer it
doesn't really do anything to make it
more comfortable it's a major hindrance
and it kept blowing this new masking
paper I was trying out everywhere and it
was a real bitch to get taped to the
optical tube but eventually I was able
to get a grip with the new tape and
secure it to the optical tube and tape
around this frog tape I have it
actually does not stick very well to the
Scotch blue painters tape nor does it
want to tear very easily if you're doing
this with latex gloves like I am doing
and you're already using some other form
of painters tape stick with whatever
painters tape you've got don't try this
frog tape it doesn't like it so what the
back of the optical tube assembly taped
up it's time to tape the front of the
tube and this time I got a little wise
and decided to just roll the tube along
the deck and allow the wind to maybe
push the paper into the telescope
instead of trying to blow it off of the
telescope this seemed to work a little
bit better
it took me about 20 minutes to tape the
top of the telescope tube this part only
took me about five minutes to do with
the masking all taped off I went ahead
and got the new black base coat applied
I was using a color shift paint from
rust-oleum and the color shift paint from
rust-oleum requires that I use a black
base coat I opted to go with a
semi-gloss based codes hoping that the
semi-gloss would allow for a better
color shift the rust-oleum did say that
I could just use black primer which is
it really gloss at all but I figured if
it's going to shine through to the black
and then be reflected off of that
a semi-gloss would give a more dramatic
effect I applied probably two or three
coats of the black paint it's kind of
hard to tell exactly how many coats I
put on because I would rotate the
telescope around sometimes two or three
times during a single coat and I was
going so light I don't know if it
actually counted as the single coat or
maybe two coats in one application
however for this last application I was
going for a little bit more of the gloss
coat and so I did spray it on a little
thicker and I took my time applying it
making it a little more wet and I
sprayed it on and I do think that this
really did help give it a good black
color with this final coat of black
paint added I then allowed it to dry
overnight and then I quickly sanded it
down just to remove any of the dry
overspray that had cured to the tube
biggest problem I had when applying the
color shift paint with how fast it dried
I was running into a few compounding
issues one was the paint would dry so
fast it wouldn't actually even adhere to
the telescope it would dry in midair the
second problem was that dry overspray
would land back on the tube as I was
spraying and get caught in anything that
was still wet the result was a milky
appearance of anything that did stick
and dried to the tube and I do believe
that this was a contributing factor
among my own stupidity and mistakes that
led to the black stripes being all over
the telescope also the white milky
looking appearance was the result of
tiny air bubbles trapped in the paint
and it dried I did my best to stand them
out and clean the tube up the best I
could
the reason the telescope looks so shiny
and actually has that purple color shift
here is because I had already been
sanding it for about three hours
it started at 320 grit sandpaper and
sanded for about an hour or two and then
eventually worked my way to 400 and
ultimately 600 grit sandpaper trying to
smooth this out eventually I had had
enough
and decided to call this telescope
project a lost cause with the help of a
local powder coater I'm going to be able
to get the color shift that I want by
using professional help I hope you have
enjoyed my little journey and if you've
liked what I've done here or any of the
other videos I've done please go ahead
and subscribe to my channel and give
this video a like as always clear skies
and keep looking up
-------------------------------------------
BREAKING: Sessions Makes Epic Move to Obliterate "Sanctuary Cities" – | Top Stories Today - Duration: 3:24.
The Trump administration is moving along with its agenda of making America safe again by
finally curbing the rampant illegal immigration encouraged by Democrats and Republicans over
the last 30 years.
Trump's Attorney General Jeff Sessions has taken a powerful move against sanctuary cities.
As promised by Trump, the DoJ is cutting funds to sanctuary cities, CBS News reports.
If they don't cooperate with ICE, they get no cash.
AMAZING!
This monumental move is just what America needs to restore the rule-of-law.
For far too long, sanctuary cities have faced no consequences for subverting federal immigration
law and simultaneously putting innocent Americans in danger.
AG Sessions' move stops sanctuary cities from getting funds through the Edward Byrne
Memorial Justice Assistance Grant Programs, an important source of money for local crime-fighting
efforts.
Sessions has made it clear that cities that refuse to comply with federal immigration
officials will not receive a cent of funding from this program.
After all, if they were really interested in stopping crime, they would help ICE go
after criminal aliens.
Leftist sanctuary cities already have the highest crime rates in the country.
Maybe when they see their crime rates increase even more, they'll reconsider their decision
not to work with immigration officers.
Our Attorney General isn't holding back: "So-called 'sanctuary' policies make
all of us less safe because they intentionally undermine our laws and protect illegal aliens
who have committed crimes."
Sessions also made it clear that everyone suffers under illegal immigration: "These
policies also encourage illegal immigration and even human trafficking by perpetuating
the lie that in certain cities, illegal aliens can live outside the law.
This can have tragic consequences, like the 10 deaths we saw in San Antonio this weekend."
He was referring to an incident in San Antonio, Texas, in which ten illegal immigrants were
found dead in a parked trailer at a Walmart.
About 20 other illegal aliens in the trailer were rushed to the hospital because of complications
from heat stroke.
As Texas' Lt. Governor pointed out, this tragedy was directly caused by sanctuary cities,
Breitbart reported.
People are enticed by sanctuary cities, thinking they can live above the law once they arrive
in one.
The criminals–the cartels, the drug dealers, the human traffickers–believe this, too.
The crime from across the border must be stopped.
That's why Sessions is taking a stand.
He's clarifying what cities must do if they expect federal funding.
"From now on, the Department will only provide Byrne JAG grants to cities and states that
comply with federal law, allow federal immigration access to detention facilities, and provide
48 hours notice before they release an illegal alien wanted by federal authorities," Sessions
said.
Fantastic!
Now ICE will be able to deport the criminals right out of jail.
No more catch and release.
Thank goodness for the tag-team duo of Trump and Sessions.
Our border and laws are respected once more!
Do you think Jeff Sessions is doing a good job?
Please Share this news and Scroll down to comment below!
-------------------------------------------
Charlize Theron habló de su papel en la película Atomic Blonde | Suelta La Sopa | Entretenimiento - Duration: 3:15. For more infomation >> Charlize Theron habló de su papel en la película Atomic Blonde | Suelta La Sopa | Entretenimiento - Duration: 3:15.
 -------------------------------------------
Learning Color Motu Patlu and Paint Bucket, Motu Patlu in Hindi Video For Kids - Duration: 2:27.
Learning Color Motu Patlu and Paint Bucket, Motu Patlu in Hindi Video For Kids
-------------------------------------------
Xe máy Yamaha bất ngờ giảm giá đồng loạt tại Việt Nam - Duration: 10:55. For more infomation >> Xe máy Yamaha bất ngờ giảm giá đồng loạt tại Việt Nam - Duration: 10:55.
 -------------------------------------------
youtube功能1覽表~影片編輯器換地方找 - Duration: 2:06. For more infomation >> youtube功能1覽表~影片編輯器換地方找 - Duration: 2:06.
 -------------------------------------------
♔Fun Baby Care & Pet Care - Lily & Kitty Baby Doll House Kids Games Clean up Bath | Games For Kids - Duration: 10:58.
-------------------------------------------
♔Fun Baby Animal Care - Pony Sisters Baby Horse Care Kids Games Change Diapers | Games For Kids - Duration: 7:02.
If you'd like an alternative to randomly picking up girls and trying to figure out the right thing to say...
Trả lờiXóaIf you'd rather have women chase YOU, instead of spending your nights prowling around in filthy pubs and restaurants...
Then I encourage you to view this short video to unveil a shocking secret that can literally get you your personal harem of sexy women just 24 hours from now:
FACEBOOK SEDUCTION SYSTEM!!!