Thanks for watching
Hope you have a great time
Please, like, comment and subscribe for more!!
-------------------------------------------
How to destroy the Jumbo❓ / War Thunder - Duration: 5:51.
Fighting this tank is a nightmare for many tankers.
An almost invulnerable hulk of a tank with a quick-firing 75mm gun.
A real pubstomper at its BR.
Its name is... the Jumbo.
Are you afraid?
You should be.
This beefed up Sherman sits comfortably at the BR of 4.7.
What can we say?
If an owner of a Jumbo knows what he or she's doing, it can be a tough opponent even for a Tiger!
But today we will bring it down...using this humble tank.
Moreover, our advice will help you to prevail on virtually any kind of vehicle
that can actually meet the Jumbo in battle.
The very first thing you need to know is that even though the average armour of the Jumbo is around 137 mm thick
in combat conditions and while angling
it can easily get up to between 150 and 165 mm.
Basically, the front side of the Jumbo is mostly impervious to damage
but you don't actually have to penetrate any armour at this point.
What you need to do is to destroy the opponent's gun barrel.
The Jumbo doesn't have the fastest turret traverse speed; make use of the fact!
It will take your enemy some considerable time to both aim his or her gun at you
and move the gun away.
Got the enemy's gun barrel? Perfect.
Half of your job is done.
Now make sure that the Jumbo won't get away.
Blast the tracks off and that's it, the enemy is basically in the palm of your hand.
Yeah, keep firing those little machine guns, you do you!
It is a little early to pat yourself on the back, though.
The sad reality is that many of your opponents will have a high Repair skill,
so don't hesitate to deliver a final blow!
You have a few different options.
Take a gander at this part of the tank. That's their ammo rack.
Don't shoot at it. Why?
It's not an easy shot, and you can't be sure that it will actually blow up.
That's why a better option is to just shoot at your enemy's side, somewhere in the middle.
Yes, this way it might take more than a single hit to take care of the Jumbo
but you are very likely to eliminate two or three enemy crewmembers,
which means that the opponent won't be able to move or to shoot for a longer period of time.
Here's another idea.
People who own Jumbo often go to great pains to hide their lower front plate.
There is a reason they do that.
Yes, its armour is still mostly just as thick as the one of the glacis
but take a look at these high spots.
Here its armour is only 130 to 140 mm thick depending on the angle
Which is quite penetrable with a lot of guns at this BR!
What you shouldn't do is to shoot at the mantlet or the turret itself.
180 mm of armour on the mantlet and the effective thickness of 250 mm are no joke!
If you are ready to risk it or simply have only one shot left
try to hit the spot right under the enemy's mantlet.
If you do everything right, there is a chance that your shell will rickochet right into the layer of armour that is only 20mm thick
and pierce the opponent's roof.
Yeah, the higher the caliber, the easier it is to pull this off.
Method number four.
If you resorted to CQC, try to land a shot in the spot between the machine-gun nest and the upper front plate.
It's certainly not the easiest of shots... but the reward is worth the effort
another enemy blown to smithereens!
Now a few words about the times when you have to fight a Jumbo...on another Jumbo.
The French have it, and it isn't rare to see Americans fighting the French in War Thunder.
so what should you do?
Well, look no further than our advice No 1
try to destroy the opponent's gun barrel.
Whoever manages to do it first, is very likely to win the engagement.
After that, prioritize enemy tracks...and reposition yourself so that you can shoot at the opponent's side.
At that point you know what to do.
Finish him!
Just don't get caught in the moment, be aware of your surroundings.
This Jumbo might have friends after all.
Is there anything that we missed?
Do tell us in the comments below!
-------------------------------------------
Kendrick Lamar Makes History as the First Rapper to Win a Pulitzer - Duration: 1:28.
What's up, guys?
Frazier here for Complex News.
Kendrick Lamar has made history.
The Compton rapper has won a Pulitzer Prize in Music for his 2017 album Damn.
It's the first time a non-jazz or non-classical album has won the prestigious award in its
decades-long history, better late than never, I suppose.
Pulitzer Prize administrator Dana Canedy, while announcing the winner of the award,
called the critically acclaimed album:
"a virtuosic song collection unified by its vernacular authenticity and rhythmic dynamism
that offers affecting vignettes capturing the complexity of modern African-American
life."
So, how'd it all come about?
Well, Canedy, who took the position of Pulitzer Prize administrator over just last year, talked
to Billboard about what went down behind the scenes with the Pulitzer jury and how Kendrick
nabbed the award.
"In this case, I don't know specifically what the piece was, but in this case they were
considering a piece of music they felt had hip-hop influences and said, 'Well if we're
considering a piece of music that has hip-hop influences, why aren't we considering hip-hop?'
And someone said, 'That's exactly what we should do' And then someone said, 'We should
be considering Kendrick Lamar' and the group said 'absolutely.'
So then, right then, they decided to listen to the entire album and decided 'This is it.'"
The Pulitzer Prize for Music isn't the only award Kendrick's Damn has won.
It also received a Grammy for Best Rap Album, as well as multiple other awards.
It'll be interesting to see if another artist making non-classical or non-jazz music will
be able to grab the award next year.
That's the news for now, but for all the latest news on Kendrick Lamar, subscribe to
Complex News on YouTube.
For Complex News, I'm Frazier.
-------------------------------------------
Continuous integration and deployment using Azure Data Factory | Azure Friday - Duration: 9:11.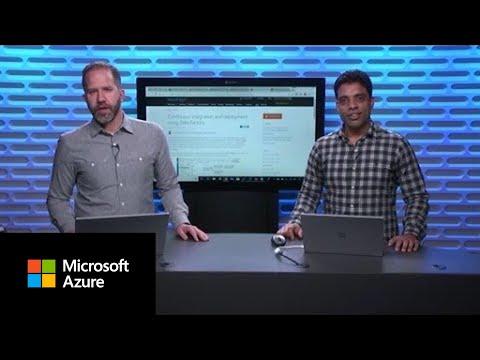
>> Hey friends it's another episode of Azure Friday.
I'm here with Rob, and he's talking to
me about Azure Data Factory and
some of the news stuff around
Continous Integration and Deployment.
>> Yes. So with Data Factory now,
we have added support for customers
to do Continuous Integration and Deployment
and do the industry leading practices to essentially
achieve their goal of moving their pipelines,
data sets, link services from one environment to another.
So generally, how it works for our customers
is that they have a Dev Data Factory,
they have a Test Data Factory,
they have a Prod Data Factory.
And developers are essentially
developing in their Dev Data Factory and
once they are done with development they want to automate
the process of moving from one environment to the other.
So with this integration that we
have done with Data Factory, with ARM templates,
and integration with VSTS Git you
can automate this entire process and do it.
>> Has this traditionally
been done in a fairly manual way?
>> Yes. This has always been manual.
Our customers would write
their custom scripts to achieve this process.
>> And no disrespect to data scientists or the community,
but is there the same process rigor
that we have in
the software engineering community in
the sense of checking my code,
I run my unit tests,
I do it in dev, I do it in test, I do it in staging.
There is a standard pipeline
for Continuous Integration and Deployment.
Does that exist in this community?
>> Actually no, and this is what
we are trying to do and we're trying to
automate that process into
end so that once they essentially
check-in in their dev environment
and they are comfortable in their test pass,
they can define their releases to
dig their code from one environment to another.
>> Sounds like a lot of what I call the administrivia.
>> Yes.
>> It is removed from you and put into this pipeline.
>> Yes.
>> So you're already creating
a data pipeline and we saw
how to do that with data bricks.
You're also now creating an operations pipeline
for the larger environment.
>> Yes, exactly. So we're allowing them to operationalize
their pipelines across environments
and how they can automate that process into it.
>> Cool. You have a demo.
>> Absolutely. So Data Factory Visual Tools are live
now and you can essentially
create your Data Factory
and click "Author and Monitor" tab.
Once you click your "Author and Monitor" tab and go to
your "Author" tab in your Visual Experience,
you can see your pipelines and we have
this new ability for you to
export your Data Factory as ARM template.
So you can click this button and
export your entire factory,
and this includes all the assets for your pipelines,
all assets for your data factory,
the pipelines and data sets,
the link services, their integration runtime,
the triggers, all exported as ARM template.
So once you export that as an ARM template,
we generate two files for you.
We generate the actual template
and we generate a parameters file.
So this template would be seen
across all environments and
you will have one parameter file for each environment.
So your dev environment,
your test environment and all these parameters
file contains is your connection strings,
your secrets, and all of that information.
So you can essentially now pick
this template and deploy it to
your UAT Data Factory and to
your Prod Data Factory and only thing
that you have to change is the configuration file.
So, you can again create processes to do it.
But what we've also done is that with
our Visual VSTS Git integration
we have defined a process on
how you can automate this end to end.
So right now I am in what we call S3 Data Factory Mode.
So if I do anything,
it goes and publishes
directly to my data factory servers.
But I can hook up a VSTS Git repo with my data factory,
so I can select the VSTS Git.
It automatically loads the tenants that I have access to,
I can select my Microsoft Tenant,
I can select the accounts that I have access to,
so I'm going to just pick out my account and it
automatically loads the projects
that are existing in your VSTS Git account.
So I'm going to select my Data Factory project and I can
create a new Git repo or I can use an existing one.
So in this case, I'm going to use
an existing one that exists and,
again, it is going to ask you that
which branch do you want to use for collaboration.
Most of the customers use Master as
the collaboration branch but it is totally
up to you if you want to use another branch.
And then you'll define your root folder and you check
this box to say that whatever
data exists in my data factory,
I want to import it to my VSTS Git account as well.
And all of these assets will be imported
as JSONs in your VSTS Git account.
>> That was my next question.
So, what we're putting into Git,
just to be clear if there's
any confusion for people who are watching,
it's the textual representation of the factory.
It's not certainly terabytes of data,
it's the description of the factory,
not the contents of the data.
>> Yes, it's the metadata. As we call it.
>> The metadata. Exactly. Just for people who aren't
familiar, the ARM templates,
or Azure Resource Manager,
is that ability to basically now I can say,
"File", "New My Data Factory".
>> Yes, exactly.
>> And dev and test and staging prod.
>> Yes, and we actually link you from this UX as well.
So you saw that I exported as an ARM template,
and you can click this import
ARM template link and all we are
doing is we are redirecting you to Azure Portal,
where you can import your template.
So you can select that exported template,
provide your configurations,
and just import that data factory
into whichever environment you want to do that. Right so.
>> When changes happen to the template in source control,
does that kick off a process and
then validate and rerun the factory?
>> Yes. So, right now when I
hooked up the VSTS Git account you can see that
a branch was created just now and in this branch all
your data sets integration runtime are defined as JSON.
So it's the text representation
of your entire Data Factory.
Now, what you can do while here is that you can define
or release and I've actually a
good visual for you to show this.
So you have your working branches in Git and
this generally we call that as feature branches.
You create your pull request
and push the stuff to master.
And once you're there in the master you
publish to your Dev Data Factory and,
once you publish to your Dev Data Factory,
we actually create ADF
publish branch in your VSTS Git report.
And once that happens,
you have defined a VSTS release
which has a trigger defined in it,
and the moment the ADF publish branch gets generated,
the trigger files and automatically takes
your entire text representation,
which is the JSONs for your pipeline triggers,
and take it from one environment to another.
So you can take it from dev to UAT,
from UAT to prod.
So that entire process can be automated by
defining VSTS release for it.
>> So you haven't just simply turned on Git integration,
you're actually coming with a
formalized process here almost
to Git flow specific to Azure Data Factory.
>> Yes and we have actually defined
this process end to end in our documentation.
We even wrote an Azure Blog for it.
So it's all published
today for our customers to take a look at.
We have the documentation,
we have the blog published,
which is listed step by step on how you can define
these releases and automate
this process end to end as well.
>> And would you recommend that anyone who is
an Azure Data Factory customer
today should definitely explore doing this?
>> Yes. Absolutely right.
Because Continuous Integration and
Deployment is part of
any enterprise scenario that you would look.
So, every customer has
different environments and they want to
do it for the purpose of source control,
for the purpose of access grant,
making sure that only certain people have
access to certain environments and it's
a very common practice to do
continuous integration and deployment
across their data pipelines.
>> So then people who are watching right
now who have a data factory, they can do this today?
>> Yes. They can absolutely do this today.
As I mentioned, the documentation is live.
The blog post is there in Azure Blog.
You can search for continuous integration and
deployment using Data Factory,
it will take you to this blog
and you can read all about it.
>> All right, fantastic.
I am learning all about
how to make continuous integration and
deployment a reality with
my Azure Data Factory here on Azure Friday.
-------------------------------------------
Des Linden, First US Woman To Win Boston Marathon Since 1985, Talks To TODAY | TODAY - Duration: 4:51. For more infomation >> Des Linden, First US Woman To Win Boston Marathon Since 1985, Talks To TODAY | TODAY - Duration: 4:51.
 -------------------------------------------
Lynda Carter, TV's Wonder Woman, To Megyn Kelly: 'You Kicked Ass' | Megyn Kelly TODAY - Duration: 17:56. For more infomation >> Lynda Carter, TV's Wonder Woman, To Megyn Kelly: 'You Kicked Ass' | Megyn Kelly TODAY - Duration: 17:56.
 -------------------------------------------
Jeep Wrangler Rigid Industries 20" Radiance LED Light Bar (1987-2018 YJ, TJ & JK) Review & Install - Duration: 6:22.
I'm Ryan from extremeterrain.com and this is my review and installation of the Rigid
Industries Radiance 20-inch LED Light Bar with backlight, fitting all 1987 and up Wranglers.
I'm gonna give installation of this light bar a two out of three wrenches.
This light bar is for those of you who want to run a 20-inch LED light bar on your Jeep
for auxiliary lighting, but also want something a little bit special.
This isn't just a forward-facing, projecting, white LED light bar like most of the others
on the market.
This has a backlight system built into it.
So, when you don't have those forward-facing, white LEDs on, this will still produce a glow.
The one I have in front of me is blue but this is also available in red, green, white,
and amber.
Even the Rigid Industries insignia on either side of the bar will glow in that same backlight
color.
So, as you can tell, this is going to be much more showy than your traditional light bar
and that sort of makes it a divisive mod.
Some people look at this and they say, "You don't need that.
That's not functional.
It's a little bit racy," and they don't like it for a Jeep.
But there's a whole bunch of you out there that are doing a build where this would fit
really well.
If you're doing a color-themed build, having a backlight might be a really nice feature
for you.
Now, this does throw a lot less light than, say, a Rigid Industries E-Series light bar,
although this is also a lot less expensive than those.
So, with this, you get more of a visual impact when that backlight is on, but you're not
going to get quite as much forward-facing light production as one of the more expensive
bars.
So it really comes down to what you're looking for on your build.
As far as construction goes, this housing is exactly the same as those E-Series lights.
This is going to be an aluminum finned housing with a black powder coat finish, a polycarbonate
lens, but once you get past the housing, everything else is completely different.
Those E-Series bars have two rows of high-producing LED lights that throw a ton of light.
You can get them in a couple of different beam patterns.
And if you get a combination beam, you have a flood pattern on the outside and a spot
pattern on the inside.
This has one row of smaller LEDs in the center.
And while it is still considered a combination beam, it does not have it broken up into flood
and spot.
Each one of the reflectors behind each one of the LEDs is designed to give sort of a
dual pattern.
So, you do get a spot with a little bit of diffusion around the outside, but it's not
as pronounced of a pattern as that E-Series light.
As I said, this is more about what it looks like on the Jeep than producing a ton of light
output.
Now, because this does have the forward-facing light and the backlight, this has a three-wire
pigtail built into it.
So you have a common ground and then you have a positive for either your forward-facing
lights or your backlights.
And you can have them both on at the same time but you don't really see a lot of the
backlight when the forward-facing lights are on.
So that does make the wiring of this light a little bit more difficult.
Most of your traditional wiring harnesses that you would purchase don't have the ability
to run a three-wire light like this.
However, Rigid does have one specifically built for the Radiance series light.
So you can always pick one of those up if you wanna make wiring this a little bit easier,
or of course, build a custom harness however you'd like.
As I said before, I'm gonna give installation of this light bar a two out of three wrenches.
Now, the nice thing about a 20-inch light bar is that there are some bolt-on mounts
available that won't require you to drill into the Jeep.
In fact, one of my favorite spots to put a light bar on a JK is right in front of the
grill, and there are a few mounts for that.
So, if you're using one of those mounts, the installation of the bar itself is no-drill
and very easy.
If you decide not to use one of the mounts anywhere you're willing to drill a couple
of holes, you can mount this light bar, whether it be on the back of the Jeep, the front,
your bumper, bumper hoop, or even a roof rack.
Now, once you get the light bar itself mounted, that's where things get just a little bit
more difficult if you're not comfortable automotive wiring.
As I mentioned before, this is a three-wire harness, so you will have to either build
a harness capable of running both of the lights that are built into this light bar, the backlight
and the projecting light, or purchase one specifically for a three-wire light like this
one.
As far as tools go to get this mounted up, you'll just need your traditional hand tools
unless, of course, you are drilling holes to get this mounted, in which case, of course,
you're going to need a drill, and you'll need your wiring tools unless you plan on purchasing
a wiring harness that is specifically built for a three-wire light like this one.
I would give yourself around an hour to get this bolted up.
And wiring this could take a varying amount of time, depending on if you're using a pre-built
harness or not, and how comfortable you are with automotive wiring.
There are LED light bars all over the spectrum as far as pricing goes.
And Rigid Industries is known for making some of the highest quality light bars that produce
a ton of light all at a very high price.
But Rigid will come right out and tell you that the Radiance series is more of a budget-friendly
series.
This is not going to produce the same light output as, say, an E-Series light, but it
does have the additional feature of having the backlight.
So this is really for a different crowd than those who are buying those top-quality, max
light output lights.
This is for somebody who wants it to look cool on their Jeep by having the backlight
lit up when they're at a show or when the Jeep is parked, but not somebody who's going
out on the trail and wants the maximum amount of light output.
However, this also saves you a ton of money versus those lights that do have more light
output.
So, again, it's really for two different crowds.
So, that's my review of the Rigid Industries Radiance 20-inch LED Light Bar with backlight,
fitting all 1987 and up Wranglers, that you can find right here at extremeterrain.com.
-------------------------------------------
Web Demystified #1 - HTML - Duration: 7:16.
Hello! Welcome to a new episode of Web Demystified.
I'm Jeremie and today we're gonna talk about HTML
HT... What?
Basically HTML is a descriptive language that allows us to tell a web browser how to handle text content.
It doesn't make any sense, does it?
Nope!
Okay, we'd better get into some details.
HTML is the oldest language of the web.
Even though it took a few years to be formally defined,
the very first web page created by Tim Berners Lee was already using a proto HTML.
and if you're curious about it that page is still online
If you are interested in the history of HTML, Wikipedia is definitely your friend.
Here, we're gonna focus on the technical side of things.
HTML is an acronym standing for HyperText Markup Language
It is quite self-descriptive but that requires a little explanation.
Let's start with that markup language thing.
It just means HTML provides a system to annotate some plain text with tags.
Those tags add semantic value to any text that will be used by browser to understand how to handle that text.
Yeah, yeah, fine. How does it look?
An HTML tag is a small string of text made up of a pair of angle brackets
surrounding its name
on which you can specify further related information using attributes.
By surrounding some text with an open tag and a closing tag
you are creating what we call an HTML element.
And we've created a paragraph!
[hissing cat]
Once you have created HTML elements you just have to nest them in order to create an HTML document.
Here is the basic structure of such a document
Hey, slow down!
Where are all those tags coming from?
and what the heck is that DOCTYPE thing at the top?
All very good questions.
First, a quick word about that DOCTYPE line.
That line is a hint that tells web browsers that your HTML document is a fully-fledged modern HTML document.
If you omit it
browsers will considered your document like all those documents that have been created in the early days of the web
before HTML was standardized.
For backwards compatibility with those old documents they have a special display mode called:
"The Quirks mode"
This display mode is... well... quirky!
To make it short every browser has a different quirks mode for historical reasons.
Meaning you can face different behaviors from one browser to the other…
yes, more than usual.
So unless you are looking for trouble
or know exactly what you doing,
you should avoid that display mode.
In clear: just add that DOCTYPE line to your document and don't worry too much about it.
If you are not afraid of headaches, you can read more in here
Okay, let's get more practical: what elements can you use to create your own HTML documents?
HTML follow rules defined by the HTML Specification.
Which is maintain by the World Wide Web Consortium, a.k.a W3C
an organization that would definitely have its own video.
That specification defines all the expected behaviors of an HTML document,
which includes more than a hundred elements with all their associated nesting constraints.
That's a lot!
If you want to explore all those various tags and their individual behavior,
I advise you NOT to get into the HTML specification!
It's long, it's full of boring details...
It's not beginner friendly, It's not even web developer friendly
To be honest, it is not friendly even for the very authors.
It's a highly technical document made for browser makers.
Instead I suggest you take a look at the MDN Web Documentation
it will provide you with a complete, yet easy to understand, documentation of all HTML tags.
As a quick overview, there are tags for many things:
Document sectioning
Document metadata
Block text semantics
Inline text semantics
Images & Multimedia
Embedded content
Scripting
Forms
Data tables
and many more!
Yes, that's a lot but you clearly don't have to remember everything.
I don't!
To be fair, one of the cool things about HTML, it's how resilient it is.
It just means that even if you do make mistakes, it okay. Browsers will do their best to display something no matter what.
So, I would say that at this point you should just fiddle with HTML and have fun with it.
Wow, hold on a second. What about that Hypertext thing you mention earlier?
Yeah! Right.
Hypertext is just a fancy word to say that a HTML document can create a link to another HTML document.
Such link can be simply activated
either by clicking,
by touching
or by using a keyboard
to move to that other document.
That sounds quite ordinary these days
but in 1990, that was kind of revolutionary to be able to move from one document to the next without having to type its address.
To create such links, HTML provides the "a" element
You can use it like this,
and it will be rendered like that.
Note the blue color and the underline which are the default look and feel for links
Now, if you click on it your browser will load the document available at the address provided by the HREF attribute.
And that's all the knowledge you need to know to start understanding HTML.
Okay, let's recap.
HTML is a markup language that allows to structure a text in order to make it understandable by web browsers.
That HTML markup is made of elements formed by tags put around text.
All valid HTML elements and their nesting rules are defined in a specification maintained by the W3C.
Yes, it's that simple!
Frankly, HTML alone is a bit dull. We definitely need something else to make it pretty.
You know what, next up we'll talk about CSS.
Thank you all for watching this video.
if you want to learn more and start fiddling with HTML I highly suggest you have a look at the learn section of MDN
In the meantime, if you enjoyed this episode, do not hesitate to like it and to share it with your friends.
Spreading knowledge will definitely fill up your karma tank.
To continue the discussion feel free to comment down below or join me and my colleagues on Twitter.
And finally… Long live the open web, see you next time!
-------------------------------------------
What to Know About Seat Height with Lowertown Bike Shop - Duration: 1:11.
(bright music)
- Your saddle height is really important
for your knees, and you should have a full extension
of your leg with just a microbend in your knee
on the downstroke if your saddle is in the right place.
You can tell your saddle's in the wrong place
if you start feeling your knees,
or if your hopes are rocking back and forth.
If your hips are rocking, it's too high,
and if you feel your knees, it's too low.
A common myth is that you should be able
to touch the ground with your feet from your saddle.
Generally, if you can touch the ground,
your saddle's probably too low.
So the best way to adjust the saddle
if it's not a quick release is to get an Allen wrench.
The Allen wrench goes into the Allen bolt,
and you can unscrew it.
Generally, a good way to decipher whether or not
the saddle is a good height for yourself
is to put it at the top of your hip bone.
Make sure it's centered with the top bar.
Get on and ride, and make sure you have
the full extension of your leg.
If it's still too low,
you might to adjust it a centimeter or two at a time.
-------------------------------------------
What to Know About Chain Lube with Lowertown Bike Shop - Duration: 1:08.
(whimsical music)
- To lube your chain, you need chain lube
and a rag.
If your chain is squeaky or squealy,
it's definitely time for a lube.
Now, to properly lube your chain,
you need to open your chain lube,
and we're gonna want to put one drop
of lube on each chain link.
You go all the way around every chain link
on your bike.
I also like to do it on the bottom
so it doesn't drip onto the frame.
And once you get each link lubed,
I spin it twice, and then I grab my rag.
I put my rag around the chain and,
very lightly, hold onto it to wipe away any
of the mess.
Usually, when you pull your chain away,
there'll be a lot of grease on your chain.
You don't wanna just lube your links
because if you don't wipe it off,
it'll actually collect more dirt
and debris, and your chain won't last
as long.
You should lube your chain every couple
of weeks to once a month, depending
on how much you ride.
And the more often you lube it
and keep it lubricated, the longer your chain life will go.
-------------------------------------------
El horóscopo de hoy, 17 de abril de 2018, por el astrólogo Mario Vannucci | Un Nuevo Día | Telemundo - Duration: 3:31. For more infomation >> El horóscopo de hoy, 17 de abril de 2018, por el astrólogo Mario Vannucci | Un Nuevo Día | Telemundo - Duration: 3:31.
 -------------------------------------------
Even Death Has An Instagram Account - Duration: 3:24.
Even Death Has An Instagram Account
-------------------------------------------
Ford 9" Rearend and Organization - Racing Tech Tip - RHRSwag.com - Duration: 1:02.
This is Ryan with RHRSwag.com here for a Tech Tip
Color code your 9" gears
How to keep competitors from catching on what gears you have
Tech guys are under cars and other racers try to take a peek
Stay ahead of the curve and color code your gears
All you need is different color spray paints
These are our gears from 500 through 633
Try different color combinations
Have a chart that is clear and makes sense
Make sure you have the proper set of gears too
RHRSwag.com Tech Tips
-------------------------------------------
Julián Gil quiere que Marjorie de Sousa cumpla su palabra | Un Nuevo Día | Telemundo - Duration: 4:02. For more infomation >> Julián Gil quiere que Marjorie de Sousa cumpla su palabra | Un Nuevo Día | Telemundo - Duration: 4:02.
 -------------------------------------------
What to Know About Tire Pressure with Lowertown Bike Shop - Duration: 1:11.
(upbeat music)
- So on the sidewall of your tire,
which is this portion, every tire has a PSI,
which is pounds per square inch.
I always say pump to your max,
because the lower your tires are,
the harder it is to ride it.
We grab our pump.
If your pump does not have a gage,
and you're trying to figure out by hand,
if you can squeeze your tire at all,
it's about half pressure.
So it's supposed to be pretty rock hard.
So this valve is a Schrader valve,
which most cars have.
It's our most standard form of valve.
So we clip our pump head on,
and we pump to our full PSI.
Once we're at full inflation,
put your cap back on, and you're ready to go.
The other form of valve is called Presta.
They hold higher pressure air better,
which is why we're seeing them on more and more bikes,
and to allow in to pump your tires,
you need to unscrew this little cap piece.
When you're done, make sure to screw it shut.
-------------------------------------------
¡Hoy vence el plazo para enviar tu declaración de taxes! | Un Nuevo Día | Telemundo - Duration: 5:06. For more infomation >> ¡Hoy vence el plazo para enviar tu declaración de taxes! | Un Nuevo Día | Telemundo - Duration: 5:06.
 -------------------------------------------
Repeat Copy of How to beginner knit Crochet TURKISH Puff Stitch Hat Inclusive Screens & Cards - Duration: 18:19.
this will be the puff stitch hat I'm using four ply yarn and a size I or 5.5
millimeter crochet hook I'm going to start with a slipknot on my crochet hook
take the tail wrap it over in this direction I have a little loop right
here wrap it over the main strand of my yarn take my hook put it below the
Strand and back up the other side like that and this creates the slipknot make
a chain of 5
and then join this will be how the puff stitch is made I like to make one chain
and then pull it up and then work the puff stitch from there to eliminate any
type of seam wrap the yarn over your hook put it through the center of the
loop wrap the yarn over pull it through wrap the yarn over the hook put it
through the center wrap the yarn over on the back side pull it through wrap the
yarn over the hook put it through the center loop wrap the yarn over pull it
through wrap the yarn over the hook put it through the center loop wrap the yarn
over pull it through there will be a total of nine loops on your hook wrap
the yarn over pull through all nine wrap the yarn over and pull through to secure
at the top that completes the first puff stitch
I like to make one chain and then pull it up
wrap the yarn over your hook put it through the center of the loop
you
wrap the yarn over pull it through
you
wrap the yarn over the hook
put it through the center
you
wrap the yarn over on the back side pull it through
you
wrap the yarn over the hook
put it through the center loop
wrap the yarn over
pull it through
you
wrap the yarn over the hook
put it through the center loop
wrap the yarn over pull it through
there will be a total of nine loops on your hook wrap the yarn over pull
through all nine wrap the yarn over and pull through to secure at the top that
completes the first puff stitch we will work five more puff stitches through
this Center loop
chain one
chain one
we have three more puff stitches wrap the yarn over the hook put it through
the loop wrap the yarn over pull through wrap the yarn over the hook put it
through the loop wrap the yarn over pull through and you can see I'm pulling it
up like this so all loops are even wrap the yarn over the hook put it through
the center loop wrap the yarn over pull it through wrap the yarn over the hook
put the hook through the center loop wrap the yarn over on the back side pull
it through there are nine loops total on the hook wrap the yarn over pull through
all nine loops and then chain to secure now chain one between each puff stitch
we have two more to complete
now we're working on our last puff stitch
after completing all the puff stitches I'm going to work a single crochet in
the top of the first puff stitch and this is to join I want to end in the
center between the first and the last puff stitch just like that that
completes round one now for round two chain one and pull up high work the
first full puff stitch wrap the yarn over the hook put it through the space
wrap the yarn over on the back side pull it through wrap the yarn over the hook
put it through the space wrap the yarn over on the back side pull it through
wrap the yarn over the hook put the hook through the space wrap the yarn over the
hook pull it up wrap the yarn over the hook put it through the space wrap the
yarn over on the back side pull it through wrap the yarn over pull through
all nine loops and then chain there will be increases in each chain one space the
second part of this increase will be worked at the end now chain in this next
space work two puff stitches with a chain one between each puff stitch
pull through all nine loops chain now chain one work one more puff stitch in
the same space
wrap the yarn over pull through all nine loops chain now chain one for the space
there will be two puff stitches worked in each space for a total of twelve on
round two
now chain
now chain
work two more puff stitches in the next chain-1 space
work the second puff stitch
now chain
work two more puff stitches in the next chain-1 space
now chain work one more puff stitch in the same chain one space secured at the
top now chain this is the last increase
chain one
now chain 1 now we're around to the beginning and we need to work our last
stitch in the beginning
now single crochet with the beginning puff stitch to join
there are 12 puff stitches on round 2 now chain 1 pull up work the first full
puff stitch
wrap the yarn over pull through all nine loops chain chain one in the next space
work one puff stitch
now chained in the next space work two puff stitches this will be the increase
on round three there will be a total of 18 puff stitches with a chain one
between each one of them now chain work one more puff stitch in the same space
now chained in the next space work one puff stitch
Chane in the next space work the increase of two puff stitches so every
other space you're working one puff stitch and then two puff stitches for
the increase
in the next space work one puff stitch
continue around to the beginning working two puff stitches for an increase and
then one puff stitch in the next space there will be a total of 18 puff
stitches at the end of round three work the last puff stitch in the same stitch
as the beginning stitch
now work a single crochet in the beginning puff stitch to join there will
be eighteen stitches total round three now we're working on round four chain
one pull the loop up work the first puff stitch
chain one and when we get back around this will be an increase now work one
individual puff stitch in the next chain one wrap the yarn over pull it through a
chain chain one work an individual puff stitch in the next chain one wrap the
yarn over pull it through now chain one in the next space will be an increase we
will be working two puff stitches
wrap the yarn over pull it through secure chain work one more puff stitch
in the same chain one space
continue around with the same sequence of stitches working one puff stitch one
puff stitch then two puff stitches for the increase at the end of round four
work the last stitch in the same space as the first stitch
single crochet with the beginning puff stitch there will be a total of 24 puff
stitches round four there are no more increases so rounds five through ten
will be working one puff stitch in each space around for a total of twenty four
rounds five through ten you can add more rounds or stop with less rounds it's up
to you
and this is the pattern that I've had posted on my crochet blog for a while
but continue around with one puff stitch in each space for the remainder of the
length of the Hat
this is the Hat complete you can continue adding rounds if you would like
to make the Hat longer I'm going to add three rounds of single crochet working
two single crochet in each chain one space around
you
just continue on around to the beginning where you'll join with the beginning
stitch continue on around to the beginning there are two ways to work
this final round you can join or you can use the continual or spiral round
continue for three rounds or your desired length now I finished my band in
a continual round so what I'm going to do is skip the first single crochet in
the next single crochet I'm going to slip stitch to attach and this will even
out the edge you can see right here if I ended it like this I would have an
uneven edge so I need to skip this stitch slip stitch in the next stitch
wrap the yarn over pull it through one more time and I've already cut my yarn
pull it through give it a tug and it evens out the edge this is my puff
stitch hat complete
-------------------------------------------
How to Get Thicker Eyelashes Naturally - Duration: 4:32.
How to Get Thicker Eyelashes Naturally
Do you wish you had thicker eyelashes?
Worried that your eyelashes are not growing enough?
You're not alone.
Many people wish they had thicker eyelashes, to make their eyes more beautiful.
There are many reasons for thin eyelashes, like age, certain medical problems, missing
nutrients, an eye infection, or hormonal changes in the body.
Other reasons are rubbing your eyes roughly and not taking your eye makeup off at the
end of the day, which can lead to the delicate hairs of your lashes falling out.
The first thing to do when you're trying to make your eyelashes healthier is to take
proper care of them.
There are also some simple ways to help your eyelashes grow.
Remember that cures won't work the same for different people.
It may take a few weeks, or a few months, for the cure to work.
Also, you may have to try more than one before you find the cure that is right for you.
Castor Oil Castor oil helps eyelashes grow, and can also
fight bacteria that stop them from growing.
Take a clean brush or cotton swab and put castor oil on your eyelashes before going
to bed.
You can add some vitamin E oil to the castor oil before putting it on.
Leave the oil on overnight, and rinse it off in the morning.
You can also mix two tablespoons of castor oil with two tablespoons of aloe vera gel.
Put it on your eyelashes using a cotton swab.
Leave it on overnight, and rinse it off in the morning.
Try either of these cures every day for two to three months.
Olive Oil Olive oil can nourish your eyelashes, and
make them grow thicker.
It also helps keep the eyelashes dark.
Here's how.
Dip a clean, old mascara stick or cotton swab in warm olive oil.
Before you go to bed, put the oil on your lashes, like you would put on mascara.
Leave the oil on overnight, and rinse it off in the morning with lukewarm water.
Do this every day for a few months, until you're happy with the way your eyelashes
look.
Aloe Vera A great way to grow your eyelashes is using
aloe vera, because it has a lot of vitamins and nutrients.
It will also help keep your eyelashes moist.
Before bed, put fresh aloe vera gel on your eyelashes with a clean mascara stick.
Leave the gel on overnight, and rinse it off in the morning with warm water.
Or Mix together one tablespoon aloe vera gel,
one tablespoon jojoba oil, and one teaspoon of chamomile infusion.
Put this mixture on your eyelashes two times a day with a clean, old mascara stick.
Leave it on for fifteen minutes, and wash it off with warm water.
Follow either cure every day for a few months for it to work.
Note: Make sure to remove latex by washing the aloe vera gel very well before use.
Egg Because eggs have a lot of protein, they are
very good for growing thicker eyelashes.
They also have vitamins that help the feel of your eyelashes.
Beat one egg and one tablespoon glycerin into a thick, creamy mixture.
Put it on your eyelashes using a cotton swab.
Leave it on for fifteen minutes, and then wash it off with cold water.
Do this three times a week for a few months.
Green Tea Green tea has a lot of flavonoids that help
your eyelashes grow thicker and longer.
Make a cup of unsweetened green tea, and let it cool.
Use a cotton tip to put the green tea on your lashes, from the roots to the tips.
Let it sit for fifteen minutes, and wash it out with cool water.
Do this two times a day for two to three months.
Note: Make sure the green tea does not get in your eyes.
Coconut Milk Coconut milk has a lot of protein and fats
that make thicker, longer eyelashes.
It also gives your eyelashes a beautiful shine.
Dip a cotton swab in coconut milk, and put it on your eyelashes.
Let it sit for ten minutes, and wash it off.
Do this one or two times a day for a few months, until you get the look you want.
When trying any of these cures, make sure to be very gentle.
Don't pull out eyelashes when you're putting makeup on, or taking it off.
Make sure to have the right vitamins and nutrients, so your eyelashes can grow nicely.
You can take a multivitamin supplement, but make sure to ask a doctor before you do, to
find out what type and amount.
Don't Forget To Follow Us On Other Social Media :
YouTube : http://bit.ly/2e1vK3L Facebook : http://bit.ly/2kYKuD0
Twitter : http://bit.ly/2ksd98v Pinterest : http://bit.ly/2gh7g9U
Instagram : http://bit.ly/2z2YbZN Daily Motion http://bit.ly/2z389dB
Google Plus : http://bit.ly/2kqyrUa Tumblr : http://bit.ly/2xXbehS
Subscribe our channel for more!
-------------------------------------------
Basic maths for kids addition - learn mathematics easily | Creative Tangrams numbers 1-10 - Duration: 16:59.
Basic maths for kids addition - learn mathematics easily
-------------------------------------------
How to Grind a Tire - Racing Tech Tip - RHRSwag.com - Duration: 1:16.
I'm Ryan with RHRSwag here to show you an overlooked Tech Tip
How to grind a tire
Different discs, different speeds - find out which are best
7" grinding disc and a variable speed grinder
2000-3000 rpm and 80 grit sandpaper works great for us
We are trying to take the top glaze off of the tire
to get to the nice fresh rubber underneath again
This is an IMCA tire so we try to take the sharp edge off
off the crown of the tire for more side bite
RHRSwag Tech Tips
Không có nhận xét nào:
Đăng nhận xét