Chancellor.
We've just received a report from Master Kenobi.
He has engaged General Grievous.
We can only hope that Master Kenobi is up to the challenge.
I should be there with him.
It's upsetting to me to see that the council...
doesn't seem to fully appreciate your talents.
Don't you wonder why they won't make you a Jedi master?
I wish I knew.
More and more I get the feeling that...
I'm being excluded from the council.
I know there are things about the Force that they're not telling me.
They don't trust you, Anakin.
They see your future.
They know your power will be too strong to control.
You must break through the fog of lies the Jedi have created around you.
Let me help you to know the subtleties of the Force.
How do you know the ways of the Force?
My mentor taught me everything about the Force.
Even the nature of the dark side.
You know the dark side?
If one is to understand the great mystery...
one must study all its aspects...
not just the dogmatic narrow view of the Jedi.
If you wish to become a complete and wise leader...
you must embrace a larger view of the Force.
Be careful of the Jedi, Anakin.
Only through me can you achieve a power greater than any Jedi.
Learn to know the dark side of the Force...
and you will be able to save your wife...
from certain death.
What did you say?
Use my knowledge. I beg you.
You're the Sith lord.
I know what's been troubling you. Listen to me.
Don't continue to be a pawn of the Jedi Council.
Ever since I've known you, you've been searching for a life...
greater than that of an ordinary Jedi.
A life of significance...
of conscience.
- Are you going to kill me? - I would certainly like to.
I know you would.
I can feel your anger.
It gives you focus...
makes you stronger.
I'm going to turn you over to the Jedi Council.
Of course. You should.
But you're not sure of their intentions, are you?
I will quickly discover the truth of all this.
You have great wisdom, Anakin.
Know the power of the dark side.
Power to save Padmé.
For more infomation >> Palpatine Reveals Himself | Star Wars Revenge of the Sith (2005) Movie Clip - Duration: 3:49.-------------------------------------------
Mad Maxine Waters Hit with Brutal Dose of Karma Outside Her $4.5 Million Home. - Duration: 2:15.
Mad Maxine Waters Hit with Brutal Dose of Karma Outside Her $4.5 Million Home.
California's loony Democrat Rep. Maxine Waters has been one of President Donald Trump's
most vocal critics.
The Congresswoman constantly calls for 45's impeachment.
This, despite a booming stock market, unemployment currently residing at a 17-year low, and our
enemies fearing us once again.
Liberal logic!
Now, Mad Maxine gets a brutal dose of karma she probably never saw coming.
Here's the scoop…
From KABC:
California Congresswoman Maxine Waters has been calling for the impeachment of President
Trump but now there are those calling for her to be kicked out of office.
Standing outside the congresswoman's home in L.A. are over a dozen protesters, a mariachi
band and Omar Navarro.
He ran against Waters and lost in 2016 but he's getting ready for round two in 2018.
"'Hashtag Impeach Maxine'.
See Maxine is talking about impeaching President Donald Trump and yet she doesn't ask herself
what about her?
What about her not doing her job for 35 years?", asked Navarro.
Members of the black community and Latinos for Trump are out here protesting, calling
for Waters to resign.
HA!
Even Californians want Waters gone.
More on Maxine, per Downtrend:
The Democrats are shattering into pieces right before our eyes and the multiple responses
to President Trump's State of the Union Address is proof that the wheels are coming
off the clown car well before the November midterm elections.
The latest nutcase to give their own response is none other than Rep. Maxine Waters, the
goofy granny with the James Brown hairdo and the one-track mind for the impeachment crazy
train.
Congresswoman Waters will be giving her own response on Black Entertainment Television
BET) so expect it to be saturated with anti-white resentment of which the president is the symbolic
figure.
SHEESH!
What do you think about this?
Please share this news and scroll down to Comment below and don't forget to subscribe
Top Stories Today.
-------------------------------------------
ASUS ZenBook Pro Laptop Review and Benchmarks - Duration: 9:10.
-------------------------------------------
Vitamin D best supplement | 6 Benefits of Taking Vitamin D - Duration: 3:34.
-------------------------------------------
Newly Uncovered FBI Texts Prove Russia Investigation Is a SHAM – Mueller Is Finished!!! - Duration: 4:08.
-------------------------------------------
Kyphosis, or Dowager's Hump, Stretches & Exercises - Duration: 12:52.
Hey everybody it's Doctor Jo, and today I'm going to show you some stretches and
exercises for... is that a video call coming in oh my gosh is JK! hey
JK how you doing? good hi! how's everyone doing? doing great doing great
over here.hey I'm shooting a video and I just want
to know if you can tell us a little bit about your channel. yeah definitely um
well I do a lot of cake decorating, so I decorate a lot of things that I'm
passionate about. so mostly movies comic books, a lot of
Disney stuff, but it's all comes from the heart. yeah. awesome and how can everybody
find your channel? what's the name of it? Oh my channel name is youtube.com slash
koalipops, so koalipops that's what you're looking fo.r okay awesome
excellent. and so I'm guessing that when you're doing all that kind of stuff you
get a lot of aches and pains and some stuff going on tell me a little bit
about that. yeah well there's this thing I'm kind of developed it's like this
hunch/ I think it's called like this chef's hunch because you're always like
over like a table trying to decorate and stuff your body is constantly in this
one sort of position. and that causes a lot of strain when I try to like move up
or like move around I'm so used to just being this way, that it's hard to
maneuver my body, so that it's I can stand up straight and that causes a lot
of problems for me. I could imagine that it does, well I've got some stretches and
exercises they'll hopefully help that out. so let's check it out.
awesome. awesome great.
So that chefs hump that JK gets is very similar to a
dowager's hump, and basically what that is is when your posture starts rolling
that upper back, kyphosis, bending forward rolling forward and if you don't correct
that, over time that can cause a lot of problems. so we're gonna start off with
really just trying to open it up, that chest with some stretches and some
exercises really just to get that opened up. first we're gonna
start off with a scapular squeeze. with the scapular squeezes, or the shoulder
squeezes, what you want to do is imagine that somebody's hand is right on your
spine, right in the middle of your back. and what you want to do is try and take
those shoulder blades and squeeze that imaginary hand back. you can use your
elbows to squeeze but keep them low and close to your body, so it's not squeezing
back this way, you want to squeeze down and back. so your shoulders stay down. so
it's not coming up like this, but it's coming down and squeezing back almost
like I'm trying to touch my elbows back together there as well as a shoulder
blade. so hold it back there try and keep those shoulders down for about three to
five seconds. take a little break and then do that five to ten times, but you
see how my chest is kind of opening up when I do that, so if you're kind of
hunched over, this really helps open back up that chest. so it should feel really
really good. the next one is going to be a chin tuck. with chin tucks they're
really great for helping correct posture in general, so a lot of times if you're
bent over focusing on something working on
something in front of you cooking, baking, your head starts going forward like this,
and then these muscles get over stretched and these get tightened up and
it ends up causing a lot of problems and strain and pressure in your neck and
shoulder area. so a chin tuck not going down this way, but you're gonna go back
this way, and what I like to do is just kind of place my finger on my chin here.
your finger's going to stay in one spot, but it's really just a starting point so
you can see how much motion you have just by doing a couple of chin tucks. so
I like to place it here leave that finger there,
and then keeping yourself level push everything back. so you're gonna go in
like this where you've got you know some double chins right there. just hang out
about three to five seconds, and then when you relax you should have a little
bit of space between your finger, and if you do that shows that those muscles
were tight and your correcting everything. so I'm here and I
pull it back it's opening everything up. so again three to five second hold, just
do five or ten of those and those should really start help opening everything up.
the next one is going to now start getting some motion again in those
shoulder blades, but moving your arms with it just open up everything. so
you're not hunched over so much. so this time you're gonna do a scaption
movement. and what scaption is, is it's not straight out in front of you that's
flexion, right out to the side is abduction, scaption is kind of right in
the middle, and that has to do with that scapula that shoulder blade, and so what
you want to do is thumbs up. you're gonna start with your hands kind of down
and you're gonna go at that 45-degree angle.
not here, not here, but kind of in the middle, and use both arms and just come
up and kind of squeeze them up. so what you want to do while you're coming up
and down is kind of squeeze those shoulder blades a little bit kind of
like you were doing that squeeze, and squeeze and lift up and then come right
back down. so not really a hold here, but it's just turning to track all those
muscles in the right direction, how they're supposed to be versus when
they're over like that. so just start off with about ten or fifteen, you don't have
to go all the way up, that might be a little tight, but just working that
motion a little bit. then the next one is going to be a tee position like the
letter T, not like drinking tea, but arms straight out with your thumbs up.
and this time you're just going to push back behind you a little bit and that
should help open up that chest area. so this is not quite a stretch it's more of
an active movement where you're just kind of warming up those muscles a
little bit to get into the stretches which will do it in just a minute lying
down on the ground. so just kind of pushing those hands back, but opening up
that chest area. so again it really shouldn't be painful, it should feel kind of
good cuz you're opening everything up and stretching it a little bit, so if
it's painful, don't push quite as far. you're still squeezing those shoulder
back, shoulder blades back, you go back, and just do about 10 to 15
of those. so the next ones are going to be on the ground and we'll start off
with a stretch for those PEC muscles. if you happen to have a foam roller the,
this works really really good for stretching those PEC muscles those chest
muscles, and you can do it a couple of different ways. and if you don't have a
foam roller I'll show you how to do it without one in a second, but this works
really good because if you can just kind of sit and lie down on the foam, right
on your spine, make sure you have your head supported so your heads not hanging
off, but just kind of be in this position where it's right on your spine and you
should be able to feel it without having to do any other motions. but then what
you're going to do is bring your hands up kind of into a stop sign position and
just let them hang down like that. and that you should really feel it in those
PEC area those chest muscle areas just like that. and if you want to change the
stretch a little bit you can bring your arms up some and then just let them hang
down. so this one's going to be a stretch where you really want to hold it for
about 30 seconds. so just let it relax let those elbows go down to the floor. if
they don't touch that's okay but hold it for 30 seconds. come up relax and do
three of those. the next one is turning it horizontally so this is going to be a
chest stretch but it's also giving me that upper back stretch as well.
so if you have that hump that kyphosis, this might be really uncomfortable to
start off with it. if you happen to have something like a pool noodle that's
really thin you might want to start off with that. a bigger one might be a little
bit too much, but you can use it just don't feel like you have to go all the
way back with it. so this time you're just going to kind of put your hands
behind your head and your roll it back and get in the position. first put your
hands behind your head and just lean back like this. so you can see that's
really just opening everything up. it's stretching that upper back and again if
you can just relax over it take some deep breaths,
and let yourself stretch so 30 seconds three times. again that might be just a
little bit too much if you have a lot of that hump going on. so now I want to try
something smaller you can even take a beach towel roll out that beach towel
and put it right there, and so you'll just have a little bit but that will
help open up that stretch as well. then to again help with the upper back area
and this one will get into the lower back a little bit as well just to kind
of loosen everything up. is a press up so now you're going to get on your stomach
and it's kind of what it sounds like. start off with your on your elbows, and
just hold the position here you want to try and keep those hips down and if
you're pushing up like that, you're not really stretching the back, so you really
want that that back just to curve downwards that way because again that's
just kind of stretching the spine in a different direction than what you're
hunched over doing. if this is easy and it doesn't really feel like much of a
stretch, then you can go into a little bit of a push-up position. but same thing
try and keep those hips down if they come up, you're not really stretching
that back, so you should be able to relax. if it hurts when you do this come on
back down to the elbows and then just hold that stretch for about thirty
seconds, and then do three of those. so also a couple things to do to help with
all of that is to stretch your hip flexors because if you're hunched over
all the time, those hip flexors become tight and then start pulling on the
pelvis. so you want to stretch out your hip flexors and you want to strengthen
your core. so we'll do those now for hip flexor
stretch. there's a bunch of different ways you can do it but an easy one is
just to get on your knees put one leg forward, and the one you want to stretch
and stay down. the key with this hip flexor stretch is to keep your upper
body straight. people tend to want to like bend forward and stretch like that,
but then I'm still not stretching that hip flexor right there, so keep your
upper body straight, and just shift your whole body forward.
so right here is where you should feel that stretch. so the same thing, with the
stretch hold that for 30 seconds do that three times. so make sure that you're
doing both sides so you can alternate back and forth to get the other side a
little bit of a break, but again keeping that upper body fairly straight and just
shifting everything forward until you feel a stretch in that hip flexor area
and holding it for 30 seconds. then the last exercise is a bird dog exercise
where you get on all fours. and this is really to help the core out and then
those trunk muscles in the back to help keep you nice and stable. so just getting
on all fours, or we call this quadruped, and then you're just going to do an
opposite arm opposite leg kick out. but try and keep your stomach tucked in
tight and your back fairly flat. so if you're arching down that's not good, you
want to keep everything nice and straight and then you're just going to
do a kick this way and then come back down and kick that way. so try not to
wobble really try and use that core to keep yourself stable, and then coming
back down. so just do about 10 on each side, but go slow and steady where you're
making that core work. so those are your stretches and exercises, hopefully
they'll help you out when you are making your cakes and all your awesome videos.
yes definitely um I I kind of need it so all of that is just if you have even
more I love it I love all of it. awesome will do will do. so everybody make sure
you go to JK's channel and subscribe to him and don't forget to subscribe to our
channel ask doctor jo, and remember be safe have fun and I hope you feel better soon. make
sure you check out JK's collab with me. where I went over to his channel
and we asked each other a bunch of fun silly questions playing the matchstick
game. what's the matchstick game? we'll check
it out click on the link up here.
-------------------------------------------
The GunVault SpeedVault SV500 - Review, Installation & Programming - Duration: 17:18.
Hi everyone.
And welcome back!
In today's video, we're going to talk about the GunVault SV-500.
I'm going to show you how to install and program it.
And I'm going to explain to you why it's my favorite gun safe, so stay tuned!
Before I start talking about the gun safe, I just want to introduce myself really quick.
My name is Koby.
And I'm with Silver Eagle Locksmith Las Vegas YouTube Channel.
If you're looking to get your house, your business or your bike more secure—and also,
your gun... so this is the channel for you.
Make sure to click the link, the subscribe button, right below.
And don't forget to take the bell icon so you'll get notified whenever I'm releasing
a new video when I release them.
Okay!
Let's move to the gun safe.
So, I know there are so many things to consider before you go ahead purchasing a gun safe.
Now, I make it really easier for you.
And I gathered all the most important things you should know about this gun safe before
you go ahead and purchase it.
So let's start.
The 1st reason is going to be the online
recommendation and the online reviews about this awesome gun safe.
But don't just take my word for it.
I also share in the link right below the video where you can actually go ahead and read some
of the reviews about this gun safe, and also if you want to purchase it as well.
So, make sure to click the link right below the video, guys, and read some of the reviews
about this gun safe.
Alright!
The 2nd reason why I recommend it, because of my personal experience of course.
I've had it for more than a year right now.
And it seems to work just fine.
When I need quick access to my gun, I have no problem.
And that's why I recommend it of course.
And I also installed it for a couple of my customers.
So far, they're really happy with it.
And that's why I'm making the video—because of my personal experience and as a professional
locksmith, I installed it for a couple of my customers, and they seem very happy with
that as well.
So, the 3rd reason is going to be the tamper indicator.
Yes!
So if someone tried to enter the wrong code, you will be able to find out that someone
attempted to try to open it with the wrong code.
So this is something that's included.
It's really cool.
And I like it.
And I think you're going to like it as well.
The 4th reason is going to be the override backup key.
So in case the battery died, or for some reason, you forgot the code, the manufacturer included
two keys with it.
It does come in a box.
There are 2 override key - 2 small keys of course.
And that's it!
So it does come with 2 keys in case your battery died or you forgot your code to access
the gun.
Now, the 5th reason is going to be the security sleep mode.
What it is, basically, if someone tried to enter 24 or more times incorrect code, it
will actually trigger the security sleep mode.
So for two minutes, the actual keypad will not accept any code.
And that's basically for another security level for the product.
It's really good as well.
The 6th reason is going to be the 3 different mounting options.
There is multiple mounting options for the product which is really, really good.
You can install it next to your bed.
You can actually install it on the wall, some other options of course depending on your
furniture next to your bed and stuff like that.
So that's something that is included as well.
Now, the 7th and most important reason why I love this product, because it's child-resistant.
Yes, it's a child-resistant gun safe.
So if you have curious children in the house, they're also coming to your bedroom and
mess up things, looking for stuff, especially small children, this awesome gun safe will
give you a really good solution for the amount of money you're paying for it.
And it's also giving you a really good security at the same time.
So, that is, in a nutshell, why I recommend this product.
Now let's move to the installation guys.
I'll show you quick how to install it and program it as well.
Stay tuned!
Okay.
So before the installation, what we will have to do is to open the safe.
And right here on the side, there are two screws that we're going to open.
This screw driver is included, by the way.
You can see it right here.
So we're going to open those two screws […]
After removing this part, we can actually see what's going on right here on the pack
on one of the batteries.
So, let's put the battery first.
Okay… there is a LED light here.
It seems to work.
Everything is good.
I'm going to put it back on.
And then we're going to close it.
Great!
So it's good as far as the battery.
Also, there is the learn and mute button.
But we're going to get to that later.
First, we're going to put the mounting plate where we want to install it.
Let's say this is the place we want to install it.
We make sure it's straight as possible.
And we're going to mark the 3 holes.
That's 1…
that's 2… 3… and 4… okay, our 4 holes.
Those ones are the holes that we're going to drill to actually hold the mounting plate.
And these are the small screws that we're going to use, four silver ones.
And we're going to use the power drill on this step.
Now, we're going to use the screws.
We'll start with the first one.
Of course, I also punch some small holes, so I know where to start.
[drilling sound] Okay, we got the first one.
And the second one, we'll do the one at the bottom.
[drilling sound] Okay, we got the two.
It looks pretty straight.
Okay!
So moving now to the third screw… [drilling sound]
It's really easy!
Okay, we'll make it tight with the small screw driver that was also included in the
package.
Okay, looks good!
Now, let's move to put the box.
After we finish with the mounting plate, we're going to move to the actual box itself.
And as you can see here, this side, there are 3 holes.
And that's where you're going to use the three short screws that was provided as well.
I'm also going to show you a picture, a better picture of those screws as well.
And what you're going to do, you're going to put it on the side that you want it to
open, either way.
As I've said, there are three mounting options here.
You can put it like this.
You can put it in that side or the other side, the left or the right side.
For this demonstration, we're going to put it just like this.
Okay!
Now, we're going to tighten the 3 short screws.
I hope you can see it well.
We'll start it with the first one… then the second one… and the last one also.
Okay!
Now, we're going to use our flathead screw driver and tighten those three screws.
And then, the last one…
Alright!
So we're done here.
Before we put the last piece, there is a small stopper that we're going to install as well.
It does have two screws also.
So you put it in just like this and put two screws on the bottom.
You can just tighten the first one and the second one with your finger, and then use
the screw driver, Phillips screw driver.
We're done with this stopper.
It's got a spring.
It's part of it.
Okay, now we're going to put back our actual door.
And we're going to put this plate that we removed.
You can see it here.
I'm just going to put back the screws.
Also, make sure when you're installing the mounting plate, at least a good distance from
the surface, so you'll have enough space, and everything will open properly.
Okay!
It's all done.
Now, we're going to do the programming.
On the bottom, there is the learn button.
We're going to click it for 2 seconds until you hear a beep.
And the green light will remain.
Now, you're going to choose your code.
We're going to do for now 2234.
And then, you press the learn button again for 2 seconds.
When the light remain red, you do the same, 2234.
And then, press the learn button again.
It will be 5 times.
And then we're done.
2234, that's it, guys.
That's all it is!
The installation and the programming is done.
Great!
There is also another button on the right side.
And that's the mute button.
If you want to not hear any sounds when you press the code, you can press the mute button
for 2 seconds.
And now it's silent.
And you can turn it back on by pressing the mute button for 2 seconds.
Okay, that was the mute.
For example, now I enter a wrong code, you press again the number 2 and 3 for five seconds.
And it will come up to the red light.
So you have the red light.
It indicates that someone tried to enter the keypad and put the wrong code.
So that's pretty much what you need to know about the tech feature.
That's pretty much it guys.
Alright, thank you so much for watching.
I hope you did enjoy the video.
And I hope it did give you a good tip about the GunVault SV500.
If you have any questions, just write a comment down below the video.
I'm always willing to answer your questions.
And if you did like the video, don't forget, thumbs up for my video.
Thumbs up!
And also, don't forget to subscribe to my channel in this button below.
And make sure to take the bell icon right after so you will get notified whenever I'm
releasing a new video when I release them.
Thank you so much guys.
And don't forget to check my other videos in my YouTube channel, Silver Eagle Locksmith.
I have awesome videos that you're probably going to enjoy as well.
So make sure to check my other videos in my channel.
We'll see you next time.
Thank you so much.
-------------------------------------------
As Trump Bashes Fake News In Davos, Liberals Stunned By What's Heard From Audience. - Duration: 4:26.
As Trump Bashes Fake News In Davos, Liberals Stunned By What's Heard From Audience.
Despite the fact that things are looking up here in America, our news from the mainstream
media is still fixated on bashing President Donald Trump whenever they can.
Too bad for them, the president most recently used his platform in Davos, Switzerland, during
the World Economic Forum, to bash "fake news" everywhere — and that was about
the time liberals were left stunned by the audience.
The left has made no attempts to conceal their disdain for President Donald Trump.
That's why we're constantly seeing lies and deceit in their reporting as they can't
wait to properly vet information and sources before getting out their next hit piece.
This has resulted in the liberal media taking a major hit to their reputation, credibility,
and their ratings.
Sadly, it seems that not even being humiliated and embarrassed on the world's stage time
and time again is enough to make them change their ways.
Of course, what else do we expect when they live and operate within a bubble, where everyone
else believes the same exact things they do?
Intoxicated by their hate, the left is only doing themselves harm, and what just happened
in Davos, Switzerland, went to prove just that.
President Donald Trump recently traveled to the World Economic Forum, where several other
heads of state and billionaire business owners went to discuss how to "improve the state
of the world."
Given the opportunity to speak, Trump issued a hard-hitting speech that centered primarily
around the idea of "America first."
"I believe in America.
As President of the United States, I will always put America First," he said to the
crowd during his scheduled slot.
"Just like the leaders of other countries should put their country first also.
But, America first does not mean American alone."
While he spoke, Trump's room was packed, leaving others who were slated to speak at
the same time, such as Prime Minister Teresa May, with more empty chairs than full.
However, as The Daily Caller reports, things would take a turn as Trump took part in a
Q&A session where he ripped into the liberal media.
"It wasn't until I became a politician that I realized how nasty, how mean, how vicious,
and how fake the press can be," President Donald Trump said while answering a question.
In the meantime, liberals were quickly left stunned by what they heard from the audience.
As can be heard in the footage, a large portion of the audience let out a series of "boos"
as Trump was responding to the question.
In short, they were showing their support by booing the mainstream media in the back
of the room at the time.
Just like that, it was made abundantly clear what people really think of the press versus
President Trump.
The liberal media would have you believe that President Donald Trump is hated by nearly
everyone.
Unfortunately, it looks like they're even dumb enough to not understand that enough
people support President Donald Trump to get him elected.
Regardless, the left continues with the non-stop lies and is showing no signs of stopping,
even though it's doing more damage to them than Trump.
What these idiots can't see is the fact that a massive chunk of this country disagrees
with the toxic rhetoric they spew every single day.
People are waking up to their lies.
It's only a matter of time before the American people stop listening to them altogether — and
rightfully so.
Even better yet, given the response President Donald Trump got during his remarks, it looks
like that reality is already well on its way.
what do you think about this?
Please Share this news and Scroll down to comment below and don't forget to subscribe
Top Stories Today.
-------------------------------------------
Exercises for a Baby with Low Tone #20: Getting ready for standing 1 - Duration: 1:46.
Hello! My name is Amy Sturkey. I am a pediatric physical therapist. Hi! I
have about 30 years of pediatric clinical experience. I'm here with my
co-instructor, Myla. She is 10 and a half months old. She has low tone, and she
has Down syndrome. She is still trying to figure out how to take weight
on her legs. So, I'm giving some strategies of how to help her figure
out that weight bearing through her legs is
a good, great idea. So I'm gonna roll her
over... Hi! Hii! Hello!
Fix the Dress... There... We are going to work on standing laying down. So I
hold on to each leg with the scissor method, one (finger) in the front one in the back
of the shins...(on the other leg ) one in the front and one in the back and my thumb's on the bottom of her
foot. My thumb's are pretending the floor. I'm going to try milk shaking her.
I'm trying to get her to keep her legs straight with weight up through her body.
1, 2, 3, 4, 5, 6. I got six seconds. The goal would be that she
would do that longer. So this milkshake idea is a simple idea to work on weight
bearing through legs laying down as opposed to standing up.
Thanks a lot, and I'll see you later! Bye!
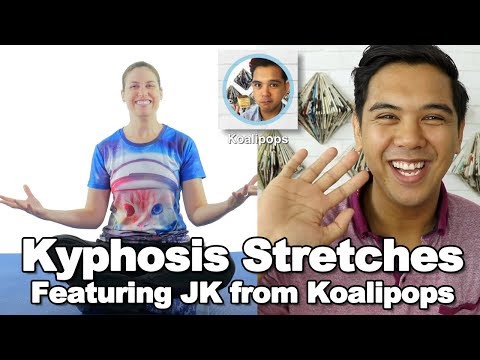
Không có nhận xét nào:
Đăng nhận xét